myspace generator
Showing posts with label casserole. Show all posts

Saturday, April 17, 2010

THE TIES THAT BIND

Welcome boys and girls. How are you doing today? I am doing alright… its gonna be a busy full road ahead of u s, but you know what, I’m ready! For those of you who “know” my mom from here, you know she has recently had an injury that has left her needing a little bit of help around the house. Hense, me… cooking, cleaning, etc. Well, she finally got in to see her normal doctor and he was not happy with how people have treated her medically the last couple of weeks. Long story short, it’s a major injury and she’s gonna have a little while for recovery. F-A-M-I-L-Y… the ties that bind and make us strong! SOOO what we’re gonna do is show how much we care! Let her know… email, comments, snail mail, whatever… let’s show her she is loved shall we! Meantime, its gonna be some major mass cooking for awhile and that means more recipes for you! YAY! You get to benefit too! So get ready for some wild and crazy adventures!

Ok, I got an email asking me why I “sign” every post with the very last word “HUGS”. It’s kind of corny, but I’ll tell you. With so much misery and despair in the world today, I figure everyone needs a good old hug. So just like if you leave your mom’s house or your grandma’s house and hug her when you say goodbye, its my cyber-hug for you when you leave. Silly, huh? Oh well deal with it! LMAO… j/k!


Well don’t ask me how I did it, cause this basket gave me a heck of a time, but I pulled off the flirty basket. She wanted flirty sexy but not over the top raunchy sex, so that’s what I gave her. The recipient is a Gym teacher and he is into working out, etc. She wanted things to flirt with him but not fatten him LOL… healthy if you will. So this is what I came up with… really playing on words and packaging.

1. Feather Mask- Indulge in your “Secret Desires” was printed on the package.
2. Bare Naked Granola (the name was good enough for me LOL!)
3. Kiss Me, Its My Birthday Flashing Lapel Pin (Birthday: the gift, Kissing and flashing? Too perfect!)
4. Truth or Dare Coupons (You KNEW coupons were gonna be in there somewhere, right? LOL)
5. Red Hots- A Fat Free food (you got it he’s hot and spicy flirting right? LOL ok just checking)
6. Sexy Dice- “Roll the dice and take a chance ON me” (Couldn’t have said it better.)
7. Trojan (hey gotta promote safety Just in Case!!)
8. Fresh Pecans… (NUTS are always good LOL!)


I wrapped it all up in a cool looking birthday paper because she didn’t want anyone knowing her business (understandable) and put a bow with the guys 2 favorite colors on it. I think it turned out really well actually. I was quite impressed I was able to pull it off. Shoot, even the clerk told me it was a tough one at one of the stores I went to buy some of the “sexier” stuff at. He was right. BUT I did it and I’m proud. Just hope nobody else wants to be flirty sexy! LOL! I like the raunchy people… its easier to shop for! LMAO!

I took some meals out to mom and dad last night for the weekend so that I could free up for shopping. I need to go bulk items and fast! I have a few things to do this morning but I’m packing up the kids & DH and guess where we are off to today? Yep super shop-a-thon at the BIG farmer’s market. Gonna see if I can nab some of those 25 and 50 pound bags of produce for cheap. I’ll share pictures with you when I come back tomorrow.

Ok let’s get crafty, shall we? We’ve talked a lot about recycling and reusable shopping bags comes up a lot. Its like they are the new trend. BUT the thing is, I’ve been making them for years LOL. And I have learned that there are so many things you can make reusable bags out of. Today I am gonna show you how to make them out of a tarp.


Craft Idea of the day: Tarp Shopping bags

1. Cut a piece of plastic tarp 18 x 36". This will give you a finished bag approx 17"w. Fold this in half, right sides together, so that it now measures 18x18". Have it so the fold is at the bottom.

2. In order to make a bottom for your bag, you must fold up the folded edge of your bag half the width of what you want your bottom to be. So if you want a 4" wide base, fold up 2". Secure the fold and sides with tape. Sew both sides with a 1/4 to 1/2" seam. You can sew right over the tape. Remove tape after sewing.

3.Now the top of the bag is your only raw edge. Fold it over about an inch and sew all the way around.

4. Straps: Cut 2 strips of tarp 18" long by about 4" wide. Fold it in half lengthwise, wrong sides together, to get a crease. Open it out and fold the raw edges in and make crease. Tape and sew along edge. Attach straps at desired location on each side of the bag, maybe 3-4" from ends, where ever is comfortable. Sew to the bag securely. Sew over it a few times, since these will get lots of stress.

5. Turn bag right side out. Note: You could purchase webbing for the straps, or be creative and use rope, heavy twine, etc. The average cost of a 6x8' tarp in my area is $4, and I was able to make 8 bags out of it. This comes out to 50 cents per bag.

As an added strength, you could also buy some of the different duct tapes in a wide range of colors and put strips on one side (to be the outside) of the tarp. I recently saw some tie dye that was pretty cool.

And there you have it! Yet another way to recycle and have a unique conversation piece all in one! Ok, time to eat! Do you remember those chickens that were roasted and deboned? Guess what… today is their day to shine! As you know, there are a few things I really love… I have an obsession with my slow cooker/crock pots and I make a lot of soups and casseroles. When you feed as many as I do, it’s nutritious and inexpensive! I also have a thing for Rosemary and fresh garlic LOL! Anyway, here is something that you can complete start to finish in under an hour and it’s a crowd-pleaser!


Farmhouse Chicken Casserole

Ingredients

2 (6 ounce) packages stuffing mix
4 cups cubed cooked chicken
2 (10.75 ounce) cans condensed cream of celery soup or cream of chicken soup, undiluted
1 cup milk
2 celery ribs, finely chopped
1 teaspoon dried minced onion
1/4 teaspoon pepper

Directions

Prepare stuffing mix according to package directions; set aside. Place the chicken in a greased 13-in. x 9-in. x 2-in. baking dish. Combine the soup, milk, celery, onion, and pepper until blended; pour over chicken. Top with stuffing. Bake, uncovered, at 350 degrees F for 30-35 minutes or until bubbly.

Ok everybody, that’s it for me today. I hope you have enjoyed your journey to the center of my Earth LOL! I’m off to market to market but fear not… I’ll be back tomorrow for another cup of OMGisthatpossible! LOL. Be safe in your journeys, be happy, and be alive! Until tomorrow… HUGS!

Monday, April 12, 2010

CRAZY 4 COOKING

Good morning everyone. How is my favorite group of people doing today? I’m here… let’s just say that. Got some problems, but otherwise, ok today. But I can those problems are really gonna hinder my production today. So anyway, I’m glad you stopped in. Sit down and stay awhile… let’s chat!


Ok, time to address some things here. To SUSAN- congratulations on the upcoming baby boy and way to go for doing what you have to do to survive. Believe me, it WILL get better. Also major kudos for sneaking in those veggies! LOL do what you have to do. Make sure you teach those babies what each veggie is and you never know, they may grow to like them as they get older! If you have problems with them eating veggies, have you ever tried purees? My autistic DS14 has a problem eating some veggies and so I puree them and put them in things he likes. Like I do butternut squash and other things in his Macaroni & Cheese, zucchini and such in his spaghetti sauce, etc. There is an excellent cookbook called “Deceptively Delicious” by Jessica Seinfeld which shows you what you need to puree, how to puree, what you can make with them, etc. Definitely a useful tool!

As for your upcoming bundle… all those names are great! I have always been partial to the Latin names Benito and Javier personally LOL! And a HAPPY LATE BIRTHDAY TO YOU! I did not know that little thing about Rosemary… that would have been very useful when my kids were little LOL! As for “knockoffs” or “Copycats” as they are respectfully called LOL, no clue. But I bet you could look up “homemade remedies with rosemary” on google and probably find something!


Now the wild onions, yes they are in the same group. They have a mild taste… similar to leeks (which are also in the onion/bulb group). As a matter of fact, they are officially called “wild leeks” LOL! They can be used in place wherever green onion or leeks are called for. They have a very strong odor, but will not make you cry like normal onions. I’ve used them in numerous dishes since I picked them and nobody has been able to tell the difference in this house LOL! Don’t you just LOVE farmer’s markets? Yes the ones you find there with the larger bulbs are another variation of the green onion. We get those at our markets here too, with the bulbs as big as golf balls! This picture shows the last ones we got at the market. They come up from the valley and they are oh-so-sweet!

And finally, as for the Garden Contest, I am sad that nobody was entering properly or even really interested, so we just decided to cancel it. I will be coming up with another idea soon though, so make sure to stay tuned for that.

Well, since I do call myself “The Frugal Mom”, I want to bring you some more frugality LOL! I actually found this article and wanted to share it with you!

Slash Your Grocery Bill and Still Eat Well
SELF.com
By Lucy Danziger


These days, calories probably aren't the only thing you're trying to cut back on. Thanks to the dicey economy and rising price of food, a lot of us are trying to limit what we spend, too. For instance, I used to buy the berries I eat for breakfast at the little local market, but found out I could save a small fortune if I went to the big superstore-and they are just as fresh. Fortunately, you can reduce the amount on your receipt without resorting to a diet of ramen noodles. In fact, by knowing just a few frugal secrets, you can stock your cart with nutritious foods for less. Try these tips to shrink your bill and still get your healthy fill.

Make it snappy
Shoppers who spend more than 30 minutes wandering the aisles are prone to spending more money at the store-and coming home with more items they don't need. Shop once a week, make a list and tick it off quick!

Use a basket
If you do need to make a pit stop at the store for a missing ingredient or two, grab a basket rather than use a cart to avoid impulse buys. Better yet, carry your goods in your hands!

Be picky about your protein
Rather than spend on pricey cuts of chicken and beef, buy a whole organic roasted chicken your family can enjoy for days. Eggs, too, are an inexpensive source of both protein and vitamins A and D. At about $2 a dozen, they won't crack your budget.

Think beyond the produce aisle
Canned and frozen veggies are packed at their nutritious peak and can last up to a year, so they're safe to stock up on during a great sale and cost less than fresh. Keep canned beans, peas and tomatoes in your pantry and bags of mixed veggies in your freezer. Build your meals around these foods to eat well while sticking to your budget.

Buy healthy foods in bulk
In my experience, whenever you have more of a food on hand-nutritious or not-you tend to eat more of it. While a jumbo-sized tub of chocolate-chip cookie dough won't do your health any favors, sales on healthy staple items like beans, soup, whole-grain cereals and frozen vegetables sure will, so pounce when you spot a price cut.

Eat organic selectively
If the price of organic food concerns you as much as the pesticides on regular produce does, relax-you don't need to go into debt to lower your intake of chemicals. "Allocate your organic dollars toward thin-skinned picks like peppers and apples, which are likelier to accumulate chemicals," says Urvashi Rangan, Ph.D., a toxicologist and environmental health scientist at the nonprofit Consumers Union in Yonkers, New York. Buy non organic thick-skinned produce, such as oranges and bananas, since you peel it anyway.

Check yourself out!
Women who rang up their own groceries spent 32 percent less on high-calorie impulse buys such as chocolate at the cash register, finds a study by the IHL Consulting Group in Franklin, Tennessee. If your store doesn't have self-service lines, keep busy with a mag to avoid grabs for candy. Healthy, thrifty shopper in aisle three!

So what do I think? Yea this article has some good advice, some common sense advice, and then there is the things that have been omitted! Like GROWING your own food! Even if it’s just tomatoes, if you figure how much you save, you would be shocked! Let’s take cherry tomatoes… a bag of about 20 tomatoes here costs $3.99… so $4 gets you 20 that you must use within “X” days or they go bad. NOW… take that same $4 or even maybe LESS and invest in 1 or 2 (should get 2 so they pollinate and flower better) cherry tomato PLANTS. If cared for properly, it will put off tomatoes all spring and summer long… giving you crops of 40 or more at LEAST! Want to go even MORE frugal? Start those plants from a seed packet that only costs 99 cents and you can have TONS of plants! You can’t beat that! So why isn’t logic like this mentioned?? Is society really that logically impaired? Oh well, we know better, right?

Now, let’s get crafty. This is a great project you can make for your kitchen to match fabrics and protect your appliances. Keep dust and any other unwanted stuff out of your toaster with this cute cover!


Craft Idea of the Day: Fabric Toaster Covers

Measure the size of the end of the toaster as shown by the red lines in the diagram. Be sure to include the length to the counter top. Add 1/4" seam allowances to the two sides and the top to allow for seam allowances.

Determine the width of the toaster. Be sure to include any knobs that may protrude. This will be the width of the continuous strip that is attached to the ends that were measured in the above step. Add a 1/2" for seam allowances.

To determine the length of the continuous strip, measure the height and width of the end section described above. Two of the height and one of the width gives you the length BUT it is advisable to add a few inches. Any extra can be trimmed off after it has been attached to the end sections but you can not add fabric once it has been cut.

Needed Materials:

-Most toasters will need approximately 2/3 of a yard of 45" wide fabric - I quilted a cotton calico, using natural cotton batting. For a stiffer cover, you may want to experiment with fusible interfacing.

-Piping - I used 1 pkg. of Wrights® Maxi Piping

-Double Fold Bias Tape - I used 1 pkg of Wrights® Bias Tape Extra Wide Double Fold.

-Matching Thread

Directions

Cut two end pieces and one continuous strip of fabric to the measurements you took in the above step. Apply piping to the end sections. Find the center top of the end sections. Match the center of the long section of fabric with the center of the long side of the continuous strip. Sew the sections together from the top to the bottom edges. Repeat for both ends of the cover. Trim off any uneven edges if necessary. Apply Bias tape to the bottom edge of the cover.

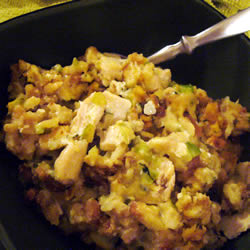
Well I have to tell you, I had a major plan change yesterday, so I stayed home and did some mass cooking (which you all know I like a whole lot!) so I could take some meals out to my mom and dad in the evening. I made more Ropa Vieja, Meatballs, Sausage and Crawfish Jambalaya, Chicken Tortilla Soup, Chili, and Squash Casserole. Gotta love those crockpots! Of course the stove was covered too, inside AND out LOL! I don’t mind… I love cooking! I made the meals and ran them out there, along with mom’s cake. I think she liked it LOL. The squash Casserole was something new for them and they really enjoyed it (at least they said they did LOL!) so I wanted to share it with you, even though casserole week is over. I think even the most finicky of people will enjoy this because its got veggies, but lots of cheese too!


Creamy Squash Casserole

Ingredients:

1 large butternut squash (about 2 ½ pounds), peels and cut in bite-size pieces
2 teaspoons chopped rosemary or thyme
1 small bag of fresh baby spinach, chopped or 10oz. frozen spinach thawed and drained
2 Tablespoons olive oil
1 jar Ragu Classic Alfredo sauce
½ cup chicken broth
2/3 cup Parmesan Cheese
3 tablespoons Ritz crackers or fresh bread crumbs

Directions

1. Preheat oven to 400 degrees.


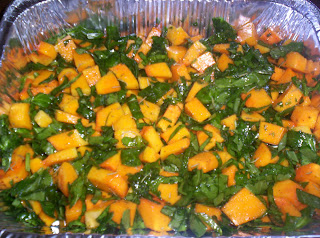
2. In a large bowl combine squash, spinach, olive oil and rosemary. Toss to coat well in oil. Place in glass baking dish (I used an aluminum pan LOL).


3. In the same bowl, combine Ragu Alfredo sauce and chicken broth. Whisk until well blended and creamy. Pour mix on top of squash mix in pan.


4. In a smaller, dry bowl, combine crumbs/crackers with the Parmesan cheese and blend well. Sprinkle on top of pan to make the “crust”.

5. Bake in oven for about 45 minutes or until squash is tender and sauce is bubbly. Allow casserole to sit for 5 minutes before serving.

OMG, DS18 who SWEARS he hates butternut squash devoured this casserole LOL! So give it a shot! Ok now, if you haven’t already guessed, I am a sucker for Chinese/Asian food. I would LOVE to be able to eat at my favorite little Chinese restaurant down the road at least once a week, but the reality is I cannot afford that. Nobody really can nowadays. Society is reverting back to home cooked meals, which I think is wonderful! I wouldn’t mind seeing some of those distasteful fast food grease spoons go by the wayside (I will NOT mention names as I don’t want to ruffle any corporate panties that may run across this blog!). Healthy eating and cooking at home is the way to go! However, there are those select FEW restaurants that you just hope and pray don’t ever leave you! Szechuan Garden in Dickinson, TX is one of those places! The staff is awesome and the food is excellent! If you’re ever down this way, you HAVE to check it out!

Alright, so anyway, seeing as I have a weakness for Asian foods, I am always trying new recipes to get that delicious feeling of oriental yumminess! So, here is another one I think you might enjoy! Its just the right crispiness and oh-so-melt-in-your-mouth-good!


Perfect Sesame Chicken

Ingredients

2 tablespoons all-purpose flour
2 tablespoons cornstarch
1/4 teaspoon baking soda
1/4 teaspoon baking powder
2 tablespoons low-sodium soy sauce
1 tablespoon dry sherry
2 tablespoons water
1 teaspoon vegetable oil
1 dash sesame oil
1 pound skinless, boneless chicken breast meat - cubed
1 cup chicken broth
1 cup white sugar
2 tablespoons distilled white vinegar
2 tablespoons dark soy sauce
2 tablespoons sesame oil
1 teaspoon chile paste
1 clove garlic, minced
1/4 cup cornstarch
1/2 cup water
1 quart vegetable oil for frying
2 tablespoons toasted sesame seeds

Directions

Sift flour, 2 tablespoons cornstarch, baking soda, and baking powder into a bowl. Pour in low-sodium soy sauce, sherry, 2 tablespoons water, vegetable oil, and a dash of sesame oil; stir until smooth. Stir in chicken until coated with the batter, then cover, and refrigerate for 20 minutes.

Meanwhile, bring chicken broth, sugar, vinegar, dark soy sauce, sesame oil, chile paste, and garlic to a boil in a saucepan over high heat. Dissolve 1/4 cup cornstarch into 1/2 cup of water, and stir into boiling sauce.

Simmer until the sauce thickens and turns clear, about 2 minutes. Reduce heat to low, and keep sauce warm.

Heat vegetable oil in deep fryer or large saucepan to a temperature of 375 degrees F (190 degrees C).

Drop in the battered chicken pieces, a few at a time, and fry until they turn golden brown and float to the top of the oil, 3 to 4 minutes. Drain on a paper towel lined plate. To serve, place fried chicken pieces onto a serving platter, and pour the hot sauce overtop. Sprinkle with toasted sesame seeds to garnish.

Ok gang, I am gonna get off of here, go take my morning meds, check my plants, and either sew or cook or I might just lay back down. I got maybe an hour sleep total last night, so I could really use a power nap! LOL! Ya’ll take care and I will see you back here tomorrow morning! HUGS!

Sunday, April 4, 2010

HAPPY EASTER!

Well Happy Easter to all my faithful friends! How are you doing this fine morning? I am fairing decent… expecting my usual bunch for some delicious hams, sides, breads, and fun!


I did a lot of sewing yesterday as I was feeling the love so I had to utilize it! I started the day by making this huge shopping bag. Roomy and bright and colorful and sure to turn heads. Tell me what you think and how much would you pay for something like this?


Then I made 3 makeup bags with different colored zippers. They just happen to be the first ones I pulled out of my zipper box and it’s a good thing they match too, huh? LOL!


Then I did some luggage tags. The first one came out a little smaller than normal, but the rest were just fine.


I also did a couple of visors covered in the autism fabric. I love these things really! Light weight and you can customize them with any fabric you want and they come out cute every time! They are those little foam visors you can pick up at Hobby Lobby for like a buck and then decorate them however you want. It doesn't take much fabric either. And from what I have learned the kids (even high schoolers around here) love them, as well as the adults! So go on... make some summer lovin' visors! LOL!


I only got 1 of these done today as these take a little bit of time. But as you can see when its folded and ready to carry, open and empty, and then open with goodies in it. I think I am going to make one of these for each of the kids in Alex’s class for a gift the last day of school. I think they would enjoy it really and maybe could use them this summer. Still debating that… what do you think?

When you clean up from a picnic or party do you find dozens of half empty cans? This quick project will help guests identify their can... and hopefully finish their can before getting another. These are SOOO quick and easy that you could whip out a ton of these in a very short time! I whipped out 3 yesterday in the cute autism fabric.


Craft Idea of the Day: Insulated Can Wrap

Materials:

Fabric Scraps - 20" by 4 1/2"
Batting or fleece - 10" by 4 1/2"
4" strip of 1" wide Velcro® or Hook and Loop tape
Thread

Directions:

1. Fold fabric, right sides together, to make it 10" by 4 1/2". Place batting under the fabric, lining up all the edges.

2. Using 1/4" seams, stitch the long edges and 1" in from each corner on the 4 1/2" edge. Leave the center of the end open to turn through.

3. Clip the corners to eliminate bulk. Turn right sides out.

4. Turn in the un-sewn seam allowance 1/4" on each side. Press the seam allowance closed.

5. Place one part of the Velcro® along the 4" edge and stitch the long edges in to place, closing the seam at the same time. Turn the fabric over, and place the other part of the hook and loop tape on the other end, on the opposite side of the fabric.

Optional:
- Top stitch 1/4" from the edge along the long edges.
- Quilt the wrap.
- Embroider names on the wrap to use them as party favors.

Well mom asked a question yesterday, that I feel I should answer. YES, Lasagna IS considered a casserole. A casserole, from the French for "saucepan", is a large, deep pot used both in the oven and as a serving vessel. The word casserole is also used for the food cooked and served in such a vessel, with the cookware itself called a "casserole dish". Casseroles usually consist of pieces of meat (such as chicken) or fish (such as tuna), various chopped vegetables, a starchy binder such as flour, potato or pasta, and, often, a crunchy topping. Liquids are released from the meat and vegetables during cooking, and further liquid in the form of stock, wine (for example coq au vin), beer (for example lapin à la Gueuze), gin, cider, or vegetable juice may be added when the dish is assembled. Casseroles are cooked slowly in the oven, often uncovered. They may be served as a main course or a side dish, and may be served in the vessel in which they were cooked.

So, to finish out Casserole week, I figured I would give you a unique concoction that is a sure tummy pleaser to kids young and old… but SHHHH! Don’t mention the veggies LOL! The best part about this casserole is that you can customize it to fit your family’s tastes too!


Pepperoni Pizza Casserole

Ingredients

1 (16 ounce) package uncooked rotini pasta
1 pound ground Italian sausage
2 (16 ounce) jar pasta sauce
2 (12 ounce) containers cottage or ricotta cheese
1 (2.25 ounce) can sliced black olives or mushrooms
12 ounces shredded mozzarella cheese
2 (3 ounce) packages sliced pepperoni
1 cup fresh or frozen (thawed and drained) spinach, chopped

Directions

Preheat oven to 350 degrees F (175 degrees C). Lightly grease a medium casserole dish.

Bring a large pot of lightly salted water to a boil. Place pasta in the pot, cook for 8 to 10 minutes, until al dente, and drain.

In a skillet over medium heat, cook the sausage until evenly brown.

In the prepared casserole dish, mix the cooked pasta, sausage, and pasta sauce. In a bowl, mix the cottage cheese, olives, spinach, and mozzarella cheese. Spoon the cheese mixture over the sausage and pasta mixture. Top with pepperoni slices.

Bake 25 minutes in the preheated oven, until bubbly and lightly browned.

Ok ladies and gents… the Easter Bunny has made his presence known and I have chocolate fiending kids yelling for my attention LOL. So I am going to sign off for today. I bid you a Happy Easter Day and have fun and eat good food and be safe in your journeys today! Until tomorrow… HUGS!

Saturday, April 3, 2010

OH PLEASE MR. OFFICER!

Mornin’! How are you doing today? I’m quite tired really. Mom and I were running the roads and consulting with stoned rabbits who carry my pretty colored eggs and rudely hide them from me! LOL Just kidding… I love the Easter Bunny. He brings me chocolate… and I like chocolate! It was an interesting day for sure!


My day started rather early, as you know. Once I completed my blog, I was in the kitchen and I just HAPPENED to notice all the seedling sprouts from the second batch of seeds my daughter and I planted! Even in the little croissant containers, there are sprouts! We have watermelon, peas, beef steak tomatoes, red cherry tomatoes, bell pepper, and a zucchini! If it’s pretty today, I will be transferring the older seedlings from batch one into 4in. pots and starting ANOTHER batch of seeds! I am shooting for my first plant sale in mid May. I want to have at least 50 small 4 inch pots and then some yuccas, sagos, etc. to offer.

So after I got all freakydeek about the seedlings LOL, I left to go pick up mom. DH had daddy duty so I made sure he was up and moving and alert LOL! I picked up mom and we started our day going to Jack in the Box to grab a drink cause it was a humid and sticky day! Well… it just so happens, there was a State Trooper in the next lane who just “happened” to notice a burnt out turn signal… UGH! So sure enough, as I turned left, he flipped on those bright lights and pulled me over! I gave him the “tender woman… oh please Mr. Officer… be easy on me” while I bat my luscious eyelashes routine LOL and was lucky enough to only receive a warning! LOL… you better believe I made sure to get a new bulb before I got home! He was really nice actually… but something that happened makes me go HUH? DUH?! The warning…. He gave me a VERBAL warning right? Ok so WHY in the world did he give me a paper statement of the verbal warning? Since WHEN do you write a “verbal” anything down? Doesn’t it become WRITTEN? LOL… That’s almost as confusing as MILITARY INTELLIGENCE!! Either way I was grateful not getting a ticket!

Then we went to the store and grabbed a few things to fill up the kids baskets for Easter and a few things for the house I forgot. The stores were full of weirdos who were arguing with themselves, racing around the store, talking to us about nothing really, and looking us up and down like a big lollipop or something! Last minute crazies running around like chickens with their heads cut off who were quite creepy at the time, but funny after we sat down and thought about it! Mom and I were glad to go home!

I hung out with mom for awhile chatting and laughing and just having fun. Then I headed out to CVS to pick up my blood pressure Rx only to have this woman, whom I have had NUMEROUS problems with before, tell me that they did not HAVE a Rx for me. EXCUSE ME? Uh yes you do… FIND IT! So I went round and round with her until she FINALLY found it. I think she does it on purpose because I have gotten her in trouble a few times before for not doing her job, being rude, and basically being incompetent! So does that mean if she infuriates me to the point of heart attack or stroke, my family can sue her? LMAO… don’t play with the BP meds broad! LMAO!!!!!


My last stop was to a small local mom & pop owned grocery store called Zieglers. They are having an incredible sale on stick butter… 2 boxes for $1. I HAD to get a bunch, cause I use A LOT of butter LOL! While there, I “parrused” (mom’s word of the day LOL) down the meat aisle and I found a few good sales. Tyson whole chickens were on sale for .79 cents a pound. I found 2 birds under $3 each. Family size chicken drumsticks were on sale too, and I found 3 packs of those for under $3 each. I found a couple of steaks for about $1.50 each which will become beef tips LOL, cube steak, and a big shank ham portion for Easter dinner. Jimmy Dean rolled sausage was on sale too, and I happened to have a coupon! Raid was on sale too… at $1.19 a can after my $1 coupon! YAY! Ants are NOT my friends LOL! I got all this stuff for about $30.

To Jean, don’t apologize for a joke LOL… it was quite funny after the initial shock LOL! Not many people even try to get me like that anymore LOL!


Oh I HAVE to tell you… since this is Autism Awareness Month, Toys R Us has partnered with Autism Speaks to accept donations for Autism research! Here is what it says on the site… In conjunction with Autism Awareness Month in April, all Toys"R"Us and Babies"R"Us locations nationwide and Toysrus.com will conduct a fundraising campaign now through April 30 to collect contributions to benefit Autism Speaks. Additionally, Toys"R"Us and Babies"R"Us together serve as the North American sponsors of 80 Walk Now for Autism Speaks events across the U.S. and Canada. Isn’t that cool? The site also gives you links to learn more about Autism. You can also make a donation online or in the store. Rest assured that your donation WILL help children in need, as Autism Speaks is a great foundation! Go to the TOYS R US site to donate today! Just think, for the price of a pack of cigarettes, you can help an Autistic child make a set of communication PECS or for the price of a whole carton you can help them buy a special weighted vest they may need for therapy! Please think about helping... kids who are just like my son would appreciate it!

Ok, so most of you know how I love food right? And I discussed that new show Jamie Oliver’s Food Revolution (which I forgot to watch but will re-air today at 2pm so DON’T TELL ME ABOUT IT YET MOM OR ANYONE ELSE LOL!). Well the other day I decided to test my Autistic 14yr old how many veggies and fruits HE could identify without help. I picked out 18 fruits and 18 veggies and printed them out like flash cards. Keeping in mind he has problems with some enunciation, I am proud to announce that he correctly identified all but 3 of the fruits and 5 of the veggies! And I picked hard ones too… like pomegranate, avocado, etc. I was SO very proud of him! I felt good about myself too… I must be doing something right when my 14yr old autie can correctly name off those and a classroom of 1st graders WITHOUT disabilities cannot! I had one of those teary-eyed proud mommy moments LOL! Well, thinking about school lunches and looking at all the reusable shopping bags inspired today’s craft.


Craft Idea of the Day: Fabric Lunch Sack

Materials Needed:

1/2 yard of fabric(can be coated in vinyl)
1" piece of Velcro

Instructions:

Step 1: Cut two rectangles 15 1/2" long x 12" wide from desired fabric. Cut 2" x 2" square from the bottom right and left corners of fabric rectangles.

Step 2: Use 1/2" seam allowance unless noted. For fabrics which do not ravel, press or finger press seams open. For fabrics which tend to ravel, do not open seams. Use a zig-zag stitch along raw edges. Pin bag front and bag back, right sides together. Stitch right and left side seams. Stitch bottom seam.

Step 3: Pull bag front away from bag back at bottom corners. Matching bottom seam and side seam, pin bag bottom to bag side.

Step 4: Turn bag right side out.

Step 5: Top Edge: Turn top edge under 1". Pin. Stitch close to raw edge.

Step 6: Side creases: Place bag on a flat surface. Measure 1 3/4" from side seam. Crease (or finger press) bag from top edge to bottom. Since backpack nylon cannot be ironed, stitch along crease as close as possible to fold, catching bag front and back. Repeat for remaining three side creases.

Step 7: Velcro: Cut 1 1/2" length of Velcro. Position and pin the “soft" Velcro piece to the front of the bag, centered 1/2" from the top edge. Stitch. Position and pin the “rough" Velcro piece to the back of the bag, centered approximately 3": from the top edge. Stitch.

Ok, isn’t that neat? Next, we have another favorite subject of mine… FOOD! Now tell me… what casserole week would be complete without the old fashioned, traditional TUNA casserole? None that’s which one! So, with a few tweeks and without further ado, I give you the…


World’s Best Tuna Casserole

Ingredients

1 (12 ounce) package egg noodles
1/4 cup chopped onion
2 cups shredded Cheddar cheese
1 cup frozen green peas
2 (6 ounce) cans tuna, drained
2 ½ (10.75 ounce) cans condensed cream of mushroom soup
1/2 cup of milk
1/2 (4.5 ounce) can sliced mushrooms
1 cup crushed potato chips
1/2 teaspoon cayenne pepper

Directions

Bring a large pot of lightly salted water to a boil. Cook pasta in boiling water for 8 to 10 minutes, or until al dente; drain.

Preheat oven to 425 degrees F (220 degrees C).

In a large bowl, thoroughly mix noodles, onion, 1 cup cheese, peas, tuna, pepper, soup and mushrooms. Transfer to a 9x13 inch baking dish, and top with potato chip crumbs and remaining 1 cup cheese.

Bake for 15 to 20 minutes in the preheated oven, or until cheese is bubbly.

Ok kids, that’s it for today! I’m off to organize, cook, clean, and drive my family nuts LOL! I hope you have fun with whatever you plan to do! Peace, Love & lots of HUGS!

Friday, April 2, 2010

GOOD FRIDAY

Well Hello there my lovely lads and lasses. How are you doing on this sticky Friday morning? I’m quite exhausted really. Yesterday I did a lot of grocery shopping for my mom in the morning and then bulk shopping for me in the afternoon. Cases of veggies and pastas, gallons of milks, dozens of eggs, pounds of sugars and such… the cashier I guess was new because she was a little shocked I think LOL! 2 carts of just “staples”. Didn’t even cover fresh fruits, veggies, or major meats yet!

Ok everyone give Jean a big round of applause! She got me with the ONLY April Fool’s joke pulled on me yesterday! OMG I read the first part of that comment and almost cried! Then I scrolled down. VERY funny LOL! Everyone around me didn’t dare try to pull one over on me LOL. About gave me a heart attack! LOL!


Oh I so have to tell you about this book my mom got for me from Amazon.com. Its called “The Forager’s Harvest: A guide to Identifying, Harvesting, and Preparing Edible Wild Plants” by Samuel Thayer. I had mentioned how I wanted to go on a wild foods scavenger hunt, remember? So after that and the wild onions in my mom’s yard, she got me a surprise! It’s got glossy pictures and from what I have read so far, it’s very easy to follow! I am gonna have the best time with this book. Gimme a couple of days and I will have this book read cover to cover! Its one of those “I can’t put it down” kind of books. But from what I see, you can apparently eat way more things than I could’ve ever imagined!


Ok so I make purse packages and sell them as you know… they all contain a tote bag, photo album, calendar, coupon holder, eyeglass case, makeup bag, scrunchy, cell phone pouch, and lapel pin. I do them in all kinds of prints and I sell them for $25 (plus shipping when necessary. Would you like to see them for sale here on the site? They make great gifts too! Post comments and yes or no’s and if ya’ll do, then I will work on a paypal order link!). This one you see has the Autism material I have been talking about. So today’s craft is the makeup bag out of this package. Of course, you can use any fabric you like. They also make great pencil bags, a small sewing kit, a travel first aid kit, and tons of other uses!


Craft Idea of the Day: Zippered Bag

MATERIALS - for one pouch

fabric - 1/4 yard
7" all purpose zipper
contrasting or coordinating thread
25 mm bias tape maker
straight pin

Instructions:

Wash, dry and press fabric. If you do this before you sew it up, you'll be able to throw your finished zippered purse in the wash without worrying about it.

Cut two 8 1/2 inch x 4 inch pieces of fabric. Press a 1/4 fold along one long edge of each piece of fabric. This is where the zipper will be sewn in.

Pin one side of the zipper (right side up) onto the pressed edge of one of the pieces of fabric.

Attach the zipper- Using your zipper foot, slowly sew along the zipper.

If you don't have a zipper foot, you can use your regular foot, as shown below. After you pin the fabric to the zipper, open the zipper halfway. Sew about 1/8" away from the zipper.

When you reach the zipper pull, put the needle in the "down" position and lift up the foot. Move the zipper pull to the top of the zipper. Continue sewing to the end of the zipper.

Repeat for the other side of the zipper.

When you are done, open out the pouch and cut out 1/2" squares from each corner of the pouch. This will reduce bulk in the corners when the pouch is complete.

Cut two 2 inch by 9 inch strips from the remaining fabric and create bias tape. One of the strips will be cut in half for the sides of the pouch, and the second strip will be used for the bottom of the pouch.

To use a bias tape maker, insert the strip right side down into the tool as shown below. Pull the tool across the strip so that the fabric comes out at the small end with the edges turned in. Press the tape with a hot iron as it comes out. If you need help getting the fabric to come out of the small end of the tool, you can move it along with a pin by inserting the pin into the opening in the plastic part of the tool.

For the sides, cut a piece of bias tape that covers the bottom of the zipper to the cut corner of the pouch, plus 1/2" (this will be about 3 1/2"). Open both ends of the tape and fold under 1/4". This will create a non-fray edge for the bias seam. Press both ends closed.

Fold the pouch in half, right sides together. Pin the bias tape along one edge of the pouch, making sure to enclose both pieces of the pouch.

Sew the bias tape down, taking your time. Make sure to have the top edge of the tape not too far up near the zipper, or else the zipper will hit it. Repeat with the other side.

Before you sew the bottom up, make sure to open the zipper or else you'll end up with a permanently closed bag! Use the second piece of bias tape and sew the bottom up the same way you did the sides. The final touch is to sew along the cut corners of the pouch to reinforce the corners. Sew along the bottom of the side bias tape binding (as close to the edge as possible), put the needle into the "down" position, rotate the fabric, and sew along the side of the bottom bias tape.

Turn your bag right side out. It's complete! When you look inside, your bias taped sides and bottom should overlap each other. Enjoy and Fill your bag up with sewing notions, knitting notions, or whatever you like!

Ok, so we only have 3 more days of casseroles, so I hope you have found one you enjoy… this one I heard a lot about a few years ago, so I decided to try it out for myself. Yet another popular dish around here, so take a look-see and see if it is something you and yours might enjoy!


King Ranch Casserole

Chicken layered with a spicy sauce and cheese--popular in Texas and now made more healthful for Tex-Mex lovers everywhere.

INGREDIENTS

1 1/2 cups reduced-sodium chicken broth
1 cup skim milk
1/2 cup all-purpose flour
1/2 cup nonfat plain yogurt
1 14-ounce can diced tomatoes, drained
1 4-ounce can chopped green chilies, drained
1/4 cup chopped fresh cilantro or parsley
1 tablespoon chili powder
1 teaspoon dried oregano
1/2 teaspoon ground cumin
salt & freshly ground pepper to taste
1 1/2 teaspoons canola oil
1 large onion, chopped
1 red or green bell pepper, seeded and diced
2 cloves garlic, minced
2 cups diced skinless cooked chicken
10 corn tortillas, cut in quarters
1/2 cup shredded reduced-fat cheddar cheese

DIRECTIONS

Preheat oven to 375 degrees F.

Bring chicken broth to a simmer in a medium saucepan. Whisk together milk and flour in a small bowl to make a smooth paste. Add to the broth and cook over medium, whisking constantly, until thickened and smooth, about 3 minutes. Remove from the heat and stir in yogurt, tomatoes, chilies, cilantro (or parsley), chili powder, oregano and cumin. Season to taste with salt and pepper. Set aside.

Heat oil in a large nonstick skillet over medium-high heat. Add onion, bell pepper and garlic; cook, stirring occasionally, until tender-crisp, about 3 minutes.

Line the bottom of a shallow 3-qt. baking dish with half the tortillas. Top with half of the chicken and half of the onion mixture. Spoon half of the sauce evenly over the top. Repeat layers with remaining tortillas, chicken, onion mixture and sauce. Sprinkle with cheese and bake until bubbly, 25 to 30 minutes.

Alright kids, I am out of here for the day. Gonna go make another run to the store this morning and then come back and probably sew. Dad’s got kid duty so I can go “consult with the Easter Bunny” LOL! I think some of the kids want to hang out today… at least from the sounds of what MY kids were jabbering. And I want to get lots of sewing done today hopefully… so this is the Frugal Mom signing off! HUGS!

Thursday, April 1, 2010

AUTISM AWARENESS MONTH

Well a Happy April Fool’s Day to you there! How are you doing this day of days? I’m good… it was a busy day yesterday for our house. Doctors, cleaning, planning, etc. The doctors appointments went good… got tons of Rx’s LOL, DD got her final Gardasil shot and the Meningitis shot, and the DS18 got his physical for football spring camp and then next school season. I think my pharmacist hates it when I come… seriously… cause I brought in a combined 11 prescriptions today alone! LOL I could start my own pharmacy. And that’s only 1 months worth LMAO! I did also find out that I lost another pound according to the scale at CVS! YAY! That’s 8 pounds this month! WOOHOO! We didn’t go to the beach because we weren’t on the island long enough for the water to be warm enough to go in. Also didn’t go to Pier 1 cause they were still closed by the time we were done. So we came home and piddled LOL!


I started painting the yellow squares on the cabinet doors yesterday when we got home from the Doctor’s appointments. I used that blue painters tape, and let me tell ya… IT SUCKS! I had to go back and straighten up each square I “painted” by hand! It was a lot of hassle if ya ask me! I won’t be using it again! This picture is the first cabinet door after the touchups. Once I get the wallies on there though, it will be so cute! I just have to wait til I have the cash for them to order online… cause nobody around here has lemons! UGH! This kitchen is truly gonna end up being a DIY! But I am having fun LOL!


All this painting is getting me in the crafty mood! Well since today starts Autism Awareness month, I will begin sewing my little heart out with Autism print goodies. I have learned so much in my journey to make his life easier, and I will learn everyday for the rest of my life! Autism effects 1 in every 150 children and that gap is closing every year. It is more common in boys than girls. The puzzle piece was chosen to “represent” autism. It means different things to different people. The ASA is quoted as saying “The puzzle pattern reflects the mystery and complexity of the autism spectrum. The different colors and shapes represent the diversity of the people and families living with the condition. The brightness of the ribbon signals hope—hope that through increased awareness of autism, and through early intervention and appropriate treatments, people with autism will lead fuller, more complete lives.” Although there are a few underlying meanings as well, one being is that a high percentage of children with Autism play with puzzles. The reason being, puzzles are a 1 person game that do not rely on any interaction from anyone else. The interpretation of Autism comes from Latin defined as “oneself”. Here is how I see it. My son is the best gift God could have ever given to me. Even with his Autism. He is a puzzle you never know where the next piece is going. Anyone can put a puzzle together to see the pretty picture in the end. I hope that once all the pieces come together, everyone will see just how beautiful and smart these children are. Don’t focus on the Autism, focus on the child.

One of the things I will be making is a cute traveling Crayon tote for kids. It’s a great travel item for when you are going to the doctor, taking road trips, etc. It has single slots for crayons, as well as pockets for coloring books, etc. It would also be something neat to maybe put in an Easter basket (which is Sunday ya know!). Put some crayons and a book or 2 from the Dollar store and they make great items to donate to children’s hospitals and foundations, too!


Craft Idea of the Day: Jungle Crayon Bag

Supplies:

2 pieces jungle print 10” x 17”
1/2 yard red solid
7/8 yard royal blue solid
1 yard green solid
1/2 yard yellow solid
2 spools variegated Woolly Nylon
6” x 1” strip red hook-and-loop tape
1 spool blending serger thread
Embroidery threads to contrast with fabrics
All purpose threads to match fabrics
1 ¼ yards 1” wide red webbing for handles
Can of temporary Spray Adhesive
Seam Sealant
Basic Sewing supplies and tools

Intsructions:

Outer Bag:

1. From red solid fabric, cut 2 pieces 17* x 14”. From Royal blue fabric cut 2 pieces 17” x 17”.

2. Machine embroider a 3” to 4” band on one 17” edge of each red piece with appropriate jungle animals.

3. With variegated thread in both loopers and blending serger thread in left needle, serge top 17” edge of jungle print pieces and red pockets.

4. Place 3 fabric layers together and spray with adhesive. With right side of each piece facing, sew all layers together along unsergered 17” edge.

Inner Bag:

1. From red cut one piece 17”x 8”. From Royal blue cut one 17”x12”. From yellow solid cut one piece 17”x20”. From green cut one piece 17”x32”.

2. Embellish both 17” edges of each strip with appropriate machine embroidery.

3. Serge both 17” edges of yellow, red, and blue pockets. Layer red and blue pieces. Mark 1” intervals on red fabric and stitch through both layers on marked lines.

4. Layer all 4 fabrics and spray with adhesive. With red stitch thread, stitch a horizontal line across the center of the red pocket to complete the crayon partitions.

Assembly:

1. Place inner and outer bag layers together, wrong sides facing. Spray with adhesive.

2. Serge around all outer edges with variegated thread in both loopers and blending serger thread in the left needle.

3. Place seam sealant at all corners and allow to dry completely and then trim all serger tail threads.

4. Cut Red webbing in two 20 ½ “ lengths for handles stitch both ends to outer bag front. Leave 2 ½ “ of webbing from top edge to bottom of webbing piece, all being stitched to bag in a rectangle pattern and then an “X” in the center.

5. Cut hook and loop tape in 1” segments for fasteners. Place two fasteners between the jungle print and red pockets, each side of outer bag. Center one fastener between red and blue pockets, each side of outer bag.

Now, I know some of you are saying that it’s a cute idea, but you don’t have a serger, right? Don’t worry cause I don’t have one either. I will be dressing the edges with ribbons, etc. and using good old fashion sewing. There won’t be any cutesy embroidery on mine, but they will be awesome with the puzzle prints representing autism! When I get one done I will post the pictures!

Now I bet all that reading made you hungry right? Well, as you know this is casserole week, and with me living on the Gulf Coast and always talking about seafood, you should have KNOWN that it was going to come into play SOMEWHERE LOL! Here is a great recipe for some serious seafood scrum-diddly-umptousness!


Seafood Casserole

Ingredients

1/3 cup minced onion
1/4 cup butter or margarine
1/4 cup all-purpose flour
1 cup milk
1 cup light cream
1/2 teaspoon Old Bay Seasoning
1/2 teaspoon salt
1/2 teaspoon pepper
1 tablespoon chopped pimento
1 (8 ounce) can sliced water chestnuts, drained
2 tablespoons lemon juice
1 tablespoon snipped fresh parsley
1 cup flaked cooked crabmeat
1 cup peeled cooked shrimp
2 cups cooked rice
1 cup shredded Cheddar cheese, divided

Directions

In a saucepan, saute onion in butter; blend in flour. Add milk and cream; cook and stir until thick and bubbly. Remove from the heat; stir in salt, pepper, pimiento, water chestnuts, lemon juice, parsley, crabmeat, shrimp, rice and half of the cheese. Spoon into a 2-1/2-qt. casserole. Bake at 350 degrees F for 25 minutes or until heated through. Sprinkle with remaining cheese just before serving.

Alright gang, that about does it for me today. Its gonna be a day full of cooking, cleaning, sewing, and shopping! LOL! I am feeling speedy and spunky so its gonna be super crazy running day! Ya’ll be safe in whatever you find yourself doing today and I will see you tomorrow. HUGS!!

Wednesday, March 31, 2010

IT NEVER FAILS

Well a big HOWDY from Texas! LOL Hope ya’ll are doing good this morning! I am doing well… my plants are good, my kids are good, and my house is getting a little back to normal. Ok, Jean… whatcha talking about that the “Spunky Renee is on vacation?? I happen to be right here thank you very much! LOL!

Ok so remember how I said it was gonna be a lazy day yesterday? Well… it wasn’t. It never fails that I can’t sit still long enough to “relax” if you will. I always have to be doing something and yesterday was no different. I started by looking up lemon stuff on the computer but not finding much for that. SOOO I got annoyed, got up and dressed and went window shopping. I picked up some cat food at Petsmart then I went to Hobby Lobby. They didn’t have lemon anything except 1 overpriced, fake plastic lemon!


I did however get an idea for the centerpieces one of my customers wants me to make. She was telling me how the party is going to be black and either gold or silver… she couldn’t make up her mind. So it was a little frustrating for me with no determined color scheme. Well when I was walking around the store I saw these centerpieces of flowers in colored terra cotta pots. Hmmm… ok lets think classic… weddings, anniversaries, etc. What do they all have in common? Black & White! So I painted a small Terra Cotta gold, used white silk roses with black and gold tiny buds and added some silver star garland rolled in spirals. I might add some ribbon but I’m not quite sure yet. What do you think? Is it pretty and classy or funky and tacky?


Ok, so remember I told you I want to do my kitchen in the Lemon theme? Well I am trying anyway. After Hobby Lobby, I wandered to the next store into the hardware, paints, etc. I was looking at the paint sample cards. I found one called “Lemon Peel” and I fell in love! That is the paint color for my kitchen! I got a quart mixed up for me and then paid and left. Let me tell ya, its pretty bright! LOL… This picture just shows the first step… I will post new pictures each time its updated until its done.

Then I got some gas for the car and went and picked up the kiddos. I put together the centerpiece and was going to clean some more when I get real faint and had to sit down. My head hurt, I was ill to my stomach, and it was just like someone hit me with a bag of bricks. OOOPPS. Uh silly me forgot to take my meds that morning or eat all day… uh oh… so I tested my sugars, which were a naughty really low. Ok, stop what I’m doing and get to munching… starting with a candy bar! Good thing I have secret stash LOL… but honestly it was like eating mud… not very appetizing!

So, what’s on tap for today you might ask. Well, I figured after the kids get done in the doctor’s office, I might stop buy Pier 1 or Ikea or whatever it is down the road and see if maybe THEY have lemon stuff. The kids only have a half day today, so I’m not even gonna rush and try to get them back before school lets out. Maybe I should take them to the beach or something… its supposed to be a beautiful day and it shouldn’t be too crowded being a weekday. Hmmm… it’s a thought. After we’re done in Galveston with whatever we plan to do, I figured I would come back and paint more in the kitchen and maybe do some planting. Tomorrow starts April Autism Awareness, so I also have to clear out the table so I can do some mass sewing! My daughter is letting me use her machine… isn’t she so sweet? I was thinking about maybe putting a link on here so that my readers can buy some of the stuff if they wanted. What do you think? Would you like that? Remember, I contribute part of the purchase price to the Doug Flutie Jr. Foundation.

Ok so, while I was painting my kitchen yesterday, I got to reminiscing about when my DD was little and always wanted to help me in the kitchen when I was making cakes, cookies, etc. It was more like she just wanted to lick the bowls LOL, but to her it was helping! Then of course she’d get batter all over her and we’d have to change clothes. Well that made me look at aprons… and it inspired today’s craft. And the artisan just “happened” to use a dish towel with, of all things… LEMONS! LMAO! Go figure! So if you have little kids, grandkids, etc. who like to help you in the kitchen, try this one on for size… kids size! LOL!


Craft Idea of the Day: Kids Dish Towel Apron

Supplies:

1 dishtowel (mine measured 18" x 28")
one package of double fold bias tape--extra wide
thread to match
ribbon or trim (optional)

Instructions:

Lay out the dishtowel with the shorter edge on top and measure 4 inches in from each top edge, and measure 9 inches down each side edge. Draw a line between these two marks and cut on the line using scissors or a rotary cutter.

This is when you would add any ribbon or trim. In this example, it is added at the top and the bottom of the apron.

Now you need to open up your bias tape and pin it to the edges of the apron.

You will want to pin the bias tape to the apron so that there is a 15-inch neck hole and 22-inches of bias-tape hanging at each edge for ties. Now you can sew the bias tape to the apron.

Now fold your bias-tape over to the back of the apron (the neck-hole and tie bias-tape pieces will be sewn to themselves) and sew.

Finish the edge of the apron with a parallel seam and you are done!

I just thought that was the cutest thing. It would also go great if you bought a young girl her first easy bake over, or something like that. It would be a great gift for all kinds of events even if you don’t have kids of your own, but know someone who does.

Ok, now as you know, after our beloved crafts, its time to eat! WOOHOO! I love this part LOL! Well it’s casserole week peeps! So today I am bringing you another super delish pan of homemade yumminess!


Delicious Chicken and Broccoli Casserole

Ingredients
4 skinless, bone-in chicken breast halves
2 stalks celery, cut into thirds
1/2 teaspoon salt
1/8 teaspoon pepper
2 cup cooked rice
6 ounces sour cream
1 (10.5 ounce) can condensed cream of chicken soup
1 (10.5 ounce) can condensed broccoli & cheese soup
1 (16 ounce) bag of frozen broccoli florets, thawed/drained
1 cup of shredded cheddar cheese
1/8 teaspoon onion powder
1/4 teaspoon garlic powder
salt and pepper to taste
2 cups crushed buttery round crackers
1/2 cup butter or margarine, melted

Directions

1. Preheat oven to 350 degrees F (175 degrees C).

2. Bring to a boil the chicken breasts, celery, 1/2 teaspoon salt, 1/8 teaspoon pepper, and enough water to cover. Cover, reduce heat to medium low; simmer for 35 minutes. Drain, reserving 1 cup liquid. Cool chicken, remove meat from bones, and cut into bite-size pieces.

3. In a large bowl, stir together sour cream, soups, broth, onion powder, garlic powder, cheese, broccoli, and salt and pepper to taste. Mix in cooked rice and chicken. Spoon mixture into a 9x13 inch casserole dish. In a resealable bag, shake together crushed crackers and melted butter. Sprinkle crackers over the top.

4. Bake in preheated oven for 30 to 35 minutes.

Ok I’m drooling already! YUMMY! Ok folks, I’m gonna hop on off of here and wake the kids for their doctor appointments this morning so I can get on the road. I will be talking to you all tomorrow… same blog time… same blog channel! Peace, Love, and lots of HUGS!

Tuesday, March 30, 2010

BORN IN THE WRONG ERA

Good morning everyone! How are you all doing today? I am alright. I’ve got the kids off to school and I already watered my plants and put my seedlings out for some “fun in the sun” LOL! I’m gonna take it kind of easy today… just kinda piddling around doing not really much of anything.

I went out with my mom yesterday on a “Lemon Hunt” LOL for things for the kitchen and let me tell ya… there was nothing to find ANYWHERE! OMG I was like “Are you serious?” Who knew lemons as a theme would be so difficult?! I told my mom maybe I was born in the wrong era cause from what I remember and have seen, these kind of things were easy to find back in the day. I found chicken stuff but that was kinda it! It was so frustrating. We found one piece of fabric and that wasn’t really long enough to do anything with… so the hunt begins. I’m gonna start ordering kitchen catalogs and weird stuff catalogs, etc. to make my pretty kitchen!


Well I got a few garden updates to share with you. Remember my Giant Pumpkin plant? Yep here it is! Its getting quite large and soon it will have to go outside forever to produce a wonderfully large pumpkin to amaze and astonish people of all ages! LMAO!!! But seriously… its getting real big huh? If I actually get a giant pumpkin I am gonna flip!


These are the Apache Berry vines I got that the Houston Garden Center! They are putting on the first bloom! YAY! Pretty soon it will be pickin berries in my own garden! WOOHOO! I’m still praying for the other vines I have left… but they aren’t looking too well!


This is my big baby! Its one of my Roma Tomatoes and its about as big as an egg almost. Isn’t that the cutest thing?? And I have 5 of them growing already! And don’t even ASK about the cherry tomatoes! I have so many of those growing its absolutely crazy!


For those of you who have never seen this before, this is broccoli plants flowering like crazy! Pretty soon it will be munching on some yummy broccoli (raw of course) with some ranch dressing…. OH YUMMY!


These are the second set of seedlings that DD and I planted a few weeks ago. We have sprouts!! Right now I see peas and Beef Steak Tomatoes popping out and 1 watermelon. We are gonna start round 3 of seeds probably sometime this week.


And finally this is my first tray of plants big enough to be in 4 inch pots. They will eventually be for sale when I have enough to justify a table sale on the roadside. I am aiming for maybe May to have enough to sale. I’m gonna offer the yucca plants and whatever else I can find and grow. LOL!

I decided that, along with the baby plants, I am going to sell some homemade jams too… but not ordinary jams & jellies… oh no… you can buy those at the local grocery store. But have you ever seen Habanero jelly or Jalapeno Jelly or even Mountain Dew Livewire Jelly at the store? Didn’t think so LOL! When I was cleaning out the storage, I found 2 brand new cases of 4oz. jelly jars that would be perfect for the unique flavor jellies. Because trust me, you don’t need very much of these to pack a punch! I may even play around and experiment with some NEW flavors LOL!

Oh I have to tell you about the weird dream I had last night. I dreamt that I had mutant tomato plants take over my back porch! LOL… I dreamt that they busted out of planters and pots and just rooted into my deck and grew everywhere! Oh I was freaking out… but I had tons of tomatoes of all kinds! LOL! Isn’t that the funniest thing!? Think I spend too much time with my plants? LMAO!

Now for the crafty person… like me… who likes to sew, having enough stick pins can be an issue. LOSING them is an even bigger issue LOL. A cute gift for the seamstress/crafter in your life is this neat little pincushion. And the best part is, you can use different size jars and store the extra pins inside!


Craft Idea of the Day: Canning Jar Pincushion

Supplies:

Fabric Scrap of your choice
Jar with lid and band
Cotton balls or fiberfill
Card Stock
Glue gun

Instructions:

Step 1: Using the lid of the jar, cut out a circle of the same size from the card stock.

Step 2: Using the lid of the jar, trace around it on the wrong side of your fabric. Increase that circle’s radius about 1” and cut out the larger circle.


Step 3: Layer the fabric, cotton balls, and lid then place the “sandwich” inside the band.

Step 4: Press the lid down so that the cotton balls and fabric form the pincushion on the opposite side of the band. Check to see if you need to move the fabric to avoid creases. Make any necessary adjustments and then fold in the fabric and hot glue it to the underside of the lid.


Step 5: Trim away any excess fabric and hot glue the cardstock over the fabric edges.

Step 6: Line the band with a small bead of glue and insert the pincushion into it, pressing firmly. Add the lid to the jar and YOU HAVE A NEW PINCUSHION!

Ok, so are you hungry this morning? I am starving actually. Not sure what is going on with me, but its day 2 in the casserole week, so here is a sweet but savory dish I thought you’d enjoy!


Country Ham & Pineapple Casserole

Ingredients

1/2 cup butter or margarine, softened
1 2/3 cups sugar
8 eggs
16oz. cubed ham
2 (20 ounce) cans crushed pineapple, drained
3 tablespoons lemon juice
10 slices day-old white bread, cubed

Directions

In a mixing bowl, cream butter and sugar. Add the eggs, one at a time, beating well after each addition. stir in pineapple, ham, and lemon juice. Fold in the bread cubes. Pour into a greased 13-in. x 9-in. x 2-in. baking dish. Bake, uncovered, at 325 degrees F for 35-40 minutes or until set.

Ok folks, that’s all for today. I am going to sit back, drink a cup of cocoa and maybe even read a bit. Who knows… all I know is today is lazy day/do whatever day for the Frugal Mom, so I will see you tomorrow. HUGS!

Monday, March 29, 2010

CRAZY FOR CASSEROLES

Well hello there everyone. How are you doing this morning? I hope you are well. I am tired. I was cleaning and painting and trashing quite vigorously yesterday and so I am quite sore. But I made a lot of progress really. I got my pantry reorganized and cleaned out, 2 big bags of trash out, 4 boxes sorted through and put or thrown away, cat litter changed out, kitchen cleaned up, dinner cooked, and I started working on my desk area. On my breaks where I had to sit down I cut some coupons, planned a few meals for April, and sorted some receipts. I stayed busy!


Another thing I did was decide what theme I wanted to redecorate my kitchen in…. and its LEMONS! I absolutely love lemons! The bright yellow is cheery and fresh & Clean feeling, the smell is crisp and clean, and its fruit so its healthy LMAO! I got inspired for the lemon theme actually when I was looking at the refurbished armoire craft yesterday. They had redone one in a lemon theme and it was bright and happy and just wonderful! Isn’t that picture just the cutest thing? They did the inside for a bedroom, but it can easily be adapted to a kitchen. However I am just gonna use the painting idea and the lemon cut outs in my kitchen since I don’t have an armoire to refinish. Next I have to find a lemon fabric I like for the curtains, potholders, etc. I also found a lemon kitchen timer, a clock, and a few other things that are just absolutely adorable! Since it is kind of expensive to redecorate a room, it will be a work in progress LOL.

I want to talk about all the skuddlebutt my blog caused yesterday for a bit. Some people thought I had an attitude, some people were very supportive, and some people sent some actually very vicious emails. My blog was not intended to ruffle anyone’s feathers or make you pick sides, etc. It was just a general vent. When you live under the stress factors I have and you see issues that have some way touched your lives, you tend to get annoyed. All that bottled up tension gets to you and eventually you explode. I’ve personally seen my family and friends go through a LOT of trials and turmoil and when I see it I get (excuse the language) PISSED! It’s a normal human reaction. I chose to vent here, where I felt safe, so that others could see a bit of the wrong that is taking place. But also that way I didn’t blow up on anyone who didn’t deserve it. Sometimes the best way to relieve our stress it to write it down. Have you ever written a letter you never intended on delivering, but it felt so good to get it out in some way? It’s the same concept and totally a normal thing to do when you have no control over something. I do not censor your comments, so please don’t feel like you must try to censor mine. Let’s just agree to disagree or be supportive of anything said here. This blog is your haven (and mine) to exercise our freedom of speech, ok? No more nasty emails telling me to leave the country, dropping F bombs on me, etc. PLEASE. I do care for you all and want you happy and healthy. Now let’s get back to having some fun around here!

To Susan- are you doing alright with that bun in the oven? Did you ever tell me what we are having or when you are due even? LOL… I want to say you have but I can’t remember… I’m sorry. Now to answer your questions… first off the key lime cheesecake bars have been called tart by some. If you want really tart, zest some lime into the batter, squirt more juice when you are eating it, etc. There is a lot you can do to alter to your liking. But I am glad I was able to kill 2 birds with 1 stone for you LOL! As for the healthy slow cooker ideas… I will work on that for you and then share them soon!

Now about what to offer your kids in the summer. Milk contains lactose and bacteria which do not “play well” with the heat. Remember our mom’s telling us not to drink milk in the middle of the day and go outside? Well being that I am lactose intolerant, I was forced to learn all this stuff about milk LOL and I found out mom was right! The sugars in the milk (lactose) do not break down properly and the bacteria begins to irritate the stomach, giving us the nauseous feeling. However, most dairy products, cheese, sour cream, cottage cheese, and some ice creams, have most of the lactose processed out… explaining why those do NOT make us ill. However, there are tons of good healthy things you can offer your kids for hydration during the summer! There are so many natural ingredients which are excellent coolants. But what are the best summer drinks? Here is a list of drinks that you can offer your kids in the summer:


Watermelon juice: It is wonderful thirst quencher which contains all the minerals required for the body. It has low sugar which does not disrupt a diet program or increase your weight. It contains magnesium, phosphorus, iron and beta carotene. You can even make ice lollies with watermelon juice. However, avoid using bad quality watermelons as it might upset your stomach.


Papaya juice: It is wonderful digestive aid and can be consumed by everyone. It is great for people with weak digestion, non-vegetarians and for those who need enzyme supplementation to improve the digestion of proteins. It is good for detoxification and for people who want to improve liver function. However, pregnant women should avoid papaya juice in large quantities or taking it regularly.


Lemonade: Lemon is a good source of vitamin C. It improves immunity in the summer and is excellent as a thirst quencher due to its cool nature. One should always add a pinch of rock salt and cumin powder to enhance its taste. However, drinking concentrated or large quantities of lemon can cause an uncomfortable acid kind of sensation in the stomach so be careful.


Butter Milk or Lactaid: Very cooling in nature and is available all over the country. It is a good source of calcium, protein and very filling in nature. However, people of certain constitution or blood group may feel uncomfortable with dairy products and if milk is making you or your kids ill, try a lactose free milk (I use Lactaid) and only drink it first thing in the morning or after sunset.


Mango Juice: It is made with raw mangoes which have a cooling effect on the body. It is rich in vitamins, minerals, and antioxidants which are needed by the body to fight against diseases. Mangoes are good to eat either ripe or unripe. The ripe mango is excellent for toning up heart muscles, stimulating appetite, and improving the skin's texture and appearance. It is also antiscorbutic, diuretic, laxatic, and invigorating. This tropical fruit is also helpful for people who have liver disorders. It's also high in calories and carbohydrates which are needed for those who are trying to gain weight. Ripe mango is a good source of beta-carotene and is good in the prevention of various Vitamin A deficient disorders. Mangoes are also found to have powerful antioxidant and anticancer properties as well as helpful in treating acidity, poor digestion, and anemia. Drinking mango juice is also believed in improving the memory, concentration, and great in preventing mental weakness. Mangoes also contain Vitamin E which helps in the better functioning of hormonal system-improving the sex life. The amount of Vitamin C and calcium found in mangoes prevents internal hemorrhage also.


Rose water: Rose water has rose as a base which lowers the aggravated pitta. It can be added to any drink to enhance its aroma and flavor. Pitta dosha governs all transformations in the physiology, from the digestion of food to the metabolizing of feelings, emotions and sensory perceptions.


Smoothie: A smoothie is a blended, chilled, sweet beverage made from fresh fruit. In addition to fruit, many smoothies include crushed ice, frozen fruit and vegetables and frozen yogurt.


Coconut water: It is very refreshing natural drink and takes care of mineral requirement in the summer when the soaring temperatures deplete all the water and salts from the body.


Khus sherbet: Khus (poppy seeds), according to research, decreases the temperature of the body and aids in cooling the body. It is also supposed to be a good blood purifier and good for calming the nerves.


Ice tea: Though too much of tea is not good for health but a refreshing ice tea in the evening can be very invigorating. Try to drink the tea with limited sugar to increase the healthiness of the drink. Also if your feet won't stop sweating during the summer, soak your feet in tea! The antioxidants close the pores of your feet so they won't sweat as much (and with my son's foot odor... its a blessing! LOL).


Thandai: It consists of almonds, milk, rose petals all of which have a cooling effect and is absolutely fabulous in taste.

And finally a little bit of advice; avoid those fizzy, carbonated drinks that you see all around you. Although they are easily accessible, they're just filled with empty calories, artificial sweeteners, colors and flavors which do you no good at all. Kool-aid, sodas, gatorades, etc. are ok once in a while, but if you are trying to get back into a healthy regime I would recommend all natural. Maybe even invest in a juicer and make it totally pure. You don’t need an expensive one. I know Black & Decker makes one fairly inexpensive and it works just as good. Let your kids help you make the juice even. Teach them young and they will carry it with them the rest of their lives!

Water is good yes, but watch that too! There IS such a thing as too much water believe it or not! Drinking too much water can lead to a condition known as water intoxication and to a related problem resulting from the dilution of sodium in the body, hyponatremia. Water intoxication is most commonly seen in infants under six months of age and sometimes in athletes. A baby can get water intoxication as a result of drinking several bottles of water a day or from drinking infant formula that has been diluted too much. Athletes can also suffer from water intoxication. Athletes sweat heavily, losing both water and electrolytes. Water intoxication and hyponatremia result when a dehydrated person drinks too much water without the accompanying electrolytes. So get back to natural, homemade and healthy drinks and have a great summer. Cheers!

Well, I am slowly digging my way through the chaos that has consumed my living room. I have found numerous different crafting items, so when I can find that corner of the world, its going to get a brand new organization system LOL! But to hold you over for some big projects, I found a little idea to recycle those old bottle caps! They would also make unique earrings!


Bottle Cap Key Chain

Supplies:

cotton swab
rubbing alcohol
1 bottle cap from a glass bottle
jump rings
1 large split ring
craft drill
medium craft drill bit
craft pliers

Instructions:

1. Using the cotton swab and rubbing alcohol, clean off the bottle cap.

2. Next, use your craft drill and drill a hole through the bottle cap. Start at the back of the bottle cap, under the ridge, and drill all the way through. You will have to use some pressure.

3. Slip a jump ring through the hole and close it with the craft pliers.

4. Make a chain of jump rings as long as you like and attach it to the jump ring you put through the bottle cap. Make sure to close all of your jump rings!

5. Attach a split ring to the last jump ring on the chain.

Aren’t those cool? Alright… the kids are off to school and I’m hungry. I’m thinking about dinner already but not sure what I want to make. I was thinking last night that I want to make this week CASSEROLE week! Casseroles are easy one pot wonders that feed an entire family. Last night I made the Mexican Shepherd’s Pie and they ate it up! So today I am gonna share the Mexican Pie with you and then I will give you a new casserole recipe everyday this week! I think this is gonna be fun!


Mexican Shepherd’s Pie

Ingredients

1 1/2 pounds ground beef
1 onion, finely chopped
garlic powder to taste
salt and pepper to taste
1 (14.5 ounce) can diced tomatoes or rotel
1 (1.25 ounce) package taco seasoning mix
3/4 cup hot water
1 (11 ounce) can whole kernel corn, drained
1 (8.5 ounce) package corn muffin mix
1 cup shredded Cheddar cheese (optional)
1 (2.25 ounce) can sliced black olives (optional)
1 can black beans, drained
Sour cream to garnish

Directions

1. Preheat oven to 400 degrees F (200 degrees C). Spray a 9x13 inch baking dish with cooking spray.

2. Place the beef and onion in a skillet over medium heat. Cook until beef is evenly brown and onion is tender. Drain grease. Season with garlic powder, salt, and pepper. Mix in the tomatoes, and cook 5 minutes. Stir in the taco seasoning and water. Bring to a boil, reduce heat to low, and continue cooking 5 minutes, until thickened. Mix in black beans and corn. Transfer to the prepared baking dish.

3. Prepare the corn muffin mix according to package directions. Spread evenly over the top in the baking dish.

4. Bake 20 minutes in the preheated oven, or until puffed and golden. Garnish with olives, sour cream, and cheese.

Okie dokie kids, I am gonna get off here and go fix me some breakfast. Then I guess cleaning and such are in order? LOL or not… not sure yet… All I know is the sounds of the birds chirping and the cat scratching and no kids bickering is so wonderful this morning… it truly is a Folger’s Morning! LOL… See ya tomorrow! HUGS!