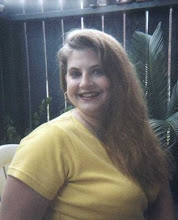
Then my mom and I were “wandering” in my garden and we noticed a few more cherry tomatoes were red and ready to become a snack! SOOO I picked them LOL! Mom says “Here’s one too” as she plucked it off the vine and it went right into her mouth! LMAO she said it was so tasty and flavorful! LMAO… I now deem her the Dickinson Tomato Bandit! LMAO! So I plucked my tomatoes and cut some fresh parsley for dinner as you can see… it’s so wonderful to eat the fruits of my labors (no pun intended LOL).

Hazel, thanks for your comments and feedback! And to answer your question, you can also use cola, beef broth, or just water even instead of the beer for the ribs and it turns out just as delish! I use the cola most, as there are no beer drinkers in this house anymore, but occasionally I will go pick up a single one at the convenience store. Last night, however, I used beef broth and everyone thought the ribs were absolutely divine (you can see our dinner pictured here). My mom was “cutting” them with a fork they were so tender. I roasted a ton of veggies: yams, potatoes, yellow squash, zucchini, red and green bell peppers, carrots, onions, and fresh garlic cloves minced up. I tossed all the veggies in olive oil and seasoned them with salt, pepper, and a hint of Italian seasoning and they were absolutely OMG YUMMY! Especially the yams LOL! The DH and I were fussing over them LMAO! It was cracking my mom up!
Ok, I keep forgetting to bring up the Jamie Oliver special. Jean, it’s on Friday nights on ABC… so whatever channel is your ABC (You’ll have to check) but here it is Friday night at 7pm I think… Ok, so the one this past Friday was him trying to conquer a High School. It was absolutely gut wrenching and when the main woman told him that FRECH FRIES counted as a veggie!? ARE YOU KIDDING ME? I was jumping around like a p’d off gorilla yelling at the screen! LOL… I know, what an image right? Anyway, Jamie Oliver gathered a group of teens and they are trying to make an impact on the school. To see the kids’ faces when he took away their fries was priceless. The kids ended up cooking a healthy meal to a restaurant full of guests, including their parents/families and their state senator! You should have seen the adults faces when they learned the kids did the cooking. Well one of the teens names is Bridget (I think) and she is a big girl. At the end of the dinner, each teen got to say a small piece on why they thought Jamie’s program was so important. Bridget states that she has always had weight problems, and the doctor found spots on her liver and has given her 7 years to live if she doesn’t make some dramatic changes. I so incredibly lost it right there! When I had cancer many years ago, the doctor gave me one of those time frames… gave me an expiration date if you will. It’s a terrible thing to hear and it just terrifies you to no end! You start thinking about what you will miss out on, what you could do, etc. For me… it was my kids. They were very young (not even in school yet) and at that time, I just wanted to be around to watch them graduate. I cried so much! That’s when I saw the world really had color and that I was not really living, I was just existing. I got to eating better, and fresher, and living life as best I could. Here I am now… in remission, feeling pretty good, and only 2 years away from my DD graduating! YAY! GO ME! And a big raspberry to all those doctors who said that word I hate… “CANT”. So my heart goes out to that young lady named Bridget and I hope all the best for her and that she can make some major changes to save her life! This weeks episode is gonna be pretty good by the looks of the previews! Ya know who really gripes my hide on this show, aside from Alice the cafeteria lady at the elementary school? That stupid radio DJ! He needs a good old fashion can of Whoop A** opened up on him! Stupid “good old boy” mentality! I wonder if he realizes his poor attitude is partly what is killing their kids!? (Sorry for the language, but he really irks me!) Well he gets pretty humbled this next show as the preview shows him with Jamie in a funeral home and they show a double wide coffin for the larger citizens. It was quite scary actually. Either way its gonna be a great show! Ya need to watch it!
Ok, to my Jeanie in Ohio LOL… Aww I feel so loved! Thank you! 88 cents a lb. is a GREAT buy! Way to go! I hope you stocked up! Tyson whole fryers were 77 cents a pound last week here… I picked up a couple LOL! So how did the soup taste? I am glad my crafty challenge is keeping you motivated to make some great things. You can use those crafts for gifts or you can find numerous outlets to make an extra buck or two! Either way, keep it going girl! And if your in the mood to start sowing some seeds… get yourself an empty egg crate and make some holes in the bottom and plant some seeds. Bring them inside at night and place them outside, perhaps on a table or bench or something, during the day! You will have sprouts in no time and by the time you are ready to put them outside permanently, it will be nice and toasty for them! And to hear you talk about making something for donations was wonderful! It warms my heart!

Now let’s get to talking about what I accomplished yesterday. I started out the day sewing a couple of purses and all the accessories. This one is the yellow “Support the Troops” ribbon. It comes with a lapel pin, photo album, calendar, coupon holder, make up bag, eyeglass case, tissue holder, cell phone pouch, and scrunchy!

Then I did a U.S. Navy one. This one comes with a lapel pin, photo album, calendar, coupon holder, make up bag, eyeglass case, tissue holder, cell phone pouch, lanyard, and scrunchy!

Then I saw a little pile of cut strips. I got the thought… SCRUNCHIES! I made these 8 Breast Cancer scrunchies.

I made music note ones after that. I have 9 of the yellow with music notes, 9 of the white with black music notes, and 2 of the rainbow music notes on black. Cool huh? I always like to have extras because it never fails, either the girls in the band always want one, or their moms or even just people at the various band competitions… so I throw a few extras of these bad boys in my bag and make a buck or two just sitting on my bum! LOL!

And once the smoke was clear, the screen was up, and the guests were all gone, I accomplished one more craft for the day… another one of those Crayon totes in the Disney Cars theme fabric (from one of the bolts). I was just looking at the fabric and HAD to make a Disney one for like a little boy. I thought it was adorable.
And that was it for the night. With my swollen feet and legs, I shut it all down and headed to stretch out and cry in my nice soft bed LOL! OK, now today is Day 3 of the Fabric Challenge… so what’s on tap? Not sure… I’m noticing this challenge is one of those fly by the seat of your pants things. Maybe it’s my mind’s way of not getting bored LOL. However I have an awesome craft idea I want to share with you today! With the super hot Texas summer creeping in on us quickly, these are a great idea for anyone who is going to be outside for extended periods of time no matter where you are!

Neck Coolers
step 1: Gather all materials
Materials: 100% cotton fabric (prewash all fabric so that colors will not bleed when cooler is wet) thread Water absorbing (sodium polyacrylate) polymer crystals; Tools: Scissors or rotary cutter and mat sewing machine or hand-sewing needle *The most common brand of crystals is Watersorb. You can visit their website or you can also sometimes find them at garden centers and hardware stores.
step 2: Create fabric tube
Cut fabric into a strip 4 1/2 inches wide by 40-45 inches long. This can most easily be done by cutting from selvage to selvage. (Selvage are the finished edges of the fabric as opposed to the raw edges that fray.) Fold right sides together along a long edge and pin. Sew along the edge to create a long tube.
step 3: Turn and Press
Turn the tube right side out. Press (iron) the length of the tube with the seam at the center, not at a fold.
step 4: Stitch across and add crystals
Find the center of the tube and stitch across the center. Make sure to lock your stitches each time by backstitching a few stitches so the dry crystals won't shift. Using a funnel, fill both halves of the tube with 1/4-1/2 teaspoon of crystals. Shake them down until they reach the center seam. Do not be tempted to use more. The crystals hold a tremendous amount of…
step 5: Finish ends.
Cut your ends at an angle and fold the edges inward to create a hem. Iron flat and sew across this hem to finish your cooler.
step 6: How to use.
Soak your neck cooler in water for 30 minutes to activate the crystals. (I soak mine in the fridge.) After the first 10-15 minutes, smoosh the crystals around to evenly distribute them in each pocket, then soak for the remaining time. Once it has expanded, lightly squeegee the excess water off the outside with your hand if you don't want it to drip on you too much. Tie around you neck
Now the other day I gave you an idea to use that left over ham from your Easter dinner… but what happens to all the extra CANDY? YUMMY! Well if, by some slim chance LOL, you can’t possibly eat all those stockpiled bags of jelly beans you acquired, I’ve got a sweet new idea for you! Check this out!

Jelly Bean Bark
Ingredients
1 pound white confectioners' coating
1 pound jellybeans
Directions
Line a jelly roll pan with waxed paper and set aside.
Melt the white confectioners' coating in the top of a double boiler over just-barely simmering water, stirring frequently and scraping down the sides with a rubber spatula to avoid scorching. Spread the melted white confectioners' coating onto the prepared pan. Sprinkle the jellybeans over the top.
Refrigerate at least 1 hour or until firm. Break into pieces to serve.
Doesn’t that sound sinfully delicious? Can you say YUMMY! LOL well that’s all the time we have today kids. Tune in tomorrow for another crazy day of the FC, good food, and crazy fun! Until tomorrow… Peace, Love, & lots of HUGS!