myspace generator
Showing posts with label donations. Show all posts

Thursday, May 13, 2010

SEW CRAZY 4 POTATO PASTA

Top of the morning to ya my little chickadees! How are you doing this morning? I am good. I got a lot accomplished in the last 36 hours (Tuesday night and yesterday people LOL wakey wakey already LMAO) and I always feel pretty spectacular after some serious crafting sessions LOL! I know, it was supposed to be my day off, but you and I both already knew it wasn’t going to happen LOL! I got lots to share with you today! Take a look!


I started the day yesterday morning with a quick trip to my local Wally World and it yielded some pretty awesome results! This load cost me $17.86! YAY! I had $4 off on Women’s and $3.00 off on Men’s coupons for the Nivea Body wash (which were $3.97), $1.50 off any Whiska’s dry cat food (on sale for $2.97), $3.00 off each the BIC Comfort 3 Advanced and Soleil (which were on sale $2.88 each YAY!), Buy 1 Get 1 FREE Ziploc bags coupon AND a $1.50 off 2 bags (which the quart size and gallon size boxes were $1.97 each and the sandwich size was $1.34) and then the milk, cheeses, and allergy meds were “generic” so those were all regular price. I think it was a great buy! Think I need some more of these coupons LOL! Factor out the generic stuff and I really only paid $5.93 for everything! COOL HUH? Coupons are a wonderful thing! I’m already planning another super duper trip and have ordered more coupons from the Coupon Clippers! LOL!

Oh and to Tabitha, about the carrots… I paid a little less than $11 for the 25 pound bag of carrots. That breaks down to about .44 cents per pound. It’s A LOT cheaper than the grocery stores here. Normal price on a pound bag of carrots runs about $1, and occasionally you can find them on sale for 49 cents per pound (but that’s rare). So, even when they are on sale, I still save about a nickel a pound by buying in bulk.


Here you see a pair of hand towels I picked up at the Dollar tree that I embellished with the fabric from my kitchen curtains! All 3 curtains are up now and the hand towels are decorated. Making the towels sparked another idea with my lemon fabric!


Remember how I said I had to still buy the wallies for the cabinet doors? Well not anymore! I took the fabric scraps and cut out the whole lemon pictures and then spray glued them on the cabinet doors! This not only saves me money (no more buying the wallies), but I used up (didn’t waste) the scraps AND guaranteed that the wallies are something I like AND that they match! Pretty smart, huh?


Remember when I went to JC Penny with those latest $10 coupons and got some shirts? Well this is the Coca-Cola purse I made out of one of those free T-shirts I got! I also used some more “scraps” out of the green crate for the Fabric challenge. I think the really cool part is the fact I used the “printed shirt tag” on the inside as a pocket! Cool, don’tcha think?


Here you have “The Snack Sack”. I cross-stitched this picture about a year ago with a kit I got clearanced and never knew what to do with it… until today! I applied the same method as the T-shirt purse with adding matching fabric on the top and bottom of the cross stitched picture and then proceeding normally to make a purse.

While on the purse topic… the start of the lucky lotto bag has not gone so well! Note to viewers… the modge podge didn’t dry and it ruined the one side I started… so now I have to collect more non-winning tickets to redo the one side. The other side, however, worked well with the spray adhesive. I found a funky fabric backing that I spray glued on the back of the tickets. I’m gonna let it set for a couple of days to make sure its stuck good… meanwhile, I got some more $2 and $4 winners that I need to cash in for more tickets LOL… anybody got any losing $2 tickets? LMAO!


This is a present (here’s hoping she doesn’t read this before I get over there this morning LOL!) for my mother. It’s a Hippie walker tote! It has a velcro strap that she can just wrap the flap over the bar on the walker and it will hang in front… suitable for the mail, papers, or bounce rollers LOL or whatever she wants to put in it (even snacks LOL).


Here is the matching cell/hanging pouch. She can hang this too on the walker and put her cell phone in it when she is walking or whatever else she might see fit (why do I get sudden images of candy bars and such? LOL). I am trying to make things somewhat easy for her and I knew that, as she is a self-professed “hippie”, she should LOVE this fabric!


Well it has begun. Normally I always have more than one project going at once. I have officially started sewing for Madison’s room today. She never could decide how she wanted to decorate her room and when she finally did, I got all the stuff and told her to clean her room. She did and then I had to hold off due to family emergencies. But now I can get back on course and begin working on her stuff (just have to get her to clean the room again LMAO!). I made 2 pillow cases out of the room fabric tonight. Now I just have to buy new pillows LOL!


I pulled out a piece of fabric from the green crate and just kind of stared at it a little while. What to do… what to do… well I decided on can wraps. They have the playing cards on them and I think would be a great give away/favor at a poker night party. Or they could just be for someone who likes poker!


Remember that oh-so-precious veggie peeler my caring father got me? LOL! Well yesterday I played with carrots (sadly I didn’t finish prepping the 25 pound bag though) but I conquered POTATOES! Oh boy was that fun! Now, if you paid attention to the Wal-Mart shopping picture, you would see milk, mozzarella cheese, parmesan cheese, and ricotta cheese… what does that normally make? Yep, LASAGNA! Now I am not real big on lasagna believe it or not, and my mother not liking pasta actually made this idea pop into my head! That spiff-a-licious peeler makes for some really THIN slices of potatoes… so why not make some potato lasagna? It took me 1 and a half hours to prep from beginning to baking but it actually turned out really good… the pan weighed a ton, and after dinner so did my tummy! LOL! I took step by step pictures in case you guys and girls wanted me to post my recipe on how I made it. Maybe a good thing for someone needing/wanting gluten free?

Sew, are you feeling a little crafty now looking at all my crazy sewing stuff? GOOD! LOL! I think this might be an interesting thing to make for hospital donations. Now, I don’t know if mom remembers, but in the hospital I was joking with mom about making a Foley cover because she was embarassed and didn’t want anyone seeing it. She was always trying to cover it up with a sheet (she’s such a proper lady LMAO). Well sure as the sun is hot, I found an actual site that gives instructions on how to make a Foley Bag cover (a.k.a. as a catheter bag cover)!! I think it would be a good thing for patients who are on dialysis, etc. Give them a little bit of “dignity” back if you will. Click the title to go to the page and see all the pictures, etc. I found the link on my Free Sewing patterns page… I should’ve guessed! LOL…


Craft Idea of the Day: Donatables: Catheter Bag / Foley Bag covers

Materials

14" x 32" rectangle of opaque fabric
2 - 18" pieces of some material to use as ties - or make them from fabric

Instructions

1. Fold larger piece of fabric in half length-wise.

2. Make a casing on each narrow end for the ties. Do this by folding over edge twice and ironing flat.

3. Open up the folded and ironed ends, and fold the fabric right sides together so folded ends are together. Sew up the sides to just 1/4" under the first ironed fold. Trim the bottom corner and iron the seams flat.

4. Fold the top casing over so that the cut ends on the sides do not show. Sew close to the edge making the casings and making sure the ends of each one are not sewn shut.

5. Cut two roughly 18" pieces of some sort of tie... I used satin cord for this one and have used ribbon and even bias tape for this. Thread one piece through each casing so that two ties stick out on each side. These will be used to tie the cover to a wheelchair or bed rail.

NOTE: I have tied some other finishing touches that I like better than the above. Just make the bag and hem the opening instead of making it into a drawstring top. Then do one of the following:

 Use 2 strips of blanket binding. Sew on each side of the hemmed opening, folding the ends to make the binding neat. Be sure you sew along the edge so there is plenty of room for the drawstring. Finish the drawstring as above.

 Sew bias tape along the sides of the bags leaving extra bias tape at the top. Cut it long enough to be a tie. Then sew another piece of bias tape from about 1 inch from the top of the bag. Cut the second piece to march the length the first piece. Tie off each as above. See photos below.

The sizes in this pattern can be somewhat flexible. The finished width should be as close to 13" as possible, the bottom to top not much more. How much tie you use depends on what you use.. since I used satin cord I made them longer to be sure they can be tied snugly. You could also use some other type attachment... Velcro for example.. so long as the strip of Velcro's fabric is long enough to reach around the bed rail or wheelchair arm.

I made this up as I went along and am not an experienced seamstress, so feel free to make and suggest improvements. Email me at hathorn@drizzle.com

This pattern is yours to use and republish.. but we would really appreciate if you would let people know it was from NW Wings of Love www.nwwingsoflove.org.

OK it’s that time again! Time to tempt your taste buds with a slice of heavenly deliciousness! Its PIE TIME! YAY! Day 4 of the Unique Pizza Week brings you a sweet treat today. A fruity dessert that’s sure to please your crowd! "Refreshing sliced fruit and creamy whipped topping over a tender cookie crust - delicious, impressive, and easy. Enjoy! Kiwi and peaches may also be added to pizza if desired."


Fruit Dessert Pizza

Ingredients

1 (18 ounce) package refrigerated sugar cookie dough
1 (8 ounce) container frozen whipped topping, thawed
1/2 cup sliced banana
1/2 cup sliced fresh strawberries
1/2 cup crushed pineapple, drained
1/2 cup seedless grapes, halved

Directions

Preheat oven to 350 degrees F (175 degrees C).

Press cookie dough evenly into a 12 inch pizza pan. Bake in preheated oven for 15 to 20 minutes, until golden brown. Cool in pan on wire rack.

Spread whipped topping over cooled crust. Arrange fruit in a decorative pattern. Refrigerate until ready to serve.

Ok everybody. Its time for me to get off here and get dressed so I can go to work! I hope you enjoyed the inside scoop as to what I did on my day off. Have fun in whatever temptations life may lead you to today… just remember to be safe! Until tomorrow… HUGS!

Wednesday, April 14, 2010

SCATTERBRAIN

Well Good morning everyone! I hope you are doing well today. I’m doing well I guess LOL. Very tired and a little stiff, but its alright because I woke up and I’m alive! I want to thank Jean for the wonderful gift of Brandywine seeds! I plan on planting a set this evening once I get home from picking up kids, etc. Right now I have so many things to share and going on in my head, I am a real scatterbrain today! Let’s see if you can keep up LMAO!

OK, I had a lot of emails asking about the Ronald McDonald thing I mentioned yesterday. So I sat down and really thought about it. Here is what I am gonna do. First thing is I am going to contact the director at the Galveston Ronald McDonald house and ask about number of children, tenants, families, etc. Then I am going to take both kinds of fabrics.and plan on making crayon totes, burp clothes, and whatever else I can make with the McD’s fabric. I must be careful to use the fabric wisely LOL! OK, so then I am also going to go to Wal-Mart and price things like Crayola crayons, colored pencils, etc. to fill one of the totes. That times how many totes I will be making is what this “Project Ronald” will take. I know that when the school supplies go on sale, the crayons are like 20 cents per box, so if someone gifts $4 and I need to make 20 totes, then that $4 will buy ALL the crayons! I am also going to get a copy of their wishlist and buy a few things for the house, like paper goods, flour, etc. and donate that as well. I know I saw paper towels, etc. so we will see how much money we can raise for them. Cool huh? I have set up an Etsy account, but I haven’t listed anything on there yet (haven’t had the time LOL). Everything I make off selling things on Etsy from the day I start selling until Sept. 1st will be funding for this project. I am going to ask some of my “band kids” if they want to help in either distribution or something. Hopefully I can get pics of the gang outside the house… I think it would be a good experience for them all. Anyway, I will let you know when “Project Ronald” is officially started!

Ok, so I did a bunch more sewing yesterday… continuing the Fabric Challenge. I was going through the green crate and found some half finished projects that I figured I would conquer yesterday. I don’t know WHY I start something and don’t finish them like this! Its kind of annoying when I go back and see this! What WAS I thinking?? Anyway, Lookie Lookie what came off my creative little fingertips!


This was not a half started project, but it WAS an old shirt that my mother found in a box in the attic when we were cleaning it out. Jameson’s is an Irish Whiskey for those who don’t know. So anyway, since it also said St. Patrick’s Day on the shirt, I figured a green shamrock fabric was in order. Did this turn out absolutely adorable or what?! I’m gonna have a hard time selling this one. LOL I showed it to mom last night and she said I should find other “vintage” shirts and do the same thing. LOL, guess she really liked it too! I have done T-shirt bags before, but for some reason this one turned out absolutely wonderful! Hmmm... maybe its the color... who knows LOL!


This is a set of 5 baby burp clothes tied up with a “It’s a Girl” ribbon. I make these and either sell them separate, as groups like this, or even in baskets, etc. They are very soft, contoured to fit mom’s shoulder, and 100% machine washable!


These are 5 cell phone pouches that I had to complete. I only had the fabrics cut and all the stuff laying together, so I sewed them, strapped them, snapped them, and voila! 5 totally awesome cell pouches!


This is the Sunflower casserole cover made from 2 tapestry place mats. My mom likes sunflowers and when I saw these mats, I thought of her!


This is the “fat chef” tapestry casserole cover. Apparently this little dude is very popular in kitchen décor nowadays. I just bought it because I thought it was cute LOL!


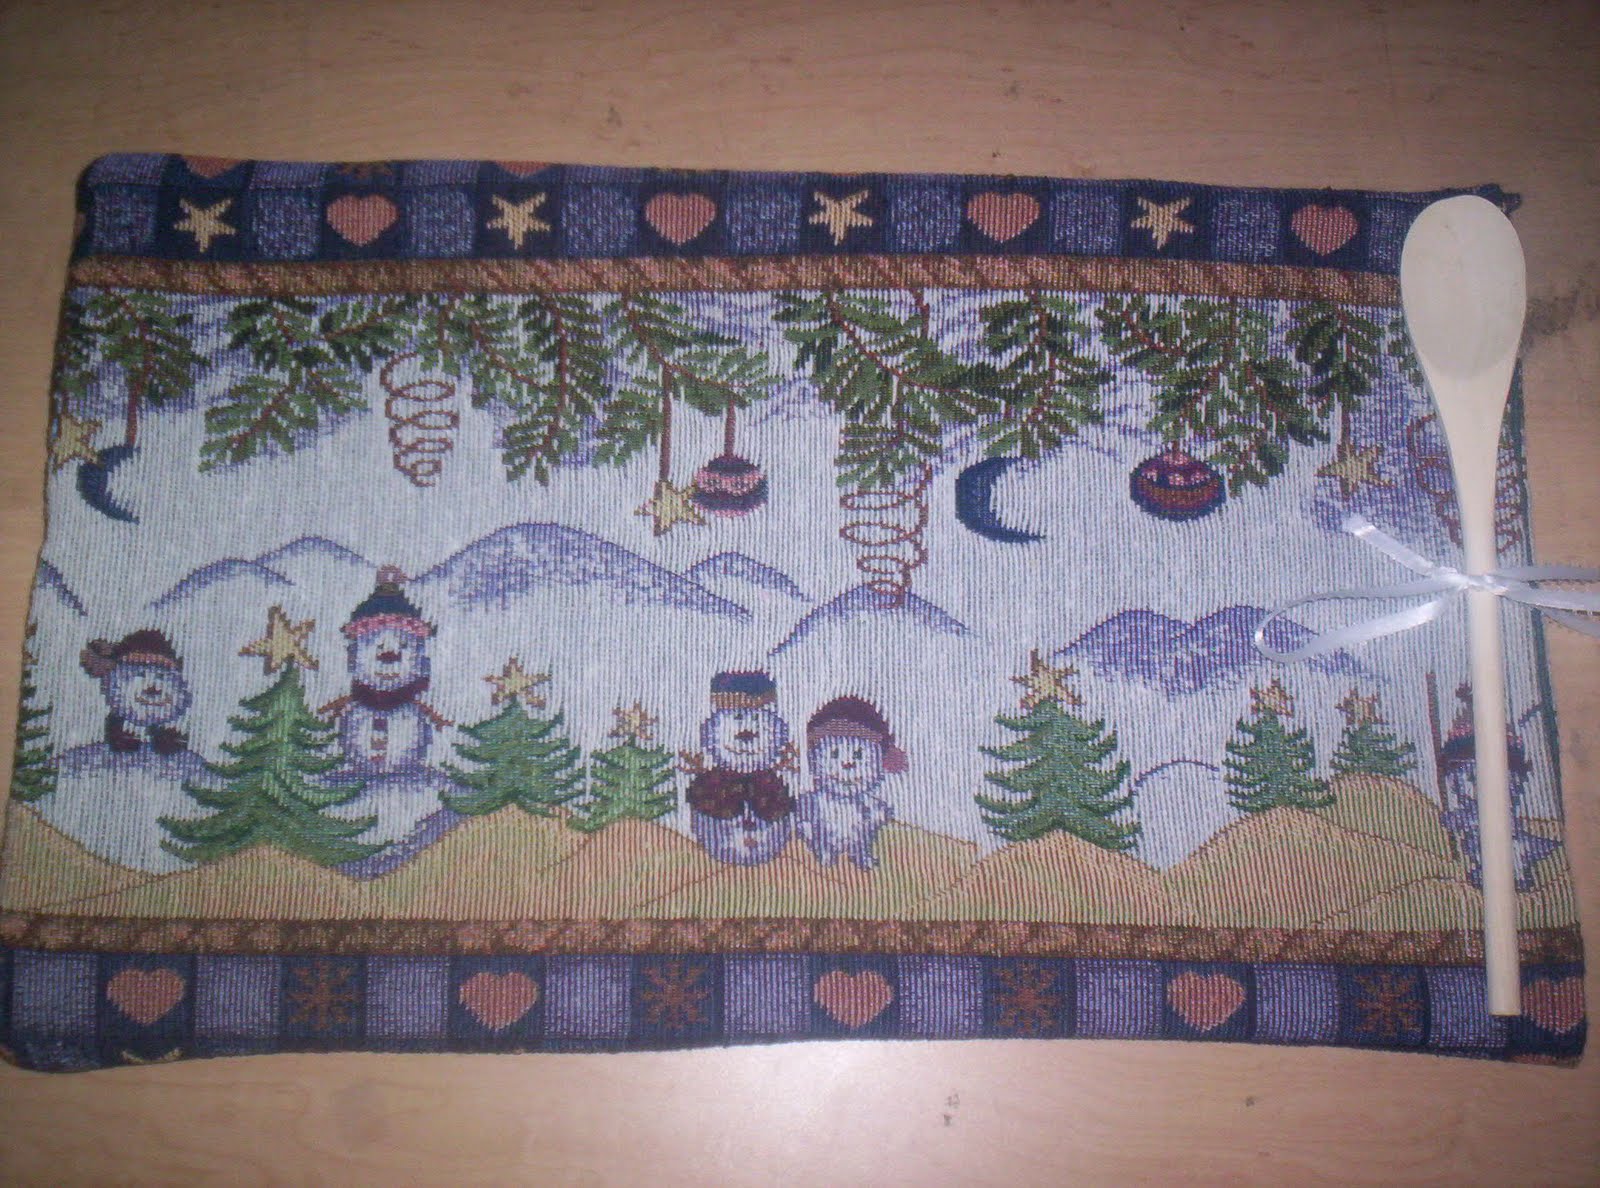
And this is the snowman tapestry casserole cover. I had lots of covers ready to be sewn together in the box. There were 7 total I think. I only got to these 3, so watch for the others in the next couple of days.


These are 9 drawstring bags that I finished today. The story behind these easy little guys is simple. A couple of my DD’s friends needed something to hide their pads and other feminine stuff during a school trip. I had these little drawstring bags I made. Then I got the idea to put travel size toiletries of all kinds in them and use them for donations to places like the women’s crisis center and the men’s homeless shelter. I would use coupons and get trial size toothpastes, toothbrushes, etc. for free or for just pennies and then make up these cute bags and donate them. I normally whip out at least 100 of these per year!


Here you see the 2 insulated can wraps I made yesterday. Tinkerbell and John Deere… neither is a particular favorite of mine, but they are very popular so I continue on! LOL… Good thing there isn't too much more of these fabrics left LMAO! Kidding... don't want to offend anyone... I'm just in a playful mood today LOL!


This is a set of Autism hand towels, which could also be used for other purposes I suppose. I just liked how the green compliments the bright puzzle pieces! Lovely… and another autism craft down too!

As you can see I was a busy little bee yesterday. I didn’t get everything completed that I pulled out of the crate that was half done, but I made a super huge dent… I would say at least ½ of it. I know that I have about 3 or 4 casserole dish covers and maybe 10 other things. I don’t know why I do that… start something and not finish it, especially when there is either not much left to do or not much to do in the first place. Crazy I know, but see this Fabric Challenge is helping me get all this done and build my inventory too! Awesome huh? I think so… and I am coming up with some super cute stuff if I do say so myself LOL!

Ok so I was taking a sewing break and reading on the yahoo local news yesterday and I ran across this census article and I just had to go WTF?? I’m sorry but I need a vent moment… Read some of this bologna!

Census Bureau officials urge patience
By Ian White
The Daily News Published April 10, 2010

Anyone worried about their participation in the census can rest easy — there’s not a problem the Census Bureau has not thought out, an executive for its Houston-Galveston area office said.

“Whether you’ve received no form or more than one form, there’s no need to worry,” said Eduardo Guity, the bureau’s area media specialist, when The Daily News put to him three potential problems identified by county residents.

He called on people still awaiting a form to be patient, saying the bureau still is mailing them, but they should arrive by Monday.

The bureau will be following up at addresses from which it has received no reply by April 15, and Guity said: “We’re going to get the information come what may.”

And in answer to a common perception that mailing each form is costing the taxpayer $57, he said: “Mailing each one costs us 44 cents. The $57 figure is the cost of sending someone to an address from which no form has been received, which is why we’re encouraging everybody to mail their completed form to us as quickly as possible.”

The bureau is prepared to send an inspector to each unresponsive address up to seven times, after which neighbors will be asked about the number of residents at the errant property.

“We’re authorized by law to do that,” Guity said. “Usually at least one neighbor knows how many people live next door, so we will complete our count one way or another.”


ARE YOU SERIOUS? This man is really that ARROGANT? I mean come on, does he realize the things he just said? Someone please tell me why this man is telling people to “be patient”?? They’re the ones wanting the information… not me! Shouldn’t THEY be patient? If I want to fill it out a week after I get it, HE needs to wait, right? Then they are gonna invade your privacy and ask NEIGHBORS? OMG really… REALLY? OK I gotta change the subject now, before I blow a gasket!

Crafts… as you can see from my challenge projects, I love them! I like seeing bits and pieces of “nothing” and knowing I can put them together in some way, shape, or form, and turn them into something really cool or useful! And I like recycling too! LOL I can think of only one good thing that could come out of my pakrat/hoarding problem… I can make all kinds of neat recycled crafts! LMAO… ok seriously though, recycling- to me anyway- makes you feel good. You’re not being wasteful and you are being creative… unique even! You are going to have something that maybe nobody else has! And that’s an AWESOME feeling! The little kid in you comes out and goes “Nanner nanner boo boo” LOL! So what is the craft today? Well if you have any old vinyl LP’s laying around that you’re just not sure what to do… try this! It would make an awesome gift for yourself or a friend… especially if the friend is old enough to really APPRECIATE what a vinyl record really was/is! Records can be bought from op shops, thrift stores or garage sales. If you don't want to destroy the classics look for damaged or cracked albums.


Craft Idea of the Day: Vinyl LP Earring Holder

Materials:

Old LP Record
Heat Source
Knitting Needle or Metal Skewer
Plate Stand

Directions:

1: Take your LP Record and place some heavy cardboard behind it. This will prevent the metal skewer going through onto your work surface

2: You will need a heat source, either a lighter, candle, Gas flame or you can heat a knitting needle or metal skewer up on a electric hot plate but be very careful and wear oven gloves to prevent burns.

3: Take your Hot Needle and poke it through the record to make a whole. You obviously want to make your holes in sets of 2 for each pair of earrings.

for smaller studs you could use a heated darning needle. Place as many holes as you need around the record. if you want to hang bracelets you can make a hook using a heated nail and pushing it into the record and allowing it to cool. This will give you something to hang necklaces on etc.

When completed allow all the holes to cool completely.

Place it onto a plate stand and onto your dressing table.
You could also create a hole for a hanging ribbon at the top so that you can make a hanging loop. This will allow you to carry around the record from bedroom to bathroom or even to hang it up out of the way when not in use.

Is that not cool or what? I like the bowls you can make with old LP’s too. Nowadays, having something “old” is really the new cool. Us older “cats” LMAO just call it vintage or retro… but some of the young buzzards call us antiques or old! I prefer retro thank you! So I remember the days of playing my old vinyl records and dancing around my room and if I jumped too hard the record skipped and Rick Springfield went from singing about a girl to a dog LMAO! Hey don’t laugh, he was cute back in the day! LOL… but then again, didn’t our moms say the same about Donnie Osmond? EWWW! LMAO!

OK let’s talk food. Its always a good time for slow cookin! As you know, if it weren’t strange, I would probably marry my triple crockpot! LMAO… JUST KIDDING! Anyway, yes I love them and I love to share crock pot recipes with you. A big thing around here to make, seeing as we always have tons of people coming through here, is soup. You can make soup pretty inexpensively most time and it feeds a large crowd. So if I have 10 hungry kids running around between band practices and football games, etc. I try to make sure to have at least one pot for them to munch. Most of the time however I have numerous crock pots going, a stovetop of pots, and even sometimes things in the oven… cornbreads, rolls, etc. to go with their soups. Even the “cool mom” as they call me, has to make sure they get a good meal! So today I have another soup recipe for you to enjoy.


Albondigas Soup

Ingredients

1 pound lean ground beef
1/4 pound pork sausage
1 onion, chopped
1 egg, beaten
1/2 teaspoon salt
1/4 teaspoon ground black pepper
1/4 teaspoon garlic powder
1/4 cup milk
1/4 cup chopped fresh basil
1/2 cup cornmeal
6 (14 ounce) cans beef broth
1 (8 ounce) jar salsa
1 onion, chopped
2 (14.5 ounce) cans peeled and diced tomatoes
1/2 teaspoon dried basil
1/2 teaspoon dried oregano
1/4 teaspoon ground black pepper
1/2 cup white rice

Directions

Mix together beef broth, salsa, 1 onion, tomatoes, dried basil, oregano, and 1/4 teaspoon pepper. (If you use condensed beef broth (e.g., Campbell's), eliminate the salt in the meatballs and use 5 cans (10.5 ounces each) broth plus one quart water.) Bring to a boil and simmer 20 minutes.

Combine ground chuck, sausage, 1 onion, egg, salt, 1/4 teaspoon pepper, garlic powder, milk, fresh basil, and cornmeal, and mix well. Form into tiny, bite-size meatballs.

Add meatballs and rice to broth. Simmer, covered, very slowly for 1 to 1 1/2 hours.

Alright kids, I’m outta here for today. Gonna go chill out with my mommy while the DH stays and does his housely manduties! LMAO! I will see you tomorrow for more great adventures in blogland! Peace, Love, and lots of HUGS!

Tuesday, April 13, 2010

SWEEPSTAKES BONANZA

Good morning everyone. How are you doing this wonderful morning? I’m braced up like Frankenstein, but I’m alive so we’re good! I hope you are all well. I want to thank my mother for that very touching comment she left me yesterday! You made me cry mom! LOL… but it’s a good cry! My family and friends know that whenever I can help, I will be there regardless of anything else! I’m glad to help! I love you mom! And today’s blog is in honor of that phenomenal woman who brought me into this world, taught me everything I know, and has always been there for me… my best friend! Thanks mom!

Well Earth Day is April 22nd this year and we should all do a little something in honor of it (I think anyway). My mom received this email and sent it to me. It’s from H-E-B and it said “Stop by your H-E-B on April 22 between 3-7 pm to drop five plastic shopping bags into our storefront recycling bin and get one reusable shopping bag free, while supplies last.” SO, if you have a H-E-B around you, call and ask if they are going to be a part of the Earth Day giveaway! I think it’s a great idea!

There are other things you can do in honor of Earth Day as well. I think the Arbor Day Foundation does something similar, but have you ever personally thought of planting a tree? Maybe a fruit or nut tree in your yard? Not only are you replenishing the trees, but you would get fruits and/or nuts to enjoy. Just a thought ya know… Google Earth Day and I bet you can find lots of ideas.

Another great idea, is again from my mom… sweepstakes. What harm can it do in entering and taking a chance to win something you might really need or just plain WANT! If it’s free, I say NOTHING! Did you know there are literally thousands of sweepstakes you can enter on a daily basis all over the place? I thought today, I would bring you a few of them here. Bookmark them and go back and enter for as long as the contest runs. Who knows, you may be the lucky one!

Enter to win Olive Garden's 2010 Win a Culinary Tour of Italy Sweepstakes. Win an 8-day guided trip for two to Italy! (Learn from Italian chefs at Olive Garden's Culinary Institute of Tuscany, Experience the local cuisine of Rome and Florence, and Explore the Rocca delle Macie Winery are just a few of the “highlights”). Every day you return, you could win a $25 Olive Garden Gift Card!

Then there is the “Easy Home Meals $10,000 SWEEPSTAKES”. Grand Prize Winner will receive $5,000 cash. (5) First Prize Winners will each receive $1,000 cash.

Visit Redbook Magazine online and pick from tons of sweepstakes you can enter everyday! From shopping sprees to books to shoes and more… Enter one or enter them all!

(I like this one!) Purex is giving away a $20,000 Green Home makeover plus a $1,000 daily cash prize! Also on the site you can get a free sample and a coupon too if you tell a friend. It’s a multi-make-me-happy website! LOL!

Want to take home a real collector's item? Here's your chance. You could ride away in the 1972 Monte Carlo from Martina McBride's video, "Wrong Baby Wrong." Visit CMT community to watch the video and enter to win the very car you see!

Ford Vehicles has a contest called “Invasion of the Bulls” and it runs through 10/10/10. Grand Prize is An All-New 2011 Ford Super Duty® and A lifetime supply of season tickets to the PBR Built Ford Tough Series (now that’s MY kinda prize! LMAO). In addition, 3 lucky finalists will win: Trip to Las Vegas for you and a friend, Exclusive VIP treatment and tickets to the 2010 Built Ford Tough PBR World Finals, and a Private lunch with top PBR Riders.

Win A Chevy Silverado HD courtesy of Fantasy Fishing (it appears). (1) Grand Prize: one (1) 2011 Silverado HD 2500 4WD Crew Cab 153” LTZ Truck (“Vehicle”). Approximate retail value $51,670. Contest ends 6/22/10.

Win A Dodge Challenger Sweepstakes * Must Be 18 Years Old To Enter * 1 Entry Per Person * Ends Nov.30,2010 * Winner Will Win A 2009 Dodge Challenger R/T * Worth $39,930 *

Fresh Express is offering FREE salad for a year contest (saw this on TV LOL). PRIZE: (30) Grand Prizes: of (52) Fresh Express salad coupons redeemable for a total of 52 bags of salad. Approximate Retail Value of each prize: $200.

These are just a few of the THOUSANDS of sweepstakes you can find online! Just do a search for sweepstakes and you will be amazed at the tons of great things you can enter to win! What do you have to lose right? It just takes a few minutes of your time and its free! Who knows, you might actually win something! It shocked the tar out of me when I won a gas grill from Marlboro one time! So have fun and good luck!

Guess what I did yesterday? You guessed it… I was back on the sewing challenge. I swear every time I turned around and looked in the green crate I found another pile of material that was pre-cut to make shopping bags LOL! I didn’t get an enormous amount done, but the ones I did get done were pretty snazzy I think! Check these out!


This is the Kitty Klaus tote bag I made from a pillow panel I found in the crate. I had 2 sets of the panels, so I made it into a bag. The sets had 6 different pictures, so I might make totes out of all of them or pillows or who knows yet LOL! But I know it had cows and dogs as well and something else I can’t remember LOL!


Here you see the Native American/Eagle shopping bag. It’s funny that I had enough to make a bag out of this one really. Now you see what my DH’s Christmas stocking looks like! LMAO! It’s actually a really cool fabric (SHHH don’t tell him I said that! LOL)


Now ya know, I had to do at least 1 patriotic print bag, right? Of course. I found this one rolled up on the side of the crate already cut and ready to go. Sew LOL I sewed it together and I think it’s actually pretty neat! I like the multi-colored webbing for straps. Gives it just that right amount of WHOA factor! LOL!


Ok this bag got my brain exploding with ideas! This is a purple Ronald McDonald fabric I found at Wal-Mart years ago, before they got rid of their craft section (which really depressed me btw LOL). They had this one and I have a red one too. This bag was already cut, so while putting it together I had an explosion of thought come into my head! I have to have probably 6+ yards of EACH of the McDonalds fabric right? Well remember those crayon totes I was making?? HELLO! Make some in the McDonalds fabric and fill them up with crayons and such when the school supplies are on sale super cheap and I have DONATIONS to the kids at the Ronald McDonald House!!!!!! I’m gonna start on those right after I get this challenge complete and I am actually going to ask my wonderful readers to consider helping with a small donation for things like crayons, coloring books, etc. You can send the actual items or you can send a financial “gift” (I can’t legally call it a donation, sorry). I’ll let you know more about this idea when I get it worked out better… still in the preliminary stages of this idea LOL!

Ok now, I want to talk crafts. With Earth Day coming up, we must be in the “recycle” and “earth friendly” mindset! So I am double duty-ing this craft project today! I am honoring Autism Awareness with the Puzzle and Earth Day with the recycling! This recycled craft project is a great way to recycle those old puzzles that have pieces missing. This project uses a Jumbo piece from a child's jigsaw puzzle.Check it out!


Craft Idea of the Day: Puzzle Photo Magnet

Supplies:

Large Puzzle Piece
Magnet
Cardstock

Directions:

Start by cutting a window into the puzzle so that you can insert your photo. You can cut it using some scissors or a craft blade.

Paint the puzzle piece then allow it to dry, You can finish it off with a spray of clear varnish.

Run some glue around the back of the puzzle and secure your card stock to the back of the puzzle piece.

Glue on your magnet piece, You can get magnets from your local craft store or use a recycled advertising magnet.

Cut your photo to size and you can now slip your photo into the frame from the front.

You can decorate your frame further by adding small puzzle pieces, cut out hearts etc.

Pretty nifty huh? OK ok I hear you… no not you… My STOMACH! It’s yelling at me and telling me it needs food LOL. So I am always ready to serve LOL! I’m in the mood for pancakes… but not just any pancakes- we are going gluten free today!


Delicious Gluten Free Pancakes

Ingredients

1 cup rice flour
3 tablespoons tapioca flour
1/3 cup potato starch
2 cups almond milk (or 2 cups water and 4 tablespoons dry buttermilk powder)
1 packet sugar
1 1/2 teaspoons baking powder
1/2 teaspoon baking soda
1/2 teaspoon salt
1/2 teaspoon xanthan gum or 4 Tablespoon gluten substitute
2 eggs
3 tablespoons canola oil or applesauce

Directions

In a bowl, mix or sift together the rice flour, tapioca flour, potato starch, sugar, baking powder, baking soda, salt, and xanthan gum. Stir in eggs, milk, and oil until well blended and few lumps remain.

Heat a large, well-oiled skillet or griddle over medium high heat. Spoon batter onto skillet and cook until bubbles begin to form. Flip, and continue cooking until golden brown on bottom. Serve immediately with condiments of your choice.

So are you drooling now? LOL I am… alright I am gonna get off here for the day. Time to do some more sewing, check my garden, and whatever else may strike my fancy. You keep safe, be happy, and I will see you back here tomorrow! HUGS!