myspace generator
Showing posts with label jalapeno. Show all posts

Sunday, August 15, 2010

BLAZING BRUNCH

Good Sunday morning everyone! How are you doing this beautiful Sunday morning? I am doing well... quite tired and somewhat sore but excited to wake up to the sun shining and the fresh air in my lungs! The DN left this morning and its time for cleaning, organinzing, and some super cool craftiness! Why don't ya grab yourself a cup of coffee and have a seat and let's chat!

First off, its time for more frugal advise and today is a topic very close to my heart... AIR CONDITIONING LOL! Living in Texas where it seems a constant heat advisory, the air conditioners running can be heard and felt everywhere you go. I know I am in love with my AC units LOL! To the tune of some skyrocket electric bills... but I don't care! I must remain cool! LOL. Well I found some tips and frugal advise to try to control those expensive bills and I thought I would share with you!

How to Reduce Air-Conditioning Costs With These Money-Saving Tips

There are ways that you can reduce your electric bills quite significantly if you have central air conditioning or a window unit. This article will attempt to show how to reduce air-conditioning costs, even in very warm climates during the summer months.

Consider the size of the room and base your air conditioning on that when buying a unit as more does not mean better in every case. Other factors to consider are in respect of what will affect the room temperature such as number of windows, direction it faces etc. If you buy a unit that is too large for the room, it will need to work much harder and end up costing you more money.

When in the market for a central air conditioning system, always check that the SEER number (Seasonal Energy Efficiency Ratio) is above thirteen (fourteen for warmer climates). Less efficient systems’ running costs will be more and so for room air conditioners, look for an energy efficiency ratio of eleven or above. High efficiency units will cost you more on the initial purchase but, particularly if you live in a hot climate, the extra cost will more than be recovered over a few years from lower electricity bills.

Make sure that you maintain your air conditioning unit and regularly check and replace the filter (every month) during the cooling season and have it professionally serviced every year at the start of the cooling season.

Cooling systems are renowned for being the largest consumers of energy in the home. Depending on your location, it will probably only be outdone in the energy sapping stakes by your heating system. If your system is aged with a SEER rating below eight, it may be worth consideration to replace it with a more energy efficient system.

You may also want to consider installing a thermostat that you can program in order to vary the temperature according to the times when you are actually at home. A setting around seventy eight degrees Fahrenheit is okay for when you are present. If you are away from your home for more than a few hours, it may be apt to set the temperature higher (around eighty five degrees) for the time that you are away.

The location of your condenser is another important consideration. Make sure that it is in the shade and has enough room to dispose of the hot air that it removes from your home. Do not place shrubs or plants around it – enable it to breathe. You can, however, plant shade trees and plants around the house to assist in reducing the heat from the sun, particularly on western and southern sides to your home. This could result in a reduction of up to thirty per cent on your cooling costs.

Close all curtains and blinds on the sunniest side of your house to prevent the heat coming into your home and wherever possible, install awnings on the windows. Sealing any air leaks in your home will reduce costs of your air conditioning as well as your heating costs and remember to check that all seals around drying vents, plumbing are closed. Fill in any gaps that there may be around places like chimneys and weather tape any doors or windows that cause drafts.

You may wish to consider putting in ceiling fans into rooms and running them on hot days. If it is too warm for you, use the fan without air conditioning but if t is hot enough for it, using both together will allow the temperature to rise by five degrees, therefore reducing costs. Only use ceiling fans when you are in the room as running it alone doe not actually lower temperatures – it is the movement of air increasing skin evaporation that causes coolness.

The colour of the exterior of your home will also make a difference. The darker it is, the more heat it will take in so bear this in mind when building, repainting, buying property in the future. Choose light colours for the outside of your home.

Did you know that thirty per cent of heat in homes is absorbed through the roof? Ensure that any attics are ventilated sufficiently. Vents in the eaves will allow for cooler air to enter. A ridge vent or even an attic fan can reduce cooling costs significantly.

Any heat that is generated within the home will need to be removed by your system of cooling so avoid it whenever you can. Try grilling or barbecuing food outdoors or if you have to cook inside use the microwave or a crock-pot.

Following just some of these tips on how to reduce air conditioning costs will help your wallet and also make your life that little more comfortable during those long summer seasons.

• Turning down the thermostat even a few degrees helps a lot.

• Moist air feels warmer. Make sure you maintain adequate humidity during the more dry winter months. Open the dishwasher to dry dishes and release steam and hanging clothes to dry will not only cut down on your electric bill but also add humidity.

• Wash laundry in cold water only. This is very cost effective and most clothes wash just fine in cold water only.

• Do you have naturally warm areas in your home? Make them work for you. My warm rooms are the kitchen and the furnace room. I keep the furnace room door open with a small fan blowing out into my family room. The heat gleaned just from that is enough to keep the family room warm. When I do a big baking day, I also run a fan that blow the warm air out into the remainder of the home.

• On a good blustery day, get down on your hands and knees and feel around. A stick of burning incense helps to find drafty areas, but even just feeling for cold areas with your hands will help. Cutting down on those drafts will go a long way in cutting down on your heating bill! A trip to the local hardware store will help you find a bevy of cost cutting products, but simple, inexpensive things like homemade draft dodgers, towels, and window quilts will be effective as well.

• Turn down your hot water.

• Do you have a fireplace? Most people don’t realize that modern fireplaces with deeper fire boxes, are not effective heat sources and the reality is, they suck air from your home. You actually LOSE heat when you run your fire place unless you have fireplace doors that you keep closed (basically going just for the ambience) or you can close off that room and minimize the flue draft. If you really want your fireplace to work for you, consider fireplace inserts, inset stoves and that sort of thing.

• Put on an extra layer of clothes if you’re always cold. Adding a layer on top such as a sweater or sweatshirt OR a layer underneath, like silk long underwear help a lot.

• Wear a hat to bed. The human body loses a huge amount of heat through the top of the head. Keep your head warm and you’ll be warmer. If you’re a bit chilled crawling into bed, make a microwave cozie to warm it up first!

• Keep a lap quilt for those times when you’re sitting down and reading a good book and getting cold versus turning up the heat. Sticking that microwave cozie under the quilt with you is pretty nice, too.

• Consider major home improvements. We have our garage under one end of our home and that end of the house was always cold. The old wooden doors had almost no insulation value (R-value), let in snow and cold air from underneath and barely kept the garage above freezing. We invested about $1800 to have modern, well insulated doors installed and the results were amazing! The average garage temp is now about 45 degrees, that end of the house is much warmer and we have averaged about $400 LESS in heating expenses per year. Major things like new windows and doors can be a bit more costly and take more planning and saving, but will be worth it in the long run.

Tammy Paquin is the owner and publisher of frugal-families.com. You can reprint this article with an active link back to Frugal-Families.com

And now its time to craft... sewing, which also uses some electricity LOL, to me is a very enjoyable and rewarding hobby. Now when my mother was helping me declutter the other day, one thing we did is went through clothing and bagged it up for donating, freecycling, etc. I had my DH join in on the fun LMAO! Well he was going to get rid of some button down shirts he no longer fits and I snagged one out of his hands to put in the "sewing and crafts" pile. And I did that because I recently ran across another crafter's ingenious idea for making summer clothing for women by upcycling/recycling MENS button down shirts! I want to try this, so since I wear my DH's shirts ANYWAY, I figured it was worth a shot! And I bring this idea to you because I think its a wonderful project and wanted to spread the word! Make sure to go to the website for beautiful step-by-step instructions and photos!


Craft Idea of the Day: Heat Wave Halter

Materials Needed:

upcycled man's shirt (short-sleeved is fine...I used a size XL.) Note: this size fit me perfectly when I was done, and I have a small frame. If you think you might need a larger size when you're done, start with a 2XL or 3XL. There are plenty of those out there, too, and it's better to guestimate on the larger side from the get go, rather than go through all of your steps and find out that your final product is too small)
1/4" elastic, in a length 3" smaller than your upper bust measurement (the measurement right above your breasts, almost around your torso under your underarms, where a halter top would rest)
cording, long t-shirt scrap or crocheted chain, to use as a tie
safety pin
coordinating thread
elastic thread
sewing machine
serger (optional, but nice)

Alright... Welcome to the final day of HOPPIN JALAPENO WEEK and to finalize this heat wave, I am providing you with a virtual buffet of happy hotness LOL! From start to finish... appetizer to dessert. Cocktails included! I'm glad to hear that all of you had fun with this week and got lots of inspiration. You can search the internet for thousands of recipes that involve jalapenos. Here is one that I brought you many of this weeks recipes... its called Jalapeno Madness and you really need to check it out for more great hoppin jalapeno dishes! So here's your Sunday Supper... Eat & Enjoy!


Jalapeño Rolls

6 Fresh jalapeño peppers
Stick Cheese
6 corn tortillas

Stuff fresh jalapeños with stick cheese (works good cause you can just stuff it in).

Heat corn tortillas till soft ( use toothpicks to hold them together).

Wrap around jalapeño.

Freeze for about an hour.

Deep fry until crispy. Tastes great when dipped in Jalapeño Toad

Jalapeño Toad

1 pound jalapeño peppers
2 cans cocount milk
2 tbsp lime
1/2 cup chopped cilantro

Take about a pound of green jalapeños and remove the stems. Puree in a processor until smooth. Add coconut milk, lime juice, and cilantro. Blend. Simmer over low heat for however for 10-12 minutes (or so.) Chill. Tastes great on anything. Really!!


Cream of Jalapeno Pepper Soup

This Cream of Jalapeno Pepper Soup recipe is sure to kick start an evening of pure jalapeno bliss. For a stronger pepper flavor, include more peppers. For more heat, keep the seeds in the recipe. Serve as an appetizer, or in a bread bowl with a side salad as a lighter main course

.Ingredients:

6-8 jalapeno peppers, minced
8 cups heavy cream
1 tablespoons butter
1 cup white onion, chopped
2 teaspoons minced garlic
1 small avocado, peeled and diced
2 tomatoes, diced
1 tablespoon fresh basil
Salt and Pepper to taste

Cooking Directions

Heat butter over medium heat in a large saucepan

Add minced jalapenos, onion and garlic. Sauté until soft.

Set sautéed vegetables aside and stir in avocado, tomatoes, and heavy cream.

Return mixture to the saucepan and reduce heat to simmer.

Simmer approximately 15 minutes.

Stir slowly and frequently.

Stir in fresh basil, then simmer an additional 5 minutes.

Remove from heat and serve.

Serves 6-8.


Jalapeno Flank Steak Sandwiches

This recipe makes a delious dinner. The jalapeno pepper spiciness complements the deep flavor of the flank steak. Don't forget the fresh jalapeno spears at the end for the additional kick.

Ingredients

4 jalapeño peppers, chopped
2 jalapeno peppers, sliced into long spears
1 1/2 lb. beef flank steak
6 cloves garlic, minced
1/4 cup olive oil
1/3 cup fresh lime juice
3 tablespoons brown mustard
12 slices white bread, toasted
1/2 cup mayonnaise
1 small onion, sliced
4 ounces crumbled feta cheese
1 teaspoon chili powder
Salt to taste

Cooking Directions

In a large mixing bowl, combine together garlic, jalapeño peppers, olive oil, lime juice, mustard, and salt. Whisk firmly. This is your marinade.

Trim fat from steak and tenderize with a meat tenderizer. If you don't have a tenderizer, score the steaks with a knife on each side.

Marinate steaks in refrigerator with above marinade 6-12 hours, or overnight if you wish

Drain meat and cook 12-16 minutes over medium heat cooking to medium doneness, or as desired.

Slice steak into thin slices.

Spread toasted white bread mayo and sprinkle with chili powder.

Add sliced steak, onion, and cheese.

Top with remaining toast and serve with jalapeno spears.


Jalapeno Cornbread

Cornbread is typically served as a side dish and can often be a little dry if not prepared properly. This recipe turned out extremely moist and deliciously flakey. And absolutely nice and spicy! We made this up for a little dessert, but it's perfect as a side dish as well.

Ingredients

1 cup flour
1 cup cornmeal
2/3 cup sugar
1 teaspoon salt
3 ½ teaspoons baking powder
1 egg
1 cup milk
1/3 cup vegetable oil
4 small jalapeno peppers, diced

Cooking Directions

Preheat oven to 400 degrees

Lightly spray a baking pan


In a large bowl combine the flour, cornmeal, sugar, salt and baking powder and mix

In a separate bowl combine egg, milk and olive oil and beat

Combine both bowls and mix well

Add jalapeno peppers and mix well

Pour into baking dish

Bake 20-30 minutes (depending on how thick your pour) or until cornbread is done in the middle


JALAPENO CHOCOLATE DESSERT COOKIES

If you love chocolate for dessert and jalapeno peppers, this is the recipe for you!
Recipes galore!

Ingredients:

1 large jalapeno pepper, minced
2 cups sugar
1/2 cup milk
3 tablespoons cocoa
3/4 cup butter
1/2 cup peanut butter
3 cups oatmeal

Instructions:

Bring sugar, milk, and cocoa to a rolling boil. Stir contantly.

Addn butter and peanut butter. Stir until melted.

Remove from heat.

Stir in oatmeal and jalapeno peppers. Mix well.

Spoon mixture onto an oiled cookie sheet in small globs.

Refrigerate and let sit until firm, about 3-4 hours.

Preheat oven to 375 degrees.

Bake cookies 12-14 minutes, or until golden brown around the edges.
Serve warm!


Three-Alarm Midnight Madness - A Spicy Drink Recipe

Your lips will feel this drink for a while after you drink it. Of course the heat level will vary depending on the hot sauce chosen, but do not forget to include the spicy jalapeno peppers, which will happily include the extra kick you need for your midnight drink. Yes, we do recommend you drink this at midnight, chinging glasses with your friends. See who backs down first! It does have a distinctive tequila flavor, and works great as a marinade.

Ingredients

1 jalapeno pepper, sliced
2 ounces Effen Vodka
2 ounces Patron Silver Tequila
8 ounces light beer of choice
5 splashes hot sauce of choice
1 teaspoon soy sauce
Ice cubes!

Mixing Directions

To a beer glass, add jalapeno peppers, soy sauce, hot sauce and 3 ice cubes.
Add vodka, tequila and beer.

Stir with a large spoon and serve!

Comments: You can use a martini shaker to strain out the seeds and serve it in a martini glass. Or, lose the soy sauce to lighten the color.

Alright folks, I'm wrapping it up for the day. DN is on the way to church with his mom, so I am baby free for the next 3 days. I got lots of cleaning to do and "recon" if you will. Plus I am gonna get a major amount of sewing done I hope... got some more mending to do and some projects from rescued clothing to do! Keeping my word and killing some clutter! I wish you fun and happiness today and remember to smile... its good exercise LMAO! Until tomorrow... HUGS!

Saturday, August 14, 2010

STUPENDOUS SATURDAY

Good Saturday morning everyone! How are you doing this super start to the weekend? I'm doing good really. I want to publically thank my mother for A. cutting all my hair off yesterday, and B. helping me in the room to declutter! So did you eat the salmon or the shrimp last night? LOL! Yes folks, she got her seafood and such I had in my freezer for her LOL! And to Tabitha, the "Renee-ism" LOL... I like that term!

Ok kids, for our frugal moment of the day, I am talking celebrities. Now before you get all bunched up, I know that 99% of celebrities are FAR from frugal, but I was logging into Yahoo and I saw this article about a girl many of us (including me) grew up with... at least watching her grow up at the same time I did LOL! Drew Barrymore is known around the world... ya know the Covergirl/actress/director/etc. who was the cute little girl playing with Aliens in E.T. or setting things a blaze in Firestarter? Yep she embodied frugal (literally LOL) and made news and I want to share it with you cause I think it's super cool!


Drew Barrymore's $25 Red Carpet Hit

by Ariel Kaiser, The Thread Stylist, on Thu Aug 12, 2010 4:47pm PDT

Talk about mixing high and low fashion! What did the adorable Drew Barrymore choose to wear to host the Nylon magazine/Express party this week in Los Angeles?

This gorgeous $25 metallic-printed 3/4-sleeve shift dress from a thrift store paired with $760 Yves Saint Laurent "Tribute" pumps, of course! I love the 1960's vibe she's got going on; the psychedelic print, the cut, and the pumped-up voluminous feel of her hair is a total win.

It's so refreshing to see someone mix it up and have fun with fashion. Just last month she made an appearance in an Oscar de la Renta runway dress--a far cry, financially, from an Austin, TX thrift-store find.

Don't you love it when vintage Drew -- the irreverent, quirky, girl power praising, throw-a-daisy-in-her-hair Drew that we all idolized in the 90's--steps out on the red carpet?


Alright, today's craft idea is an item that you can keep for personal use or fill and give as a gift for the frequent traveler on your gift giving list. Personalizing this for a man or woman simply depends on the fabric you choose to use. It could also be used for holding craft stuff, young ladies personal items in school lockers, you name it! Make sure you visit the site because the crafter has the greatest step-by-step photos and instructions! I think you will have fun with this one! Enjoy!


Craft Idea of the Day: Zippered Dopp Kit

Materials:

3/4-yards of Far Far Away 2 Yellow Roses (or any other upholstery weight fabric)
A 12-inch separating zipper in Fuchsia or any other bright color.
2-yards of Polka Dot Bias Tape

Now... Time to eat my faithful compadres! Today is day 6 of HOPPIN JALAPENO week and I grow sad as its almost over... but I've had fun, have you? Today we are spotlighting the wonderful pepper in chicken meals! Chicken is extremely healthy for you -- high in protein, low in fat and calories -- yet it can often be quite boring. But not when you bring in the jalapenos! You'll never want to prepare chicken without jalapeno peppers again.


Jalapenos and Cream Cheese Stuffed Chicken

Ingredients:

16 ounces ground chicken
3 ounces cream cheese
3 jalapeno peppers, 1 sliced into rings, 2 diced
2 teaspoon Cajun seasonings
1 ½ cups bread crumbs
1 egg
jalapeno pepper jelly for topping

Directions:

Preheat oven to 350 degrees

In a mixing bowl, combine ground chicken, egg, 1 teaspoon Cajun seasonings and 1 cup bread crumbs

Mix well

Form 4 4-ounce patties with the chicken mixture

In a separate bowl, combine cream cheese, 1 teaspoon Cajun seasonings and 2 diced jalapeno peppers

Mix well

Add ½ of your jalapeno cream cheese mixture onto one chicken patty

Top the cream cheese with another chicken patty and mold the patties together to surround the cream cheese

Repeat with other 2 patties and remaining cream cheese

Set stuffed chicken onto a lightly oiled baking dish

Top with remaining bread crumbs

Bake 20 minutes or until chicken is cooked through

Remove from oven

Top with jalapeno jelly and jalapeno slices

Serve


Jalapeno Guacamole Chicken

Ingredients

2 jalapeno peppers
2 chicken breasts
4 slices cheddar cheese
1 avocado
1 tomato
1 teaspoon garlic
1 teaspoon lemon juice
1 teaspoon cilantro
1 tablespoon taco seasoning
salt and pepper to taste

Directions

Here are all the ingredients, pre meal. Slice the chicken breasts into thin halves and season with the taco seasoning, as shown.

First, prepare the guacamole by peeling and chopping the avocado. Mash it with a fork.

Chop 1 jalapeno pepper and the tomato and add to the avocado mash. Add cilantro, garlic, and lemon juice, and salt and pepper to taste. Mix well.

Heat a frying to pan to high heat. Add seasoned chicken breasts and sear each side, about 1-2 minutes each. Reduce heat to medium and simmer until chicken is no longer pink in the middle, about 5-6 minutes each.

Slice remaining jalapeno pepper into rings and cover chicken breasts, as shown.
Top jalapeno peppers with cheddar cheese and cover. Heat until cheese is melted.
Serve!

Alright everyone... I gotta get off here and see what we want to do today... could be sewing, could be shopping, could be cooking, you never know! All I know is that I am gonna find out something to do to have some family fun today. I hope that you get out and enjoy some quality time with your loved ones too! I'll see you again tomorrow for another excited blog from the Frugal Mom! Until tomorrow... HUGS!

Friday, August 13, 2010

CRAZY CUPCAKE CREATIONS

Good morning to you all! How are you doing this fantastic Friday? I'm good really... a bit sore but good. So how has your week been for you? Mine... very busy as you have seen! DN went home last night and I got a couple of things done... not much really LOL as I was kinda in "baby recoup" mode LMAO! Oh Mom, yes I have actually tried the Jalapeno Margarita and it is quite tasty... for a margarita anyway LOL. However, the beer was a recommendation from someone, as I don't drink beer. I have issues with beer LOL! The closest it comes to these lips is in a beer batter... fried up all golden yummy LOL!

Folks, I have done it again LOL! I found a frugal news article (in a way anyway) LOL that I was like "Wow" and HAD to share it with you. Now I know that alot of my readers aren't into sports, and of those that are... alot of people despise Floyd Landis. MY purpose on bringing you the article is because it involves garage saling and a reminder to keep your eyes and ears open! If I could turn a $5 find into a $6000 investment... shoot yea! So check out this article!

Bike bought for $5 at yard sale belonged to Floyd Landis
By Chris Chase

The bicycle at a Kentucky yard sale had two flat tires, broken pedals and carried a $5 price tag. That didn't stop Greg Estes from buying the bike in hopes of flipping it for a small profit. He should get his wish, to the tune of a few thousand dollars.

It turns out the broken-down bicycle was originally owned by Floyd Landis, who rode it in a race in 2007. The bike was built especially for Landis, complete with custom pedals that look foreign to those unfamiliar with professional cycling (hence the original seller's belief that the pedals were broken). It retailed for $8,000.

Landis rode the bike in a mountain-bike race one year after winning the Tour de France. That title, of course, was later stripped after the American cyclist tested positive for performance-enhancing drugs. Landis is currently banned from the sport, but has stayed in the spotlight with his accusations against Lance Armstrong and other athletes.

Estes told the Owenton News-Herald that the bike was found abandoned on an interstate and nobody ever reported it lost or stolen. He says he'll return the bike if someone claims it. For now though, authorities say it belongs to him.

I can understand someone thinking the bike wasn't worth a few thousand dollars. After all, how many abandoned bikes are custom-built jobs for Tour de France winners? But five dollars? That seems a little low. If I were having a yard sale I'd have probably put a $5 tag on the bike's water bottle. Even if the bike were an actual piece of junk, wouldn't, say, $25 be a more appropriate asking price?

Anyway, just like he said, the Owenton, Ky., resident showcased his new bike at his own yard sale. Estes' asking price? Six-thousand dollars.


I have to show you something... something super scrump-diddly-umptious that I made last night! Its the beginning of my many cupcake creations for a business plan I am working on. Well I made these and OMG... if you absolutely LOVE peanut butter, these are for you! I clipped that rose from my garden/bed to enhance the picture LOL. Anyway, this is a peanut butter cupcake with a Celeste Fig Jam filling in the center. Then there is a whipped peanut butter frost on top. I finished it off with a super spiffy chocolate drizzle! OMG yum! I have to get to the store today because I need a tiny bottle of tequilla for my next creations! Can't tell ya... you gotta wait! LOL but doesn't this one look devilishly decadent?? They were! LOL!

Ok today's craft is inspired by the numerous amount of trips I am always making to the store and all the couponing, etc. that I do. I found this great craft for an organizer on another site to make who was inspired by the same problem! So thanks to Becca at Blue Cricket Designs! Make sure to go check out the tutorial, as she has some wonderful step-by-step photos as well as the following instructionals!


Craft Idea of the Day: Shopping Cart Organizer

Materials:

Two complimentary pieces of Fabric. I used FAT QUARTERS.
Stiff interfacing
Coordinating Double Folded Bias Tape
Pins or stapler
Ruler

Directions:

STEP ONE: Measure and cut your fabric and Interfacing 18" x 18". I found that by stacking them and then cutting them made the process faster and easier. Lay it out just how it will be sewn....a fabric with RIGHT side facing down, then interfacing, then fabric with RIGHT side facing up.

STEP TWO: Now we will be cutting out a section of your 18" square to create the Caddy straps. Using a ruler and pen mark off the following measurements and cut through all three layers creating straps that measure 7" long x 3" wide.

STEP THREE: Use straight pins to secure the three layers together. I prefer using a stapler . It lays flatter and the staples are easy to remove.

STEP FOUR: Adding the bias Tape. You will first need to sew an 18" strip of Bias tape to the bottom section of the caddy.

STEP FIVE: Fold the bottom section in half leaving about a 1 1/2" gap. This is creating your pocket. be sure to be aware of the fabrics. You will determine what fabric shows most so chose wisely which way you fold. Secure with pins or staples.

STEP SIX: Now it's time to add the Bias Tape around the edges. Start at a top of a strap in it's middle. Pin it on if that will help you keep it straight. Sew it on using a straight stitch. Corners Can be pinned or stapled to help them line up right. The inside corners are tricky. Sew around it completely being sure to fold your tape at the very end so you don't have a raw edge.

STEP SEVEN: Sew a straight stitch line in your pocket making a second section in your pocket. You can determine how big you want each section. Also you may want to add another stitched line to make a pen pocket.

STEP EIGHT: Lastly we will be adding Velcro
Cut two 1 3/4" strips of Velcro. Separate the pieces and sew them onto the straps. Sew one on the top of the strap and the other at the bottom of the strap where it meets the pocket section.

And that will do it!!!!

Your very own Cart Caddy ready to make your life that much easier!!!!!

As easy as this looks it takes about an hour to sew. The bias tape can be tricky. I must have bough a pack that was ironed weird becasue mine was hard to get it to keep straight. Just take your time!

And now it's time for some more HOPPIN JALAPENO recipes! Being I am from the Gulf Coast, you should have known some seafood was gonna sneak in SOMEWHERE right? Well, if you love fish and seafood, you'll love the addition of jalapeno peppers to your meals. Whether you're cooking up a flaky whitefish, a meaty swordfish filet, grilling up lobster or whipping up any seafood recipe combination, make sure you've got plenty of jalapeno peppers on hand. Today I am bringing you a wide variety of seafood splendor! Lobster, oysters, crab, shrimp, and scallops to tantalize your taste buds. Eat & Enjoy!


Lobster Tails in Jalapeno Marinade

This marinade does not overpower the distinctive flavor of the lobster tails, but brings a spicy tang that makes this meal different from any lobster tail you'll get in a restaurant. Gone are the days of lobster served solely with a stick of butter. We like to bring on the jalapeno spice.

Ingredients

2 five-ounce lobster tails, thawed
1 large jalapeno pepper, sliced
2 tablespoons olive oil
1 teaspoon Creole seasoning
1 teaspoon garlic, minced
1 teaspoon fresh dill

Directions

Preheat oven to 350 degrees.

Remove the shells from the lobster tails. Set tails aside.

In a food processor or blender, combine jalapeno, olive oil, garlic, dill, and Creole seasonings.

Process until smooth.

Coat lobster tails with jalapeno mixture and set on a baking dish.

Bake for 20 minutes, or until lobster tails are opaque and cooked through.

Serve!


Jalapenos Rockefeller

This recipe is quite fun for the adventurous seafood lover. You can probably use more jalapeno peppers and spread the mixture out a bit, or include more oysters for a meatier dish. Also, try a variation with crabmeat instead of oysters. The flavor is different, but certainly delicious and spicy!

Ingredients

12 jalapeno peppers, sliced lengthwise
12 oysters, off the shell, chopped
1 small white onion, chopped
2 cups bread crumbs
2 eggs
1 teaspoon chili powder
1 teaspoon garlic powder
salt and pepper to taste

Directions

In a large shallow bowl, mix bread crumbs and seasonings.

Stir in eggs and chopped oysters. Mix well.

Stuff the jalapeno slices with your Rockefeller mixture.

Heat oven to 350 degrees, and bake on a sheet approximately 1 hour.

Serve warm.


Jalapeno Shrimp Bake

Ingredients

1 pound prawns, peeled and deveined
2 jalapeno peppers, chopped into rings
12 stalks asparagus
1 large orange, zested and sliced
1 teaspoon Cajun seasonings
½ teaspoon cinnamon
½ teaspoon ground black pepper
1 teaspoon olive oil

Directions

Preheat oven to 400 degrees.

In a mixing bowl, add prawns, olive oil, Cajun seasonings, cinnamon, ground black pepper and half the orange zest. Toss to coat the shrimp.

To a medium sized baking dish, add in this order; asparagus, jalapeno slices, coated prawns, then top with about half of the orange slices.

Bake about 20 minutes, or until the prawns are cooked through – pink and opaque.

Transfer meal to 2 dishes. Top with remaining orange zest and orange slices.
Serve!


Jalapeno Crab Cakes

Ingredients

2 jalapeno peppers, diced
1 small onion, chopped
16 ounces cooked crab meat
1 teaspoon garlic, minced
3 tablespoons heavy cream
1 tablespoon spicy mustard
1 egg
½ teaspoon fresh parsley
1 teaspoon Creole seasonings
½ cup breadcrumbs
6 teaspoons parmesan cheese
1 tablespoon butter

Directions

Heat a sauté pan to medium and add 1 tablespoon butter with onion and jalapeno pepper

Sauté until vegetables are soft, about 3 minutes.

Add cream, mustard, 1 egg, parsley, chili powder, Creole seasoning and the breadcrumbs and mix well.

Fold in the crab meat.

Transfer crab mixture to a mixing bowl and allow to cool.

Form into 6 patties.

Press 1 teaspoon parmesan cheese onto the top of each patty.

Bake at 350 degrees for 10-12 minutes.

Serve with your favorite seafood sauce.


Mini Jalapeno Scallop Kabobs

Ingredients

12 large scallops
2 large jalapeno peppers
1 tablespoon chili powder
Fresh garlic powder to taste
Salt and pepper to taste
Light spray oil

Directions

Preheat grill to medium heat.

Slice each scallop in half lengthwise. Season scallops with chili powder and garlic, then salt and pepper to taste.

Slice each jalapeno pepper into long spears, 6 slices per pepper.

Using toothpicks as skewers, pierce one jalapeno spear between two scallop slices.
Repeat until you have 12 mini kabobs. Spray lightly with spray oil.

Grill about 6-8 minutes or until scallops are cooked throughout.

NOTE: Do not overcook as scallops can become tough. It is usually a good idea to cook over tinfoil so the scallops to not fall through the grate.

Well that's it folks. Its time for me to sign off and get some sewing or something done before the DN gets here LOL. Of course, I got some serious stiffness going on this morning, so I think a nice hot shower is in order first. Loosen up this old decrepid body LMAO! Who knows, maybe I will dye my hair this weekend too! Ok, you have a terrific end of the work week day and be safe out there in the concrete jungle! HUGS!

Thursday, August 12, 2010

CHAOS AND CRAZINESS

Hello everyone. How are you doing this crazy Thursday morning? Please excuse my tardiness as its been a crazy day in our house! Had to go on a rescue mission this morning and then of course kids and cats and all kinds of chaos. 'Tis my world, this land of commotion LOL!

Today I found some super spiffy frugal information for you about saving water. Why do I bring this to you? For the simple fact that I was staring at an outragous water bill in yesterday's mail and said OMG there has GOT to be a better way to save! So without further ado...

Frugal Tips to Water Conservation

There are lots of simple things you can do to cut your household water use. It all starts with awareness. If you know some of the ways people tend to waste water, you’ll be better positioned to conserve.

The bathroom

Here are some common ways in which people waste water – hot or cold – in the bathroom.

Leaving the tap running the whole time you brush your teeth. Try putting the plug in the bathroom sink while you do this, and notice how quickly the sink fills up. Shutting off the water until you’re ready to rinse can easily cut 2-3 gallons a day of water use per person.

Using hot water to brush your teeth. Some people don’t like having really cold tap water in their mouth during the final rinse. In cold climates or in water supply systems fed from the bottoms of lakes (such as parts of the Great Lakes Region in the US and Canada), the water supply can be pretty chilly for the cooler months, and sometimes even in the summer. Instead of running the hot water so you don’t have to rinse your mouth out in freezing cold water, always fill your bathroom water cup when you’re done brushing, so the water has time to warm up for the next time you brush.

Using a flush toilet as a waste disposal device. I’ve seen people who blow their nose with a tissue, then throw it in the toilet and flush it down. This is not a very good use of 2-5 gallons of water! Using a toilet as a waste disposal may be convenient but it’s extremely wasteful.

Using a regular toilet instead of a low-flush or dual-flush toilet. Decades ago, toilets typically had 5 gallon tanks. More than a decade ago standards in North America changed and 3 gallon (13 liter) tanks were the new standard. Recently manufacturers have come out with 1.5 gallon (6 liter) tanks, sometimes in response to tightened building code standards. And there are dual-flush toilets that can flush liquids and toilet tissue with as little as 1 liter or quart of water, while solids still take 4-6 liters (1 to 1.5 gallons). If you have an old toilet, you can replace it with a low-flush model, or simply install a conversion kit; see the resources section for details. Another free way to save water on your toilet is to avoid flushing it when it’s not strictly necessary. For example, in my house when the alarm clock goes on, everyone gets up and has their morning visit to the bathroom; only the last person flushes.

Leaving the shower running when you’re not in it. Sometimes you want the shower to warm up before you hop in. So you might turn on the shower, close the curtain or shower door, and work on some other grooming (brush your hair or teeth, shave…) while you wait for the shower water to heat up. Unfortunately people often lose track of the time, and a minute or more of hot water may wind up just pouring down the drain. One easy solution to this is a water-saving shower valve, which cuts the flow of water to a trickle as soon as the water reaches 95F or 35F. You hop into the shower and pull a cord or flip a lever, and the hot water comes out full force. This keeps the water hot for you without wasting much water while you’re doing other things in the bathroom.

Taking a really long shower. This is a favorite teenager move: drain the hot water tank right before Mom has her shower. There’s really no good reason to spend 10 or 15 or 20 minutes in the shower. A shower is said to use less water than a bath, but that’s not the case when you’re in there 20 minutes. I’ve heard some people say they keep their house cool to save on heating, and so they have to take a long hot shower to get warm. Don’t forget it takes a lot more energy to heat a liter of water than a liter of air – and when that hot water goes down the drain, the heat is basically lost!

If you’re serious about saving water in the bathroom, try putting the plug in your bathroom sink when you brush your teeth, just to see how much water one person’s tooth brushing takes. Or put a plug in the shower or bathtub when you shower, to see how much water a shower uses. Or try filling the toilet tank with a measuring cup, one cup at a time, and then track how many times the toilet gets flushed in a day. You might be surprised to see how much water you use.

The kitchen

You might think the biggest water waster in the kitchen is the dishwasher. In fact, modern dishwashers are far better at conserving water and energy than all but the most diligent, energy-conscious human dish washer. And the worst of us are extremely wasteful. Common practices that waste a lot of water are:

Not putting the plug in the sink when you do dishes – just running the water continuously. This typically requires you to add more dish soap to your scrub brush or sponge after every few dishes, because you keep washing the soap down the sink. Try putting the plug in the sink the next time you try to do dishes this way. You’ll discover the sink fills up pretty quickly – it might even overflow! You can almost always do an entire set of dishes with just a half sink of water, and remember, your dishwasher can do even better.

Prerinsing dishes that go in the dishwasher. Remember, modern dishwashers are designed to wash dirty, unrinsed dishes. There should be no need to prerinse. If you find that your dishes don’t come clean unless you prerinse, you either have a dishwasher that is 10+ years old, or there’s something malfunctioning. The pump may be weak, the filter may be blocked with leftovers (we found about 30 olive pits in ours a couple of years ago), or one of the connections to the rotating arms may be blocked or leaking. If you do have to prerinse, an easy way to do so without wasting water is to leave water in the sink after you wash the pots and pans or after rinsing produce, and just scrub the dishes in that water.

Using a sink waste disposal unit. It’s much better to compost your kitchen food scraps than to grind them up and send them down the drain. For one thing, it takes water to wash all that food down the sink. For another, you’re wasting a precious commodity that can be turned into great garden soil. Waste disposal units have been banned in some municipalities because they overload the sewage system and increase water usage.

Not using a faucet aerator. Most modern kitchen faucets come with an aerator installed in the end of the faucet, that draws air in and fills the water with tiny bubbles. These aerators save water by allowing a smaller amount of water to do the job of rinsing dishes or washing hands or fruits and vegetables. Aerators can get clogged up – especially if you have hard water – so if you find you’re not getting a good volume of air in your water, try unscrewing the end of the tap, removing the wire mesh aerator, and cleaning it out. Once you reassemble the faucet you’ll use far less water to wash and rinse.

The laundry

The top loading washing machine is one of the most water-wasting devices in your home. There have been front-loading washers for decades that use as little as a third the water of a typical top loader. But for some reason North Americans are still using top-loaders, and even still buying them. There are a number of very good reasons for switching to a front-loading washer:

* They use half to a third the water of a front loader
* They use half to a third the detergent of a front loader (and you don’t actually need to buy the “HE” detergent – just buy regular detergent and use a lot less)
* They adjust the volume of water based on how much laundry they detect in the drum. For a small load they use much less than for a large load.
* They are more gentle on your clothes, so your clothes last longer
* Their spin cycle is much faster than a top loader spin cycle. Your clothes come out with less water, so you use less energy in the dryer (if you use one), or the clothes take less time to dry on the line or drying rack.

The other ways in which people waste water on laundry are:

Washing clothes that aren’t actually dirty. You don’t have to throw things in the laundry just because you wore them for one day – especially pants and shirts, which will wear out sooner if you wash them too often.

Washing instead of putting away – using the laundry hamper as a way to avoid putting your clothes away. Kids are especially prone to this. My son would sooner throw his clothes in the laundry than fold them and put them in his dresser, because it’s less work for him. Make your kids do the laundry folding and they’ll be less prone to pull this trick.

Separating whites, lights, and colors. Most clothes are color-fast. Of course it pays to check individual garments when new, but chances are almost all your clothes can be washed together in cold water. If you currently do three loads of different colors, try splitting the brights between the darks and whites and cut back to two.

The first step to saving water

Once you understand the ways in which water is commonly wasted in North American homes, it becomes easier to identify where you yourself might be using more water than necessary, and to cut waste. Remember that keeping a weekly measure of your water usage, by writing down the reading on your water meter, will help you stay on task. When you know how much you’re using, you’ll be more conscious of waste, and more motivated to save. In some areas you’ll realize big financial savings by cutting back; in others, where water is still quite cheap, the savings may seem irrelevant from a financial point of view, but you’ll have the satisfaction of knowing you are helping conserve a precious natural resource.

Robin Green runs Green Energy Efficient Homes, a website dedicated to efficient use of natural resources, especially relating to household energy use. For some specific water saving tips see his articles on shower head valves, dual flush toilet kits, and energy saving washers.


Today in talking about the Christmas Challenge, I want to aim the craft ideas for today at us mom's with little kids and crafts you can do with them. For some odd reason, nobody I have ever met has ever had anything negative to say about a handmade gift from a child. What I don't get is why some adults change when it comes to gifts like this from other adults. But anyway, doing crafts with your kids is a great way to stimulate creativity, keep them occupied so they don't get "bored", and create wonderful memories. My mom did it with us, and I did/do it with my kids, and hopefully one day (a LONGGGG time from now LOL) my kids will do the same with their kids! So today's crafts are some cute and somewhat simple crafts for you and your kids.


Craft Stick Trinket Box

Materials
Glue
Some craft sticks
Trinkets or seasonal decorations to personalize the box with

This is how you make the craft stick trinket box

First take 2 craft sticks and set them about 3 inches apart. Then glue 10 sticks across them.

Now flip over the base and begin gluing on craft sticks for the walls, alternating between the sides. Continue this till the walls are as high as you like.

To make the removable lid, set 2 sticks alongside the last 2 wall sticks and add a line of glue along each one.

Now lay 10 craft sticks across them.

To personalize it, glue a small toy, a seasonal decoration or a trinket to the top.


Emoticon Magnets

Materials

A computer and a printer
Different colored markers
A pair of scissors
Clear and flat decorative gems
Some glue
A few small, round self-adhesive magnets

This is how you make the emoticon magnets

Create a variety of emoticons slightly smaller than the gems using a computer.
After taking a printout of the emoticons, use colored markers to decorate and color the faces.

Now cut out the faces, trimming them neatly into circles or ovals slightly smaller than the gems.

Glue each cutout to the back of the pebble glass and then fix a magnet to it.

Wrap up the gifts only after the glue dries completely.

Printed Memo Blocks

Materials

Some colored duct tape
A pair of scissors
A memo pad, memo filler sheets or scrap paper that has been cut into small squares
Foamies craft foam or ink stamps
Double-sided tape and plastic bottle caps
An inkpad

This is how you make the printed memo blocks

First cut a strip of duct tape measuring 2 inches longer that the height of the stack of papers you plan to use.

Then lay the tape sticky side up on the table.

Now grasp the stack and tap the sides against a flat surface. Then hold on its end and press one edge down onto the center of the tape.

Neatly wrap the tape ends over the top and the bottom of the stack, all the while pressing firmly down to bind the paper. If required, use more tape.

Once that is done, lift the top sheet of paper and cut the tape just above the second sheet so that the binding is level with the top of the pad.

Use an ink stamp or a fun shape cut out of foamies craft foam to print a design on the three untapped sides of the block. Use double tape to stick the craft foam to a bottle cap.


CD Coasters

Materials

A few CD’s (preferably plain gold or silver in color)
Some white cotton lace
Some glue

This is how you make CD coasters

Take the CD and spread some glue all along its periphery.

Next take one end of the lace and start sticking it onto the edge, making pleats all the while.

When you have finished doing that, cut the lace and your CD coaster is ready! (you can use any other material you like to personalize the coaster too)


Rudolph the Red-Nosed Reindeer Handprint

Materials

A pencil
Brown craft foam or card stock
A black marker
Red glitter glue
Some gold sequins
Glue
Googly eyes
A red pompom
A brown pipe cleaner
A few paper clips or clothespins

This is how you make a Rudolph the red-nosed reindeer handprint

First use a pencil to trace your child’s hand onto a piece of brown craft foam or card stock.

Then cut out the shape and add black marker hooves to the fingertips.

Now add red glitter glue collar using the gold sequins for bells. That done, glue on the googly eye and a red pompom for the nose. For the tail, use one cut out from brown craft foam or card stock.

Cut a brown pipe cleaner in half for the reindeer antlers. Curl the ends and bend each pipe cleaner in two. Glue the pipe cleaners together, holding them in place with a clothespin or a paper clip until the glue dries.

Using glue put the antlers in place on the reindeer.

Today for thirsty Thursday, we are doing drinks. DRINKS? Yes I said drinks! LOL There are quite a few interesting jalapeno drinks out there and I am gonna bring you a few today to wet your whistle. The last one is kinda complicated for those of you who may engage in the habit of home brewing. Jalapenos are known for providing that ‘kick’ in food. The ‘kick’ comes from the seeds and the rib of the skin so many people remove both these parts if they want just the flavour and not the heat!! The heat or spice comes from a group of 5 chemicals that are called Capsaicinoids. Each chemical in the family has a slightly different affect. The hottest one out of the five is the capsaicin which produces the fire sensation or burning in the mouth.

Capsaicin has no taste or smell and is produced by the glands in the placenta of the jalapeno which is located at the top of the pepper just below the stem. It is interesting that the placenta creates sixteen times more heat than the rest of the pepper. Despite the heat, jalapenos are extremely popular, probably due to their versatility. They can be added to almost anything and everything from soups to drinks to pasta to meats. They are most often eaten with nachos, potato chips, hot sauce, lemonade, vodka and many people actually make cookies, bagels and jams out of them.

It is interesting that the word for Chili in the Mexican Indian language is Nahuatl which actually means chilli In terms of variety, it is Mexico that produces the largest variety of chilli peppers in the region of about 140. Many people make the mistake of drinking water when they find the pepper too hot. This actually exacerbates the problem further as the capsaicin is not soluble in water, hence it encourages the water to spread around the mouth and therefore, spread the heat. The best solution for eradicating the burning sensation in the mouth, is to take a little sugar or milk.

Nutritional Values of a Jalapeno Pepper

Serving size 1 pepper (45g)
Calories 20
Total Fat 0g
Sodium 10mg
Total Carbohydrate 3g
Dietary Fiber 0g
Protein 1g

The Jalapeno pepper is also low in fat (actually there is none in it!!) as well as in Carbs and Protein. Therefore it is suitable for people on all the different diets that exist in the market, be it Low Fat or Low Carb!!

Interesting Facts

The following is a hotness ranking of peppers from mild to hottest.

El Paso (Very mild)
Anaheim
Jalapeno
Hidalgo
Serrano
Cayenne
Tabasco
Red Chile
Chiltecpin
Tabiche
Bahamian
Kumataka
Habanero (30 to 50 times hotter than a jalapeno)


Watermelon Jalapeno Caipirinha

Here’s a spicy drink you’re sure to love. Caipirinha is the national drink of Brazil. Get a taste of South America with this wonderful jalapeno drink.

Ingredients

2 small jalapeno peppers, sliced into spears
2 ounces Leblon Cachaca
1 ounce lime juice
Dash of simple syrup
1 cup chopped watermelon
1 stem of cilantro
Cooking Directions
Mix 1 jalapeno pepper, cilantro, watermelon and simple syrup.
Shake hard with Leblon and remaining ingredients.
Strain over ice into a highball glass.
Garnish with a stem of cilantro, jalapeno spears, and two watermelon balls.


Jalapeno Passion Margarita

Ingredients
1 ounce jalapeño syrup (see below)
2 ounces tequila
1 ounce passion fruit juice
1 ounce fresh lime juice
Sugar and salt the rim of a cocktail glass.

Directions
Combine all ingredients in a shaker with ice.
Shake and strain into your favorite glass.
Garnish with lime.

Jalapeno Syrup

You'll need 1 jalapeno pepper, diced, 1/4 cup suger, and 1/4 cup water.
In a small pan, combine the jalapenos, sugar, and water. Boil, then reduce heat. Stir until the sugar dissolves. Strain the syrup.
Only 186 calories

Here's a nice, spicy drink! Enjoy a cocktail with some jalapeno kick. You can't go wrong with jalapeno peppers. Ever.


Jalapeno Beer: Jalapeno Wheat 50
Shout out to Ted on Facebook for this recipe! Thanks, Ted!

Ingredients/Brewing Instructions
9 pounds Monton DME Wheat Extract (3 – 3lb. bags)
4.5 oz. Malto-Dextrin
2 oz. Hallertau Mittlefrueh hop pellets 2.8% AA/oz. (any low alpha hops will do or use less hops for higher alpha hops)
Bring 6 gallons of filtered water to a boil, add all of above. Boil for 45 minutes, then add:
1 tsp. Irish Moss
Continue boiling for 10 minutes, then add:
50 split jalapenos (or any amount, at least 20)
Continue boiling for final 5 minutes, then turn off heat and let sit for additional 5 minutes.
Chill to about 70F.
Stir vigorously and then pour into plastic fermentor bucket, get the peppers in the fermentor too.
Pour into bucket to provide additional aeration.
Pitch a tube of Wyeast 1056 American ale yeast. Set up blow off tube.
O.G. 1.070
F.G. 1.016
Yield 1 quart and approx 42 bottles various sizes

Ok kids, I am gonna get off here and find something to do. I have tons of things I NEED to do and even more that I WANT to do but I just don't have any idea on what to do LOL! Maybe I will get inspired on one specific path if I just stand there for a bit. Either way, DN goes home tonight so I think we should maybe play with him today too. Oh so many choices LOL. Either way, I wish you well and safety wherever life takes you today and I will see you back here tomorrow. HUGS!

Tuesday, August 10, 2010

PLAYPENS & PICKLING

Well a big HI there and hello this Tuesday morning! How are you doing today? I'm good... a bit tired but once I shake the cobwebs out, it will be ok LOL. I have lots of things planned today so I have to get motivated somewhat quick like LOL! I got a couple of freecycles to pick up this morning and some errands to run and of course there is my sewing, etc. Now to my mother and her comment yesterday... I don't know how I come up with the themes... its just whatever hits me at the moment I guess. Like this weeks theme... you know how I love peppers and when I went to the store last, I found these ginormous beautiful jalapenos and thought of all the different things I do with them and how it might be fun for everyone else. So basically they just normally start with something I like, or see, or think about. And I won't lie, there have been a couple that came to me that I immediately 86'ed cause once I sat and thought about it, it didn't excite me. So there ya'll go... the method behind my madness LMAO!


I want to tell everyone this... which you already know but I will say anyways LOL... I LOVE SECOND-HAND STORES! OMG... so you know how I am watching my DN now right and have been looking for baby stuff to make it easier to care for him. Well yesterday, we went out and was looking for bigger things like playpens, strollers, etc. cause we plan to have him overnight quite a bit very soon. Well we went to this one store specifically for kids called Small Changes Kids in League City and they had some really great stuff. BUT you know what makes them an even BETTER store?? I was able to rpint off a $5 coupon off their website!!!!!! TOO COOL! Resale AND Coupons?? OMG I am so going back for more things whenever I need them LOL! If you are in my area and have little ones, be SURE to visit the site and then go to the store and check them out! You won't be disappointed... I wasn't! We found a like new Graco Pack 'N Play for less than half the normal selling price!

Alright, time to stretch your brain a bit! I was reading an article on Yahoo finance about how the rich rule the economy basically (DUH) and then I was following some links and stumbled across a page showing yahoo's top 5 questions and answers. One of them particularly caught my eye... and I want to show you... shoot ASK you the same thing! It really makes you think about life and what is important to you.

OP was ID of "sandhaw" asked: What could I buy today that would greatly enhance my life if the dollar became worthless?

Best Answer by "kricket" said: Not exactly sure what you mean by "greatly enhance my life", but Ill try to help. Seeds for edible plants. MRE's or other preserved food. Possibly a book or two on edible plants that grow in the area where you live. Bow and arrows. Water purification kit. In my opinion, if you can eat and have water to drink, you should consider your life as being "greatly enhanced". Hope this helps


I think its an extraordinary question actually... can you answer it? First off, how would you want to "enhance your life"? Are you the kind of person who wants the "name brands"... BMW's and big houses, etc. or do you want middle class luxuries or what? I think to answer this question, one must do alot of soul searching and maybe find out what is really important to them if they don't already know. Did the author maybe mean to "sustain" his life? In that event, you have to think about the bare necessities to survive. Changes outlooks and answers completely! Either way, I wanted to bring this little thought provoking gem to the table this morning. Come on folks, exercising the brain is good for you! So gnaw on this one for a while!


OMG while exercising my brain LOL and thinking about some crafts to do, I just realized how close homecoming is and that I need to get started on mums for the girls! Wow, I have about a month and I still haven't even looked to see what I need, etc... man I am seriously far behind LOL! Guess maybe I should add that to my list of challenges? LOL! Homecoming for us is September 24th I believe... and each year at MINIMUM I have to make 2-3 full-size mums... I am talking ribbons, mums, trinkets, trappings, bells and whistles, etc.! Crazy I know, but the BFF's are so happy to have matching mums... and as the "cool mom" I can't let them down LOL!

Ok now for your crafty visions today, I found this idea at Allfrecrafts.com and thought OMG that is too cute! Then I can see them for locker magnets for school which starts soon YAY! LOL... and I am always recycling old jeans and such, so why not? So I bring it to you today!


Craft Idea of the Day: Denim Pocket Magnets

Supplies:

denim jean pockets cut from old jeans

fabric paint

lace trim

ribbon flowers (optional)

fridge magnet

hot glue or craft glue

Instructions:

1. Carefully cut the pockets from the jeans.

2. Beginning and ending at the back, glue lace trim around the top of the pocket.

3. If desired, glue a small ribbon rose to each top corner.

4. Write "Coupons" or "Notes" or whatever you wish on the front in fabric paint, following the manufacturer's directions.

5. Glue a magnet to the back of each denim pocket and stick the fridge. Enjoy!

Ok so for today's choice for HOPPIN JALAPENO WEEK, I am going to preserve these royal lovelies! I must savor them all year long and there is no better ways to have a taste of summer abundance than canning and pickling and jellies! Jalapeno pepper plants put forth a high yield over a long growing season and can in all but the worst years easily produce more peppers than a single person or family can use as they come. Many hot peppers-cayenne, ancho, and pasilla, to name a few-can simply be dried, but the thick flesh of the jalapeno limits its usefulness as a dried pepper.

Pickling is a common alternative, and known as "jalapenos en escabeche" it is traditional. Pickled jalapenos are a common condiment-the jalapeno pepper rings often served with ballpark nachos are pickled-and can be used in place of fresh jalapenos to add heat and pepper flavor to a dish as long as the recipe is adjusted to account for the vinegar.

The simplest way to prepare pickled jalapenos is in the refrigerator, but for long keeping, pickled jalapenos can also be canned in a hot water bath. One refrigerator pickle recipe and two canned pickle recipes (based on current USDA guidelines) follow:


REFRIGERATOR JALAPENO PICKLES

Ingredients:

Jalapeno peppers
garlic (optional)
onion (optional)
vinegar
sea salt or canning salt

Method:

1. Peppers can be either left whole, cut into rings with the slicing disk of a food processor, or have their tops removed. If leaving whole, cut slits into the pepper lengthwise to allow vinegar to enter.

2. Pack the peppers into a Mason jar or swingtop jar, layering with garlic cloves and chopped onion if desired.

3. Mix one teaspoon of salt with each cup of vinegar being used. The total amount will depend on the size of the jar and how tight the peppers are packed. Heat salt-vinegar solution to a simmer and pour over peppers. Close the jar and store in the refrigerator.

CANNED WHOLE PICKLED JALAPENOS

The USDA recipe, but with jalapenos only, and with an extra teaspoon of salt in place of the sugar. Scale it downward in size by keeping the brine proportions the same. This can also be turned into a mixed-pickle recipe by adding garlic, onion, carrot, and bell pepper; a hot carrots mix is especially good if seasoned with a bit of cilantro.

Ingredients:

7 lbs jalapeno peppers
5 cups vinegar (5% acidity)
1 cup water
5 tsp canning, sea, or kosher salt

Procedure:

(1) Either cut the jalapenos in half, remove their tops, or slit them deeply, three or four times per pepper, so vinegar can penetrate to the inside of the fruit.
(2) Pack the peppers into pint jars. Add garlic or other seasonings if you like.
(3) Mix the vinegar, water, and salt and heat to a boil.
(4) Pour the brine over the peppers


Jalapeno Jelly

Ingredients

1 large green bell pepper
12 jalapeno peppers
1 1/2 cups apple cider vinegar
1 pinch salt
4 1/4 cups granulated sugar
4 ounces liquid pectin
4 jalapeno peppers, seeded and finely chopped
A few drops of green food coloring (optional)

Directions

Combine the green bell pepper and 12 jalapeno peppers in the container of a food processor or blender. Process until finely chopped. This can be done in batches, if the peppers do not fit.

Transfer the peppers to a large saucepan, and stir in the cider vinegar. Bring to a boil, and let simmer for 15 to 20 minutes. Strain the mixture through at least 2 layers of cheesecloth, and discard pulp. You should have about 1 cup of liquid.

Return the liquid to the saucepan, and stir in the salt and sugar until dissolved.

Bring to a boil over medium-high heat. When the mixture comes to a rolling boil (one that cannot be stirred down), boil for one minute, then stir in the liquid pectin.

Stir in the food coloring and remaining jalapeno peppers, and ladle into sterile jars leaving 1/4 inch headspace. Seal jars in a hot water bath. Refrigerate jelly after seal is broken.

(**NOTE the more seeds you leave in, the hotter your jelly will be!**)

Well everyone, that's it... a little bit of spice in your life courtesy of the jalapeno! I hope you have enjoyed today's visit and will come back tomorrow for more crazy fun and adventures. As for me today? Time to take it easy... I have GOT to get my back working right again so its resting and easy crafts and such. I might even put the back brace on today LOL! I'm off "Aunt Duty" so I am gonna use this time to catch up on household things... unless of course something better comes up (anything is better than cleaning LMAO!). SO be safe in wherever life takes you today and everyday and until next time... HUGS!

Monday, August 9, 2010

HOPPIN JALAPENO WEEK

Good morning everyone. How are you doing this cloudy Monday morning? I was watching the sprinkles fall here outside my window but they have gave way to a hot humid morning. The DN is asleep taking a nap and the DD is at band practice. I was going to go out this morning, but plans have changed, so I sit here contemplating things like crafts, food, etc. Perhaps I will go later on today. Not sure yet...

So I wanna talk about a frugal topic that I absolutely love... garage sales! When I was younger, my grandmother, mom, and I would go "garage sale hopping" on the weekends to see what we could find. Sometimes we would get lucky and sometimes... well not so much. I ran across this article which made me think back to those fun times, and I decided to share it with you. Maybe you can find something useful from it.

The Garage Sale Lady shares bargain-hunting tips
12:33 PM CST on Thursday, November 13, 2008
McClatchy-Tribune

ORLANDO, Fla. – Shelley Kincaid digs three objects out of a canvas tote bag – a slightly dented plain lampshade, the sleeve of an old stretch-lace T-shirt and a crocheted scrunchie.

She slides the lacy sleeve over the shade, securing it with the scrunchie.

Voila! She has created a pretty new lampshade from throwaway items purchased for pennies at garage sales.

Kincaid – better known to her many DIY fans as the Garage Sale Lady – was a headliner at the Southern Women's Show in Orlando, Fla., recently. During her twice-daily presentations, she transformed bargain-rack blouses into gift bags, cast-off jewelry into candelabra, and created a tuffet (Think Little Miss Muffet.) from salvaged chair legs and old curtain fabric.

"None of these things started out beautiful," Kincaid said. "You've got to mix and match, fix and patch, screw and glue."

Shelley Kincaid

Considering the dire state of the economy, there is no better time than now to catch garage-sale fever, Kincaid said.

Want to make a little extra cash? Hold a garage sale, she said.

Need to save money? Become a garage-sale shopper.

Kincaid has been doing both for more than a decade. As a result, she has made more than a little money and saved a great deal. Almost everything in her house was once someone else's throwaway – from furniture to bedsheets, towels and tools.

It was a "nightmare move" from Kansas City to her present home in Denver that sparked her passion for garage sales.

"The movers destroyed everything," she said. "My dishes were pulverized. There was all kinds of water damage. My wood furniture was buckled, my sofas were moldy."

And after the insurance claim was settled, "The insurance company took everything."
"That's when I went to my first garage sale. I started finding old things and fixing them up. I'm a designer with an engineering background. Fixing things really got my creative juices flowing," she said.

MCT Shelley Kincaid makes lampshades from a variety of materials including this one made with old lingerie.

"People admired my stuff. They wanted to know how to do it. I wrote down instructions, which eventually became a book."

Kincaid's "The Garage Sale Decorator's Bible," first published in 1997, is now in its fifth edition. It is available on her Web site, garagesalelady.com, from amazon.com and at Barnes & Noble stores.

"Then out of the blue, I got a call from a Denver TV station to do a show, "Trash to Treasures." I've been on the air for 10 years," said Kincaid, who also is a frequent guest on HGTV, the Discovery Channel and DIY Network.

It is a myth that you only find junk at garage sales, she said.

"In reality, I often find brand-new things selling for a few pennies on the dollar, she said. "Clothes people buy then never wear. Wedding gifts. Christmas gifts. Birthday presents they don't like," she said.

But it's the gently worn and even totally trashed items she treasures most. The antique china and vintage fabrics, the wonky chairs and battered jewelry, the fringe on old drapes and appliques on worn T-shirts. Things she can mix and match, fix and patch, screw and glue.

"I'm saving money. I'm creating something unique. And best of all, I'm recycling throwaways," she said. "And that's good for the planet."

TIPS FOR SELLERS

Most garage sales are on Friday and Saturday. Get a jump on the competition and hold yours on Thursday.

If most sales in your neighborhood begin at 8 a.m., start yours an hour earlier.
Advertise in newspapers, online and with neighborhood signs.

Post easy-to-read directional signs. Bright paper plates with bold arrows are inexpensive and eye-catching. Your sale is only as good as your signs, Kincaid says.

Wear your money. Keep cash close in a fanny pack for speedy transactions and to discourage theft.

For the convenience of shoppers, keep a tape measure and extension cord handy.

To entice shoppers to linger and buy, merchandise should be clean, clearly priced and attractively displayed.

Have a toy box to keep kids amused while adults shop.

Position large items out front. Dealers and people in need always want furniture.

TIPS FOR BUYERS

Shop early on the first day of the sale for the best bargains. Shop toward the end of the sale for rock-bottom prices.

Plan your route carefully.

Make a list of items you need.

Before leaving home, jot down measurements for window treatments, mirrors and furniture.

Bring a tape measure, magnifying glass and extension cord.

Stock up on small change.

If you don't see the items you're looking for, ask. You might get lucky.

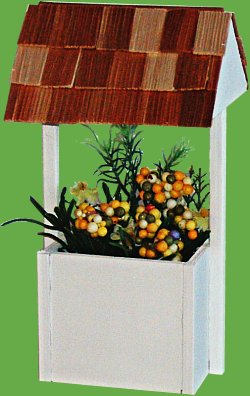
Pretty interesting huh? And some of those things you find at garage sales, you can use for crafting! Now speaking of crafts... today I offer you a wood working craft that can be used for lots of things... special celebrations to hold gifts of giftcards, cash, etc. or use it as a planter, or whatever you like! That's the fun thing about making your own things. You can do basically whatever you want with them! Now there are alot of steps to the process of today's craft, so instead of post them ALL here, I will link you to the site to find this extraordinary idea!


Craft Idea of the Day: Wooden Wishing Well

You'll need the following supplies:
Two 1/8" thick balsa wood panels 4" by 2 1/2" .
Two 1/8" thick balsa wood triangles 2 3/4" on each short side.
Five 1/4" thick balsa wood squares, 2 3/4" on a side.
Four 1/4" square posts of 2 3/4" length.
Two 1/4" square posts of 6" length.
Two 1/4" square posts of 3 3/8" length.
One piece of 1/4" or 3/8" square stock of 4" length.
One piece of 1/8" dowel cut to 4 1/4" length.
Some dollhouse shingles.
Wood glue, paint, decorations

Ok gang, its that time again... time to munch on some superb sustainance! Now I have done some themes based on music, some on fruits, some on methods, etc. but I am really loving the theme I have picked this week. You see, its something I eat just about everyday with at least 1 meal! I know my dad eats alot of these too, and so did my mom back in the day! My dear friends... in honor of the scorching summer heat, I figured I would heat up the recipes this week with some HOPPIN' JALAPENOS!! Those little green pieces of fiery heaven... yes the jalapeno! So delish... OMG gonna go throw some in some omelets when I am done here LOL! I love them about as much as I love garlic! YUM! LOL... ok so this week I will bring you jalapeno facts as well as some sizzling recipes!


Some Interesting Facts about Jalapenos:

The Jalapeno was the first pepper to be taken into space.

Dried and smoked jalapenos are chipotles, generally known in a class of their own.

The generic Chili plant interestingly enough is classified as a fruit, and not a vegetable and came from either Peru or Bolivia sometime around 7000 BC. The seeds of the plant were carried by birds across to other parts of America; Central, South and Southern North America. The Jalapeno (Chili or Chile) pepper got its name from a village by the name of Jalapa in the area of Veracruz, Mexico where it is said to have originated. It is by far the most popular form of chilli eaten especially in the US and Europe!!

Jalapeno peppers come from the capsicum family and are dark green in colour but turn red when mature. Their shape is long and like a cone and they normally reach a length of approximately 2 inches when fully grown. They are rich in Vitamin C, A and E, potassium and folic acid, so are rich in nutrients.

There are at least two varieties of Jalapeno peppers, the North American variety, and the Mexican variety. They are the two locations where they are grown the most. The North American type needs dry air with lots of water where as Mexican variety does well in the heat and humidity. Hence there is a decline in production of the North American Jalapeno during the hot summer. In general, it takes about 2.5 – 3 months for the pepper to grow and each plant will yield about 30 pods.

Jalapenos are known for providing that ‘kick’ in food. The ‘kick’ comes from the seeds and the rib of the skin so many people remove both these parts if they want just the flavour and not the heat!! The heat or spice comes from a group of 5 chemicals that are called Capsaicinoids. Each chemical in the family has a slightly different affect. The hottest one out of the five is the capsaicin which produces the fire sensation or burning in the mouth.

So now its time to eat these little Southern beauties! Today I am stuffing them! I know you have heard of classic cheddar cheese and cream cheese stuffed peppers, but check out some of the other stuffings you can put into these hot little "poppers" LOL! Eat & Enjoy!


Stuffed Jalapenos with Smoked Gouda and Pineapple

Ingredients

12 fresh jalapeno peppers
1 (8 ounce) package cream cheese, softened
6 ounces smoked Gouda cheese, shredded
1 tablespoon real bacon bits
1/2 cup canned crushed pineapple in juice, drained and juice reserved

Directions

Preheat oven to 350 degrees F (175 degrees C).

Cut a slice off the stem end of each pepper, and use a sharp paring knife or pepper corer to scoop out the veins and seeds from the peppers (wear rubber gloves and avoid touching your eyes or nose).

Mix together the cream cheese, Gouda cheese, bacon bits, pineapple, and about 1 teaspoon of reserved pineapple juice, or as needed to make a workable filling, in a bowl until thoroughly blended. Using a small spoon, stuff the hollow peppers with the cheese mixture.

Place a rack or several disposable foil bread pans upside down onto a baking sheet. (See notes for how to make a pepper rack from a foil pan.) Stand the peppers, stem sides up, into the rack, and bake in the preheated oven until the peppers are softened and the filling is hot and bubbly, 30 to 45 minutes.


Firehouse Jalapenos

Ingredients

30 jalapeno peppers, halved and seeded
1 (8 ounce) package cream cheese, softened
60 small smoked sausages (such as Lit'l Smokies®)
1 (1 pound) package thin-sliced bacon, cut in half
60 toothpicks
1/2 cup barbeque sauce

Directions

Preheat an oven to 350 degrees F (175 degrees C).

Fill the jalapeno pepper halves with softened cream cheese, then place a smoked sausage into each pepper on top of the cheese. Wrap each piece with a half strip of bacon and secure with a toothpick. Place the peppers onto a baking sheet and brush with the barbeque sauce.

Bake in the preheated oven until the bacon is crispy, about 30 minutes.


Bacon-Wrapped Peanut Butter Jalapenos

Ingredients

8 jalapeno peppers, halved lengthwise and seeded
1/2 cup peanut butter
8 slices bacon, cut in half

Directions

Preheat oven to 350 degrees F (175 degrees C).

Fill each jalapeno half with peanut butter and with a piece of bacon; secure the bacon with a toothpick. Arrange the wrapped jalapenos on a baking sheet.
Bake in the preheated oven until the bacon is dark brown, about 25 minutes.


Crawfish-Stuffed Jalapenos

Ingredients

8 ounces bacon
8 ounces bulk lean breakfast sausage
24 large jalapeno peppers
1 cup shredded Monterey Jack cheese
1 cup shredded Cheddar cheese
4 ounces cream cheese, softened
1 cup shredded Muenster cheese
1 pound cooked and peeled crawfish tails, coarsely chopped
1 quart vegetable oil for frying
2 cups all-purpose flour
1/2 teaspoon paprika
1/2 teaspoon white pepper
1 teaspoon garlic salt
1 1/2 cups beer, or as needed

Directions

Place bacon in a large, deep skillet. Cook over medium high heat until evenly brown. Drain, crumble and set aside. Stir the breakfast sausage into the skillet, and cook until crumbly and no longer pink. Meanwhile, place the Monterey Jack, Cheddar, Muenster, and cream cheeses in a large saucepan over medium-low heat. Once melted, stir in the crumbled bacon, breakfast sausage, and chopped crawfish tails. Set aside.

Remove the stems from the jalapenos, and cut a slit lengthwise down one side. Wear gloves while handling the jalapenos (trust me, I learned the hard way). Remove the seeds through the slit. Hold the seeded jalapenos lengthwise between your thumb and forefinger, and stuff with the meat and cheese mixture (you remembered the gloves, right?). Place the stuffed jalapenos onto a dish, and freeze overnight or until solid.

Heat oil in deep-fryer to 375 degrees F (190 degrees C). Whisk together the flour, paprika, white pepper, and garlic salt in a bowl until combined, then quickly whisk in the beer until a batter has formed.

Use a skewer to stab a frozen jalapeno, then dip it into the batter until coated. Place the jalapeno in the hot oil, and hold for a few seconds just below the surface, before twisting out the skewer. This will help keep the jalapeno from sticking to the bottom of the pan. Cook until golden brown all over, then remove and drain on a paper towel lined plate. Repeat with remaining jalapenos.

Ok kids, that's a wrap... a bacon wrap LOL... for today! I hope you are excited for a new week, a new theme, and new fun and adventures! I think I AM gonna take the DN, DS, and myself and go out for the day. We are gonna make a baby hunting adventure! Hunting for furniture LOL! And who knows what else! Of course, I still might just stay home and cook and sew LOL! I never know. Thanks for coming in and sitting with me this morning and be safe today in your travels and your own adventures! Until tomorrow my friend... HUGS!