myspace generator
Showing posts with label band. Show all posts

Sunday, November 7, 2010

LET THEM EAT CAKE

Well a good frosty Sunday morning to you all! Sorry for the delay but this weekend has been super crazy busy believe it or not! Football games, bike rallies, car shows, coupon shopping, and more! We still have a pizza block party to go to today and a PowWow next weekend! Plus we have football games... well at least 1. Our team made the playoffs for the 4th straight year so its gonna be a week by week thing now.


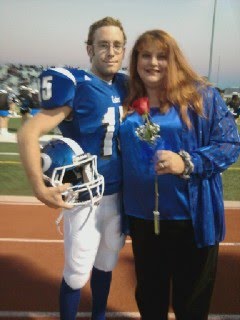
Remember the young boy who lived with me named Michael who I treated like a son? Well he is somewhat back in our lives now... but not living with me. So Friday was "Senior night" and all the seniors had their parents escort them across the football field. It was a way for the school to "honor" their seniors in the Football, Band, cheer, dance, and drill. Michael had asked me to escort him a while back and I gave my word I would. I keep my word, so no matter what I was gonna be there. I got a little emotional... as I think most people would. However NEXT year when I escort my daughter... I just know I'm gonna cry!

Then of course you have the ongoing saga with the doctors. Last week I went and everything looked really good. My blood cell counts are steady, my BP was back down, I dropped another 4.5 pounds, and my pulse was awesome. She wants to try cutting my BP meds in half... not the actual pill, but the frequency of the med. I currently take one every day in the morning. She wants to try to go every other day to start IF my BP is good at the next visit. So I am trying to eliminate as much stress as possible. I heard from my attorney too! Hopefully sometime after the 20th I go to court and I will be a free woman! YAY! So that's ANOTHER stress factor eliminated!


Ok, so yesterday first thing in the morning the kids and I went and did some coupon shopping. We did assaults on CVS, JCPenny, and Kroger LOL. We started at CVS cause I also had to pick up a prescription for Alex. OK... I picked up a bottle of Arm & Hammer laundry soap, a bottle of the new Gain dish soap (which smells just like my favorite LAUNDRY soap LOL), 2 beef sticks, a jar of peanuts, a box of alcohol swabs, and 4 blue velvet mini stockings. Total was $19.42 and I had lots of coupons... save off a purchase ones, item coupons, and extra bucks. Total AFTER was $7.09! Woohoo!

Then we went to JCPenny where I had one of those lovely $10 off $10 or more coupons. SOOOO I found a very nice Christmas present there for VERY VERY inexpensive courtesy of the coupon and doorbuster savings!


Then off to Kroger! This one was fun! Ok, so they have this "Mega event" where if you buy 10 items then the price is cheaper. I have a load of coupons for most of those items AND others I know are fairly inexpensive! On top of ALL this, they have the Jenny-O turkeys on sale for 39 cents a pound when you buy $20 of additional items. No problem... had that (before coupons anyways LOL). Man did I find the biggest turkey ever!!!!! 25.20 pounds! OMG I started singing and talking to the turkey in a Cartman voice (a character off of the cartoon SouthPark for those who don't know) and people were looking at me funny, but I didn't care! That turkey was like the mother of all turkeys! That is the biggest one I have ever found and you better believe I'da beat down someone who tried to take it from me LOL! Ok so after my moment of madness LOL, we got the rest of the goodies! I even found a butterfly shaped Wilton cake pan on clearance for less than $4! WOOHOO! Total price before was well over $128 and after was $12.37 out of my pocket... so not my personal best, BUT I did save over $115.06 in coupons! WOOHOO! Call us weird, but the kids and I have so much fun doing this... coupon shopping I mean.


OMG I so have to tell you about my cakes! LOL... the other day I got on a baking trip... I wanted to bake cakes. SOOO, since we didn't do anything for Halloween, I baked. The "Betty Crocker Baking Bug" has apparently bitten me quite early! I have baked like 3 cakes in a week! The first one I did was "Jack" the pumpkin cake. It only LOOKED like a pumpkin LOL but it was strawberry with blood red icing in the center, so when you cut the cake, it looked like it was bleeding! I know morbid, but very cool! 2 layers of yummy deliciousness! I was gonna do a sculpted cake, but I did not have enough powdered sugar to make more icing, time to bake more cake, etc... so we stuck with the simple 2 layer decorated version LOL!


THEN we have my Texas cake! I loved this cake! Super cool, right? Too bad nobody got a piece of it but my son! It was a Butter Pecan cake with white icing. I took so much time coloring the icing, sectioning and separating, etc. I was quite proud of this cake! Apparently so was Alex LOL... it started with the Panhandle... ok fine... then west TX disappeared, the Guly Coast, and finally Central Texas and the Hill Country! WTH? Where is my cake?? Then out walks Alex with EVIDENCE! No not an empty plate... but the bluest teeth I have ever seen LMAO! Oh well... guess it was meant to be eaten! LMAO! Just not all by him... which totally threw me off cuz he normally doesn't eat sweets... except pumpkin pie LOL!


So then a couple of days ago was one of my "kids" birthdays. Becky is one of Madison's friends who's been around us for years that calls me mom... okie dokie... She turned 17 and Madison wanted to make her a small cake for her birthday. Ok... so we are rushing around the night before trying to get this cake done and I realize AFTER the cake is made OMG what am I gonna put it in?? LOL. Well the triple chocolate fudge with milk chocolate cake and cream cheese decoration was set enough in the morning to lightly tent a layer of foil, so that's what we did. Becky LOVED it and started to cry!

I think I'm gonna try to go through my recipes today and pick out all the cookie recipes I am gonna do for our Annual cookie party. I have Gator Blue stockings to make as well, and I think I am gonna try to do some crafting this afternoon once we get back from the Pizza Block party. So next week I will try to do more entries and share more recipes, photos, etc... trying to get back to "normalicy" is harder than I thought LOL! OK Until next time... Peace, Love, & lots of HUGS!

Friday, October 8, 2010

HOW PATIENT CAN YOU BE?

Good morning everyone! I hope this crisp fall morning finds you well. Betcha didn't expect me back, huh? As my dear friend Cindy told me... It's been a great week!! Made it through without needing bail money or having any of those messy "hide the body" episodes... LOL. True I have been MIA but I wanted to come on here and thank everyone for the kind emails and comments and to let you know what's been going on. Yes, I'm choosing to air dirty laundry, vent, spill the beans... whatever you want to call it LOL! I am getting a divorce, got health issues, money woas, and lots more! But I want you to know that whatever you are going through, you CAN get through it... let my story serve as your proof. That's the reason I am sharing all my personal stuff with you now!

6-4-10: The young man I let move into my house and treated like a son decided that drugs, booze, and girls were more important than a loving safe home and a "family" who would help him get a good education and a better life. His attitude and actions became intolerable. Then he cowardly moved out the day I took my mom to the casino without even saying goodbye. I felt very used and "abused" both myself and for my family. My Best Friend Vicki (who is more like my sister) saw him in the store the other day and my "nephew" Josh kept asking why he wasn't at Aunt Nay's house, etc. He fessed up that leaving was the biggest mistake he ever made. GEE, YA THINK? Oh well... young, dumb, and full of... um STUPIDITY LOL!

My brother also breaks off relations with the young lady he was seeing and the baby I was watching quite frequently is no longer in my life now. I got attached yes, but didn't cry. I just hope she realizes how special he is...

8-25-10: Separated from husband... we've been having alot of problems for the past couple of years actually. I decided to "kill" the old me and change my life. Went through my boo-hoo's and why me's and then finally said OK, Bring it on! I am quite proud of myself for not trying to get him to come back home... standing my ground! After what all he did to me over the course of our marriage (I admit I enabled him quite a bit), I realized I could not hold on to the good to get through the bad because things had changed and been damaged too much. It would never be the same. So I used the last way I knew how to show him I love him... I let him go!


Time to work on me and my kids!

9-8-10: Went to the doctor. Got my release and rehab "instructions". SUPPOSED to be exercising 30 minutes a day, 3 times a week. Appointments every week for 6 weeks of what I think feels like "Fat camp". Goal is to lose weight put on by meds and bone disease, steriod meds, shots, and other health issues. Doc also wants to re-evaluate at 6 wks and see if we can lose the BP meds. Personal Weight goal is to lose 100 pounds by my birthday next year (Sept. 7, 2011). Left the doctor and the next day, started... ended up exercising for 3 hours cause it felt so dang good!

** Aside from the exercising, I am implementing alot of other changes. I have already quit smoking (May 27, 2009) and only have the social drinks (except right after kicking out husband LOL). I am not using any salt other than to cook with, I hardly eat sweets unless my blood sugars go too low, I won't eat hardly any red meat, increase my veggies and raw salads (didn't think it was possible as I LOVE fruits and veggies already LOL but I did it), and increasing my water intake (just to name a few LOL). **

9-16-10: First doctor visit. Got lectured a bit... but its ok. I lost 9 pounds, my BP was 171/102 and my pulse was 99. Doc said the first 5-7 pounds of that was probably water weight and I said THAT'S OK! It took 2-4 pounds of its fatty friend with it! LOL! She warned me to be careful and she wanted a goal of like 2 pounds a week... I cock an eyebrow and think "Uh yea ok" LOL.

STATS: -9 pounds, BP- 171/102, P- 99

** Am loving doing 2-3 hours a day of kickboxing! Met with an atty and he is going to do the divorce for me, so that paperwork has been filed! Hopefully I can be saying my thanks over my Thanksgiving turkey saying "Thank you for this divorce and pass the gravy!"**

9-23-10: Second visit to hell-o LOL! Doc starts really fussin' cuz I drop another 4.5 pounds! WOOHOO! I am excited, she's not so much. She asked if I was doing the 30/3's and I had to fess up that no, I'm doing 120-180/5's LOL! She started fussin that she thinks I am over-doing it and doesn't want me adding too much stress to the heart or problemed bones. I say :P LOL! She asked me if I was eating, etc. Fuss Fuss Fuss... gonna do what I want to do so hush LOL!

STATS: -4.5 pounds, BP- 147/93, P- 96

** Am finding that since working out, I have more energy and when I listen to music, I just wanna move LOL so I end up dancing my butt off for another hour or so some nights LMAO! **

9-30-10: What a wonderful way to end September! In fat camp! Ok, doc's getting P-turbed with me now LOL and has the nerve to ask me if A. I'm actually eating, and B. am I taking any kind of drugs because I am losing the weight too fast. I was like seriously offended and the b*tchy side comes out and tells her NO and go ahead and test me if ya want! I stressed to her that when you're doing more than the 30/3's, you're more likely gonna lose it faster DUH! Plus the dancing... but I know my body and I know when to stop or slow down. I feel great about myself and I can actually look in the mirror now and not be so disgusted! After going a couple of rounds (more like an hour or so LOL), all she could really say was "well just be careful PLEASE" LOL! Renee 1, Doc-0! Think I might need to dance and celebrate tonight! LOL

STATS: -6 pounds, BP- 135/94, P- 101

TOTAL LOSS FOR SEPTEMBER: 19.5 lbs.
REMAINING GOAL LOSS: 80.5 lbs.
REMAINING TIME: 11 MONTHS

10-7-10: Today really sucked! I felt a sort of dread yesterday and didn't want to go to the dr. today. Couldn't put my finger on why. But I had an overactive brain yesterday and today, so I had tons of things running through my head. So I grabbed an extra hour almost of kickboxing. Well I had found a picture of my STBX (Soon To Be Ex) in my son's room that I had removed and forgot to put away... still in a frame of course. Got very angry again and OOOPS!


There went some more glass. Got a few cuts on my hand, but it's ok... nothing too deep (Note to audience- do NOT box with pics of STBX around LOL... the adrenaline gets going and soon you think the pic is their face and there ya go! LOL). I woke up today with a really low feeling in my gut, but I went to the doctor anyway. Well she couldn't gripe at me too bad, cuz my numbers were "much safer" to her but very disappointing to me. I have some swelling in my legs for some reason, but other than that she is pleased with my visit. She says I have slimmed but apparently am building up more muscle mass. NOOOOO! I am so upset that I have been working so hard and this is what I end up with... uh no. Think I need to step it up some or change it somehow! We'll see what next week brings!

STATS: -0.5 pounds, BP- 130/92, P-104


So that in a nutshell is what I have been up to with myself. Of course October started DD's Marching Band season in full swing. (LOL Like the pic? Late night football marching followed by early next day marching = Sunday morning Marching Lag! LOL) The competition last weekend was great! They got lots of good pictures of her. We have comp's every weekend this month... plus football, etc. Busy... Busy... Busy. I finally did some more painting in the kitchen- just have 2 cabinet doors on the bottom and then applying the lemons and that project is done. Because of everything going on, the fabric challenge and the Christmas Challenge came to a screeching halt. Christmas will be rough this year because of finances, but also that Frank & I were married December 23rd... so yea... I would say I see some "special" eggnog this year, but I hate eggnog YUCK! LOL!


My little bunny Rescue I got at the flea market passed away. Mom thinks she may have been bred diseased but says I gave her a very good life. I got a new rabbit though... rescued him too in a way. He is a 3 yr old black rabbit named Midnight and he is fixed! YAY! LOL... also my landlord got stupid and said I had too many cats and that some had to go. SOOOO Miracle and Gizmo are now living out at my mom's house. I still have to get rid of 1 more (2 if he learns about the baby in Madison's room). He "graciously" said the bunny can stay since it's in a cage. Gee thanks dillhole! And then DD's friend needs to place 2 gerbils and they decided they should come here. UM NO! Anyone want 2 gerbils and all the goodies? LOL.


We had my little brother's birthday lunch a couple of weeks ago too... wow I feel so old, but I love my family so much! We had a great time, great food, and I even managed to get him to give me a great picture... one he is not shooting the finger in! WOW! LOL Love ya Michael! My other brother Mark is currently in TDCJ (Texas Department of Criminal Justice) boot camp to start a new career as a Correctional Officer. We were discussing this as a possibility for me too. But I won't even consider applying until I lose at least 50 more pounds! Its just a thought right now... a vague thought. But my brother's doing great and I think this is gonna be a good thing for him! Way to go Mark!

As you can see, lots of things going on right now in my life. When I started this blog it was as a wife, mother, and basically a "June Cleaver" Kinda person. However I'm NOT that person anymore. I am still a mom and I love cooking, sewing, etc. and if you want to still hang around, I will continue to be here... maybe not so much right now (definitely not every day right now) til my life settles into a normal chaos. I will still do crafts, cooking, etc... if you'll have me- the NEW me?

Well I'm outta here. Time for "The Oldies Sweating To Hate Music" LOL! (No offense to anyone- especially the makers of "Sweatin to the Oldies" LMAO!) I want to hear your thoughts and comments, etc... so until next time... HUGS!!!!!!

Monday, May 24, 2010

SUPER SALADS & SEWING

Hey there everybody! How are you doing this fresh first day of the work week? I am crazy stoked… I have lots to share with you from yesterday! I am quite proud of myself. I have already fed my kitties both inside and out, watered what’s left of the garden (including my new babies), picked a few yummies that wanted to come inside, taken the kids to school, and now I am writing you before I leave for work. Cool huh?


Well folks, Freshman marching band starts this afternoon, and my kids have to be there so they can get their partner. That means the chaos, which we call marching season, is right around the corner! Each year the upperclassman get “assigned a freshman”. The older band members are to tutor and mentor the young ones if they need any help. This year we are gaining 87 freshman!! That’s the biggest number in one year in the band’s history! (I wonder how many I will be gaining around my house LMAO!) Our band is getting close to covering the field with this addition! It’s Gonna be crazy now! Anyway, they have 2 weeks of freshman band before the summer and then the whole band starts summer training the beginning of August before school. This picture was our band this past year (October) at one of the competitions hosted by Sam Houston State University. LOL I know it (the whole band) doesn’t “belong” to just me, but I have a lot of pride in them and sometimes I just blurt out “That’s MY band” LOL! They are great kids! So it will be interesting to see how the new recruits do under the pressure… and if you think there isn’t any… GUESS AGAIN! Dickinson Marching Band is NOT for the faint hearted LOL! Let’s just say, it gets pretty tough! My brother even shattered his ankle one year and STILL tried to march! Yea band and football is a big thing around here… and I have one in each! CRAZY!!


I started out the day by running to the store to get a few things I kept forgetting to buy… including my B1G1F roses at Home Depot! Aren’t they just so pretty? And they weren’t very expensive either… 9.95 each, so it was $10.78 for both, or roughly $5.39 each… not too shabby I think. They are covered in buds, so I hope to have some beautiful bushes soon!


Once I got back home, the race was on… the sewing race that is! I made a list of 10 DIFFERENT things I wanted to get done. Sadly I only accomplished 6 of the crafts off the list, but I think I did pretty cool. This was the first thing… the Grandma T-shirt purse. I saw these shirts at Wal-Mart for like $5 and there were a couple I just had to get for the sheer purpose of making bags. This was the first one… and it reminds me so much of my mother! I matched the wording color with the butterflies on this fabric and I think it turned out really well!


This is the second T-shirt I got to make a bag… yes my pride in Texas really shines through huh? LOL! The state has the map on it and the awesome cow skull. I paired this with a pretty fabric that has the Texas Flag and bluebonnets (the state Flower) on it. I purposely narrowed the bottom as I was trying to make it similar to the shape of the state. I think its pretty nifty! I am gonna have a hard time getting rid of this one! LOL!


Here is a plastic canvas box with a Casino theme. I plan on using it to make a gift basket/package filled with Casino related items. I have a matching purse with the same print too. Isn’t it awesome!? I think it will make a good basket/container for a gift package.


Ok, this is a plain black apron my son got when he worked at Subway. He no longer needs it as he doesn’t work there, so he gave it to me. I wasn’t quite sure what to do with it then I said, “I’m gonna put some pockets on it and use it as a crafting and do-it-herself apron. I won’t be losing any more tacks, nails, etc. anymore as I work around the house! LOL I thought it was a pretty good recycle idea!


Ok, now since the band kids have to have a special towel to sit on when they are at games and such, I figured so do I LOL! So, I had bought these blue towels on clearance one time and had them sitting in a box you’ve come to know as “the green crate” LOL! What to do, what to do… MUSIC NOTE SCRAPS TIME! LOL! Now I have my own special pair of band towels for competitions, games, etc! In the school color too!


Ok, so its time to stop and make dinner. Now when I was at the store they had a really good deal on crispy chicken tenders so I decided to make the Seasonal fruit and chicken salad for dinner and try it with the crispy chicken instead of the grilled chicken like normal. While it was super delish, the whole family agreed that we like it better with the grilled chicken actually. But isn’t that so pretty?


What would dinner be without a dessert? The other day when I took my mom to the store I got some clearance breads for 49 cents each. I also had a few more packages of those apple slices left too… so I made Apple Cinnamon Bread pudding. OMG let me tell you, it made the house smell absolutely marvelous! It tasted really good too LOL!


Ok, so after dinner I was slowing down dramatically. So I was just really piddling with the scraps in the crate and I managed to make 10 cell phone pouches. BUT I ran out of snaps, so they aren’t all totally complete… I still need snaps for 3 of them and the store I need to get them at was closed for the day so they have to wait. But 7 are completed and 3 almost done. That was some pretty spiffy productive piddling huh? LOL!


And finally… the piece de resistance! The LOTTO TICKET BAG IS COMPLETED! OMG this is so freakin’ cool! I ran into a few bumps and snags along the way, but let me tell ya, this is the most awesome thing I have ever made I think! Not only did I recycle, its just freaking super-de-duper! And expensive LOL! The bag is made out of $54 worth of losing lotto tickets and then material, thread, etc. But I don’t care… I think its awesome!!!!!!! I probably won’t be making another one for a long time (that’s a lot of money for a bag) unless I put out an ad for people to save their losing tickets for me across the county! So that makes this purse truly unique as well! Ain’t that just the shiznizzle??!!!

So now you see my exciting day of sewing marathon… whatcha think? I think I rocked it out… especially the lotto bag. But all my stuff is super cool I think. And that’s what makes it so fun. So let’s get you into another great craft… especially if I have managed to inspire you! Now I told you I was gonna bring you some patio/garden crafts, etc. And yesterday I showed you a cute bird bath with terra cotta pots and told you how I love them so LOL. Well guess what… I have another neat little terra cotta craft for you!


Craft Idea of the Day: Clay Pot Wind Chimes

Materials:

3 to 4 clay pots in different sizes.
Jute (you can also use macrame twine)
3/4” to 1” wooden bead.
Paints of your choice.

Directions:

It is best if you paint your pots first. You can free hand a design or use stencils. There are a lot of decals on the market that you can also use. Any craft store will have decals in all different designs. Swans and ducks look really nice on chimes.

Cut about a yard of jute. Put one end of the jute into the wood bead. Tie a knot and pull the ball down to the bead. Tie another knot about 1 ½’ up from your bead. I usually put a washer on top of the knot because the knot will shrink in time and your pot will slip past the knot.

Put your smallest clay pot on next. You will have to judge where to put your next pot. It should hang over the smallest pot by about ½”. Keep working up the line with your pots getting bigger. After you have your last clay pot on tie a loop to hang it with. If you have extra jute at this point just cut it off.

You now have a clay pot wind chime that you can hang anywhere. These wind chimes are very easy to make and make great gifts.

Now, we have been having such fun with themed food weeks, I figured I would bring you another. So far, I've brought you casseroles, soups, pizzas, and grilling. Now I want to go to something else that sparks excitement in some and dread or fear in others… SALAD. This week is SUPER SALAD WEEK! Now salads don’t just have to be green lettuce with raw veggies, etc. You have many different kinds of salads… pasta salads, meat salads, veggie salads, fruit salads, etc. So this week is a sneak peek at salads unique! LOL! I’m not posting the salad I had for dinner last night again because I posted it on March 27th, so go check it out there! LOL I am, however, going to bring you the first salad, which also has a bit of grilling… the perfect cross-over recipe to start another fantastic theme!


Grilled Pepper Steak Salad

Ingredients

2 1/2 teaspoons minced garlic, divided
1 teaspoon freshly ground black pepper
1 pound lean skirt steak or flank steak
8 cups packed torn romaine lettuce or mixed salad greens
1 large tomato, seeded, chopped
1 ripe avocado, peeled, seeded, diced
1 1/4 cups Sargento® Shredded Reduced Sodium Mild Cheddar Cheese, divided
1/4 cup thinly sliced red onion (optional)
2 tablespoons extra virgin olive oil
1 tablespoon fresh lemon juice or white wine vinegar
2 teaspoons pureed chipotle chlies in adobo sauce (optional)

Directions

Rub 2 teaspoons garlic and pepper over steak. Grill over medium-hot heat on a covered grill 3 to 5 minutes per side for medium doneness depending on thickness of steak. Transfer steak to a carving board; tent with foil and let stand 5 minutes.

Meanwhile, combine lettuce, tomato, avocado, 1 cup cheese and red onion in a large bowl. Combine oil, lemon juice and remaining garlic in a small bowl; mix well. For a spicier dressing, add chipotle chilies. Add mixture to bowl; toss with lettuce mixture. Transfer to four serving plates.

Carve steak crosswise into thin slices; arrange over salads. Top with remaining cheese.

Okie dokie gang, it’s that time again. Time for me to get off here and get dressed and ease on down the road. I’ve had a blast this morning sharing my day off crafting photos and everything else with you today. I hope you can meet me back here tomorrow, because you never know what I’m gonna have in store for you! So until then… HUGS!

Sunday, May 23, 2010

CLOSING GRILL MARKS

Good morning everyone! How are you this bright and sunny Sunday? I am very tired. It was a late night at the Band Banquet last night. I want to thank you all for the comments yesterday. You guys made me cry! But it was a good cry. Its nice to know that something I am doing is truly appreciated. I got a few great pictures to share with you (had severe camera issues last night so couldn’t get as many as I wanted UGH!).


After work yesterday, I made a coupon run with some of the coupons that are going to expire at the end of the month. Everything in this picture (and I forgot to add a few things) was bought using a coupon. The total before hand was almost $170.00 and when I was done, I paid less than $50 for everything! YAY! I received some awesome savings in the mail and the paper and I had to use them. For instance, I had $1.50 off Secret deodorant which was $1.88. 38 cents for deodorant works for me! Then I had coupons for $1.50 off Old Spice deodorant and I paired them with a Buy 1 Get 1 Free, so I ended up paying 88 cents for both roughly! Colgate and Crest toothpaste tubes were $1.50 each and guess who had $1 coupons LOL! Fruit chillers were 88 cents each after $1 coupons. Reynolds Recycled foil was 68 cents after $1 coupons, Raid was $1.12 after $1 coupon. Gain was $3.97 after coupon, and the Febreze fabric refreshers and air effects were all $1 each after $1 coupons. I got a 16 pound bag of cat food and 5- 3.5 pound bags of Friskies with coupons and inside those bags are MORE coupons with a real LONG expiration date (so guess who is filing those away! LOL). PLUS the coupon flyer in the cat food says they are going to be changing the looks of the bags soon and they look like they may make some super cute purses!!!!! SOOO guess who’s gonna be on the lookout for the new bags! LMAO! The Whiskas were free and the Velveeta cups were free too with $1 coupons! The 9lives 4pks were only 42 cents after my $1 coupons and the Niveas were 97 cents after coupon. The always and Charmin were the most expensive things at $3.97 each after coupon, but hey… some things you just have to have! LOL BUT the Always at least had a bonus box, so that made getting it a little easier to handle LMAO! And the travel disposable coffee cups were $1.15 after my coupons. The last thing I found was the Gillette Mach 3 Turbo blades. Now we all have the handles, but if you have ever seen the refill blades are rather expensive! $12 for 5 blades YIKES! Well I had $4 off ANY blades that I thought I was not going to get to be able to use… UNTIL I went to check out! They had 2 blade travel packs for $4.78!! WOOHOO! Now 78 cents for blades I CAN HANDLE LMAO! I got all I had of those and proceeded to check out! I had some awesome finds and I am gonna place ANOTHER coupon clippers order super pronto for more great coupons! I am finally getting ahead and replacing some of my super stockpiles. It feels so good! I just wish I could stockpile the cat food LMAO but they eat it too fast LMAO!


OK it was on to the banquet last night. OMG look at this beautiful cake!! I think I want to make one just like this for Madison’s birthday (or have this lady make one just like it! LOL)! Music notes and super yumminess like moist little heaven in your mouth!


Here is Madison with Mrs. Mac! I couldn’t help but chuckle that DD is taller than her but doesn’t Mrs. Mac just look like the sweetest thing?? Well she is! She was at every game, every concert, every performance, and well… just everywhere! She took care of the uniforms and plumes and everything! She did a lot and she will be missed!


This was one of the centerpieces they had on the tables. They are slightly cute… although I think I could have done such a better job than this! I know, I can be a bit of a craft snob LMAO! This to me says that someone just threw it together with no real thought or imagination… typical for this booster. We had an incident with one of the “booster moms” last night that I won’t go into, but let’s just say she needed to be smacked a few times!


Here is DD after she got her award. She was quite proud of herself. And you can see my brother in the background making all kinds of goofy faces. I swear I can only get a few good pictures of that boy where he isn’t either doing something wretched with his face or he’s flipping the bird! Gotta “LOVE” little brothers! (See me rolling my eyes LOL)


Here is DD’s BFF/my other main “adopted band kid” Katie after she got her award. She is growing up to be a very wonderful young lady… she has a new job she will be starting soon, so I won’t get to see as much of her… I’m sad but she has to grow up and I am not like some moms who can’t let go of their kids. I say GO!!!!! LMAO…


Ok now here is the problem with being such a dang good cook. I can’t go hardly anywhere to eat without saying (at least twice LOL My kids pointed this out) “Mine is better” LMAO! The banquet was catered by a local restaurant named Gio’s. And while their food was better than last years catering, I still could have made better! LMAO! This was their Chicken Fettuccine Alfredo. Not bad, but not the best either. Don’t even try to eat that bread without cracking a few teeth. And they slopped too much dressing on the salad! YUCK!


This was their lasagna. Again, nothing to write home or change your britches over, but all in all it, was edible LOL! DS14, however, wanted nothing to do with it LOL. He hated it so much that we had to make a B-line for McDonalds to get him some burgers and fries on the way home. I’m not surprised that he took a bite and said oh heck no LOL.


This is the DD after I had just made a joke about something and everyone was laughing (and loudly) LOL! She was so pretty last night and so grown up. Wow, I tell ya I feel older (and pop another gray hair) every time I look at her! Pretty soon she will be driving and I will hardly ever see her! Wow…

So there you have some glimpses into our night out. For the most part, we had fun. There were a few incidents that left us either very upset or very hurt. But we each deal with them in our own way. A few of my “kids” weren’t there last night. I found out there was another Quinceañera going on last night that some of the kids had to attend instead. It was a very busy night around town LOL!

If you haven’t guessed, I have the day off again and probably Wednesday too, so I am going to try to make a dent in the green crate today and Wed. I also need to run to the store for a few things I forgot to get… including my dang roses at Home Depot! UGH! LOL but when I am done with the running, I will be crafting. So what are YOU going to craft today? Me? Well… not sure really. I might try the doo rags or a few other items. OR I might try this neat little idea on for size… well its not really “little” LOL as it would have to be rather big LMAO… and I wonder how my landlord is gonna feel about it LMAO! Anyway, this is a terra cotta pot idea (I told you I LOVE terra cotta crafts) that would be good for a yard or even a patio/garden.


Craft Idea of the Day: Terra Cotta Garden Birdbath

You can choose what size terra cotta pots and trays you want to use. Glue them together with clear caulking, let dry at least 24 hours. Whitewash with thinned out white acrylic paint. Let dry about an hour, then paint what ever you want on it, or just blend paints, that is also nice. I liked the leaves and frogs on mine. It is really whatever you like. Let it dry 24 hours then spray with sealer. You really should let it dry 24 hours then spray again and let dry another 24 hours. Fill and watch the birds play in it.

By Sheri from Stockton, CA


Ok folks, its that time again! Time to make your mouth water with my closing grill marks for the week. Have you enjoyed this theme? Want another? Today I am gonna show you something tender and sweet and good to eat! Lamb… now if you haven’t tried it, I suggest you do. It is a delicate meat but oh so tasty! And for dessert… going basics with some fruit. Nothing is supreme to fresh fruits with cream! Oh boy oh boy!


Southwestern Lamb Chops

Ingredients

1 cup orange juice
2 jalapeno peppers, seeded and finely chopped*
1 teaspoon ground cumin
1/2 teaspoon salt
Dash pepper
3/4 cup halved, sliced sweet onion
4 teaspoons cornstarch
1/4 cup cold water
1 cup fresh orange sections
2 tablespoons minced fresh cilantro
8 lamb loin chops (1-inch thick)

Directions

In a saucepan, combine orange juice, jalapeno, cumin, salt if desired and pepper. Cook over medium-high heat until mixture begins to simmer. Stir in onion.

Combine cornstarch and water until smooth; add to the sauce. Bring to a boil over medium heat; cook and stir for 2 minute or until thickened and bubbly. Remove from the heat. Stir in oranges and cilantro; keep warm.

Grill the lamb chops, covered, over medium-hot heat for 12-14 minutes, turning once, or until a meat thermometer reads 140 degrees F rare; 160 degrees F, medium-well; or 170 degrees F, well done. Serve with orange sauce.


Grilled Peaches and Cream

Ingredients

4 peaches, halved and pitted
2 tablespoons clover honey
1 cup softened whipped cream cheese with honey and nuts
1 tablespoon vegetable oil

Directions

Preheat a grill for medium-high heat.

Brush peaches with a light coating of oil. Place pit side down onto the grill. Grill for 5 minutes, or until the surfaces have nice grill marks. Turn the peaches over, and drizzle with a bit of honey. Place a dollop of the cream cheese spread in the place where the pit was. Grill for 2 to 3 more minutes, or until the filling is warm. Drizzle with additional honey on top and serve immediately.

Ok everyone, I hope you have had a great time and I invite you to come back tomorrow for more wonderful adventures of the Frugal Mom! I know its been a real joy sharing my days with you and I look forward to more great adventures to share! So until tomorrow… HUGS!

Friday, May 21, 2010

SAYING GOODBYE

Good afternoon lords and ladies. How are you doing this blessed day of days? I am well… somewhat somber hearted but good. I am sorry for the late posting, but we had a transformer blow on our street this morning and we were without power. So I spent the morning working on Madison’s room!


We went to the band concert last night and let me tell ya… there were some tears. We got home real late… I think we finally laid down around 12:45-1am… yea I am draggin’ today! Mr. McDonald, the band director at the High School is retiring this year. Our family has known the McDonalds for 17 of his 32 years of teaching. He instructed my brothers and now my daughter. His wife is one of the sweetest things you can imagine! We have the band banquet tomorrow night and I hope to get some great pictures there to share with you! So not only are we saying goodbye to our graduating seniors, but to the band director as well. Saying goodbye is rather hard to do. And the man who is taking the directors place is a guy I went to school with... the class under me actually! Do you know how old I feel??! Anyway, I wish Mr. Mac a Happy Retirement and Mr. Brazelton the best of luck with the new position!

I am not really gonna do a craft today as its kinda late. However I will make sure that there is one tomorrow and that we get back to normal with the postings. SO, now… Here’s the special feature I know you have been waiting for… FOOD! I am using seafood again and once again it’s one of mom’s favorites. I feature this ingredient again because I don’t think it gets enough attention honestly. While I am not too fond of them, I know lots and lots of people are, so I will give it the spotlight it deserves. So without further ado...


Grilled Mussels with Curry Butter

Ingredients

3 tablespoons butter, softened
2 cloves garlic, pressed
1 teaspoon curry powder
1/2 teaspoon ground cumin
1/8 teaspoon salt
2 pounds mussels, scrubbed and debearded
1 cup chopped red bell pepper
1/4 cup chopped fresh parsley
1 lime, thinly sliced
1 lime, cut into 4 wedges

Directions

Preheat an outdoor grill for high medium-heat and lightly oil grate.

Whisk together the butter, garlic, curry powder, cumin, and salt in a small bowl.

Arrange four large sheets of aluminum foil on a flat surface. Divide the mussels into four even portions and place one portion on each piece of foil. Dot the mussels with the curry mixture. Sprinkle the red bell pepper and parsley over the top of each portion. Top each with lime slices. Wrap foil tightly around the portions.

Cook the packets on the preheated grill until the mussels have opened, 5 to 10 minutes. Discard any mussels which do not open.

Transfer the mussels to small bowls and garnish each with a lime wedge to serve.


Grilled Sweet Potatoes with Apples

Ingredients

2 large sweet potatoes, sliced
2 apple - peeled, cored and thinly sliced
ground cinnamon to taste
brown sugar to taste
1/2 cup butter

Directions

Preheat an outdoor grill.

In a bowl, toss the sweet potato and apple slices with the cinnamon and sugar. Divide the mixture into 4 portions, places each on a large piece of aluminum foil. Top each with an equal amount of butter. Tightly seal foil around each portion.

Place foil packets on the grill, and cook 40 minutes, turning every 5 to 10 minutes, until potatoes and apples are tender.

Alright kiddies, its time for me to get off here and finish the DD’s room and then get dinner and such going… we all know what happened the last time I had a day off LOL! I went crazy LOL! See you in the morning with more great crafts, foods, and exciting adventures! Until then… peace, love, and lots of HUGS!

Friday, March 12, 2010

BACK IN THE GAME

Good morning all my friends! How are you doing this bright and beautiful morning? I am doing much better today than yesterday LOL. DD texted me after she got off the plane and we chatted a bit, then she was off for a day of fun n the sun with her friends at Epcot! If you’re over that way, remember to wave HI to the Dickinson High School Band LOL! She sent me a space postcard and she was in it having a blast! Then she called me before she went to bed and all is well. And she even texted me this morning! Thank you to everyone for the comments yesterday! They made me feel a lot better. To my mother… you ALWAYS have to get that “I told you so” in there don’t you? LMAO… and to Cyndi… hun I am so sorry! I don’t want you to leave and I didn’t mean to make you cry. I can say I think I have some awesome kids… both biological and communal! They are polite and helpful and I would claim every one of them! As far as the cheesecake comment… oh I rolled LMAO and then I opened a candy bar! LOL! Talk about putting on pounds… take that doc! LMAO! But seriously, I AM glad that my thoughts can provoke powerful emotions in people. Sometimes that’s what we need… a good cry… it cleanses the soul. And thank you to Hazel and Vincent as well for being so kind. I couldn’t ask for better readers! I have the best in the world… commenters, emailers, and just readers all around!


Ok, I was trying to recoup from the emotional train wreck I was yesterday, so I built me a small planter from some scraps of wood. I stained it and let it dry all day in the sun. It’s small and cute! I love it! I made this one out of 2 x 12’s. I think this is gonna be either a box for a tree or for my peas… not sure yet LOL. The DH went over to the houses behind us, where they are building on the houses, and got some more scraps of various sizes. I can build another 2x12 box like the one I did today… just a little bit thinner (not as wide). And then there are a bunch of 2x2’s I think they are… that will make a cute thinner box; like a window sill box. I’m gonna need more screws though LOL!

OMG I so have to tell you what I discovered yesterday! Ok… I have been taking my trays of seeds outside during the day for the sun, fresh air, etc. (LOL they kinda sound like pets don’t they?) LMAO! Anyway, I put them out on the patio table, which is where I work with smaller plants, plant seeds, etc., and went to water them and low and behold I have yet another sprout! But this is no ordinary sprout! It’s a GIANT PUMPKIN!!!!!! Yes you heard me… one of the seeds FINALLY germinated! YAY!!! I was so dancing for joy!

My dad built my mother some raised beds on planter platforms… and she got her gift card, so guess what we will be doing today? Yep SHOPPING FOR PLANTS! YAY! LOL… Of course, I am so stoked about my giant pumpkin, I doubt I could find a plant as awesome! LOL… But mom has 2 rather large planters to fill, so I think we will be bringing home lots of babies LOL! I don’t mind. As you all know, I always have so much fun with my mom. And then Saturday we will be going to the Galveston Home & Garden Convention. Don’t worry I plan on taking lots of pictures and hopefully getting lots of samples, seeds, whatever!

Ok, Easter… here are some more crafts to get you in the Easter mood! Bunnies… there is nothing better than the image of a fluffy soft friendly little carrot nibbling ball of fuzz! So here are some crafts dealing with bunnies.

Craft Ideas of the Day: Easter Bunnies


Terra Cotta Easter Bunny

What you'll need:

2 Terra-cotta pots (any 2 of same size)
White Gesso
Gold glitter craft paint
Paint brush
White felt
Pink felt
Scissors
2 Small wiggle eyes
Hot glue or tacky glue
Pink ribbon
1 Tiny pink pom pom
3 White pom poms (at least double the size of the pink pom pom)
2 Small silk rose buds
Wire cutters

How to make it:

1. Base coat the two terra-cotta pots with white Gesso. Let dry.
2. Glue the terra-cotta pots together (see photo).
3. Cut a piece of ribbon to fit around the middle of the bunny. Glue in place.
4. Tie a bow with another piece of ribbon and glue on.
5. Add gold glitter craft paint on center of bow.
6. Glue white pom poms on right above ribbon (see photo).
7. Glue pink pom pom above and right between white pom poms.
8. Glue on wiggle eyes.
9. Cut out ears out of white felt. Cut ears a bit smaller out of pink felt. Glue together.
10.Glue ears on top of the bunny.
11. Cut the stems off the rosettes with the wire cutters.
12. Glue a ribbon rosette in front and in back of ears.
13. Glue bunny tail on the back of bunny, about half way up the bottom pot. Let dry.


Bunny Envelope

What you'll need:

4X6 envelope in pastel shade
Pencil
Scissors
Pink construction paper
White construction paper, optional for eyes
Black construction paper, optional for eyes
Red marker, pen, or crayon
Wiggle eyes, optional

How to make it:

1. Lick the envelope shut.
2. Turn the envelope up long ways (portrait). Note: Most of the envelope will be ears.
3. Leave about 2 inches to draw on the bunny face. Draw on ears and cut around the ears.
Note: This leaves you with a little opening for the grass and eggs.
4. Cut out inner ears out of pink construction paper and glue in place.
5. Glue on wiggle eyes, or cut eyes out of construction paper and glue in place.
6. Glue on pom pom nose, or cut a nose out of construction paper and glue in place.
7. Draw on mouth with red pen.
8. Fill opening with Easter grass and an egg or goodies.


Egg Bunny

What you'll need:

Hard-boiled egg dyed pink
2 medium wiggle eyes
2 medium white pom-poms
2 medium pink pom-poms (optional)
7 miniature pink pom-poms
¼ of a cardboard tube
Pink paint
3" x 3" piece of pink construction paper
Glue stick
White craft glue
Scissors

How to make it:

Dye hard-boiled egg pink, according to the instructions on the dye package. Paint the cardboard tube pink and set aside to dry. Place pink egg in the cardboard tube. Cut two long ears from pink construction paper. Glue the bottom of both ears onto the back of the egg. Use white craft glue to attach wiggle eyes to the front of the egg. Below the eyes, glue two white pom-poms next to each other to make the bunny's cheeks. Just above the two white pom-poms, glue one of the miniature pink pom-poms to make the nose. Lift the egg out of the cardboard tube and lay it onto its back on the cardboard tube. Allow the glue to dry. To make the feet, cut an oval from the pink paper, about 1.5" high x .75" wide. Cut the oval in half width-wise. Glue three miniature pom-poms to the curve of each foot. After egg has dried, set it on a towel while you glue the feet to the front of the cardboard tube. Place the egg back in the tube upright. OPTIONAL: You can also glue two additional medium-sized pink pom-poms on either side of the bunny to make paws.

Tips:

Instead of a boiled egg, use a plastic egg.

You can make a tube yourself out of construction paper to eliminate the painting step.

For a more simplified foot, skip the miniature pom-poms and draw on the toes with a marker.


Sleepy Bunny

What you'll need:

½ egg shell
Wooden doll stand
2 large white pom poms
4 medium white pom poms
1 miniature pink pom pom
Scrap of black felt
Pink and white acrylic paint
White felt
White craft glue
Scissors
Thin white ribbon

How to make it:

Be sure egg shell is clean and dry. Paint outside of egg shell pink. Paint the doll stand with a mixture of white and pink paint. Let dry. Glue the egg shell to the doll stand. Add some glue to the inside of the egg shell. Place one of the large white pom poms inside the egg shell. Glue the other large white pom pom on top of the first one. Glue two medium white pom poms to the inside of the egg shell so that they show at the top of the shell (paws). Glue the other two medium white pom poms to the head for the cheeks. Glue the miniature pink pom pom in between the two cheeks. Cut two long ears from the white felt and glue to the top of the head at the sides. Fold them downward and glue the ends to the egg shell. Cut two small crescent shaped slits from the black felt and glue on to head for sleepy eyes. Tie ribbon around the bottom of the egg shell and form a bow, trim the ends.

Tips:

Pom poms can be purchased in large value packs with different colors and sizes.
Be sure to check the craft stores following each holiday for major clearance priced items.

You could get even more creative and add a sleeping cap to the project by cutting a piece of pastel colored felt and rolling into a cone. Glue it to the top of the head and bend the end downward and glue to bunny’s back.


Bunny Ears

What you'll need:

White poster board
Pink construction paper
Scissors
Pencil
Tacky glue or school glue
Tape or stapler
Easter stickers, optional
Markes, crayons, or colored pencils; optional

How to make it:

Cut a strip of poster board about 2" wide by about 24" long. Cut out 2 ears out of poster board each about 8 1/2" long x 3 1/2" wide. Cut out 2 smaller ears out of pink construction paper. Glue the pink ears inside the white ears. Glue the ears inside the band, positioning to fit behind the child's head. Let the child decorate the head band with stickers, markers, crayons, or colored pencils if they wish. Tape or staple the band to fit the child. Cut off any excess.


Bunny Pin

What you'll need:

1 large round pre-cut wood pieces (recommended: Woodies)
2 medium teardrop pre-cut wood pieces
2 small teardrop pre-cut wood pieces
1 (1/4") pink pom-poms
2 (10 MM) wiggle eyes
Tacky glue
White craft paint
Pink craft paint
Paintbrush
Red thin line paint markers or permanent marker
Jewelry pin back

How to make it:

Paint the round pre-cut wood pieces white. Paint the 2 medium teardrop pre-cut wood pieces white. Paint the 2 small teardrop pre-cut wood pieces pink. Let all pieces dry. Glue the pre-cut wood pieces together as shown in the photograph. Glue the eyes and pom-pom nose on the round pre-cut wood pieces as shown in the photograph. Use the red paint marker or permanent marker to draw on the eyebrows and mouth. Let glue dry. Glue the jewelry pin back to the back of the round pre-cut wood pieces. Wear and enjoy!

So there you have it… lots of crafts about bunnies! I think bunnies are so incredibly cute! Fuzzy and cuddly… you just want to squeeze and hug them all the time! Now as for food, lets stick with some Easter bunny food too…


Easy Bunny Cake

Ingredients

1 (18.25 ounce) package yellow cake mix
3 3/4 cups flaked coconut
1 (16 ounce) package vanilla frosting
30 small jellybeans
4 red licorice

Directions

Heat oven and prepare two 9 inch round baking pans as directed on cake box. Prepare cake batter with as directed on package adding in 1/2 cup of coconut. Divide batter evenly between the prepared pans. Bake and cool cake as directed on package.

When cooled, place one whole 9 inch cake layer on serving tray, forming the bunny's head. Cut 2 convex shaped ears from each side of the second layer, place on each side of head to form ears. Use concave shaped piece for the bowtie, place about 1/2 inch below head.

Frost entire bunny covering top and sides of bunny. Pat remaining 3 1/4 cup coconut evenly over top and sides. Decorate the bunny face and bowtie with jellybeans and use the licorice to make whiskers.

Ok kids, I’m off to shop til we drop for plants and such! I’ll share lots of pictures from our adventures with you when I get back! Until tomorrow… HUGS!

Thursday, March 11, 2010

EGG-CELLENT ADVENTURES

Well an early morning hello to my friends out there on the information super highway! I’ve been up since 2am and I can tell ya… I am one tired pup! I would like to lay back down until I have to pick up the boys this afternoon but I have to go back to the doctor this morning for fasting lab work. It feels so weird without my mini-me… but she’s gonna have a great time and I told her to take lots of pictures for me! So we won’t tell her that I cried myself back to sleep when I got home (for at least an hour) and I frantically watched the Southwest Airlines “Check Flight Status” website all morning! LOL…


I thought this was supposed to get easier and I would WANT them to go away, but it’s not working out like that… someone fibbed to me! LOL. And to make matters worse, when I dropped her off, she wanted me to walk her in, where I got a group hug from like 10 other kids… all calling me mom of course… and all looking to me for those “comforting words” ya know? So I told them I loved them all, to have fun, be safe, stay together, take lots of pictures for me, and I would see them when they got back Monday. I hugged them all and the first AND last one… the most important one… was DD15. I hugged her tight and told her I loved her and would see her soon. I quickly ran out to the car where I proceeded to start balling. So I got that 30 minute power nap before I was up and running again! But not having to get her ready for school triggered another crying session and I haven’t stopped yet. Hopefully it will stop soon.


Ok, let’s get distracted (me basically)… I have had a couple of people ask me about the doctor, so I will just tell you it did not go well. I am now on high blood pressure meds, a new water pill, and they will discuss different diabetes medications and other problems once they get the lab results back. I have to go back for a follow up in 2 weeks. I have gained an excessive amount of weight since July so of course, they harped on that too! I’m not sure what these doctors expect when you have an injury and/or disease that incapacitates you for 9 months… HELLO MD’s… YOU’RE GONNA GAIN WEIGHT YOU MORONS! Ugh, that’s why I hate going to the doctors. They are trained to point out your flaws! And I don’t like acknowledging I have any (even though I KNOW I do) LOL! She said the migraine the past few days is due to the blood pressure. My sugars were also very high, so I have to keep a log of my BP and my sugars for the next 2 weeks until I go back. Fun FUN! NOT!

I ran out to Mom & Dad’s yesterday to borrow a bigger suitcase for the DD and while I was there I grabbed more scrap wood from the garage. I am also gonna be calling Home Depot and Lowe’s today to see if they have any scraps. They are even doing some minor construction on a house behind ours, so I am gonna go over there too and check for scraps! Care to guess what I am gonna do with them? Yep… MORE planters! LOL you can call me crazy if you want, but the project was fun for me and they turn out so cute and really, right now, I need SOMETHING to keep me busy/distracted so why not!?

Alright its time for some more Easter crafts. Today I want to talk about eggs. What would Easter be without the traditional Easter Egg!?

Craft Ideas of the Day: Easter Eggs


Speckled Easter Eggs
by Jane Lake

This method of decorating Easter eggs is very messy - but lots of fun! Just to be sure to wear an apron and spread lots of newspaper around your work surface to catch the flying paint.

Supplies:

hard boiled eggs
egg dye
tempra, watercolor or craft paint or food coloring
old toothbrush

Instructions:

1. If you want to begin with colored eggs, then dye the eggs using commercial egg dye or natural egg dye.

2. Spread newspaper over your work surface. It's also a good idea to protect the front of your clothes with an apron or smock.

3. Dip the toothbrush in a small amount of paint or dye in a contrasting color.

4. Run your finger or thumb over the top of the toothbrush bristles to splatter the eggs with small drops of color.

Variations: You can wash the toothbrush and use a second or third color to make speckled eggs with lots of different colors.


Tie Dyed Easter Eggs

Supplies:

eggs, hard-boiled, boiled in a saucepan of water with 1 tbsp of vinegar added or blown eggs
food coloring in assorted colors
paper towels
plastic wrap
old shirt or apron

Instructions:

This is such an easy way to make tie dyed Easter eggs - and very pretty too.

Boil your eggs or blow the eggs out if you wish to keep them permanently.

To blow out an egg: Poke a small hole in each end of the egg. Use a long needle or skewer to break the yoke. Hold the egg over a bowl and blow hard through one hole until the egg has emptied out of the shell. Rinse with water, let dry, and decorate.

To Tie Die Eggs: Take a paper towel and dampen the towel with water and vinegar, making sure it is just damp.

Place a piece of plastic wrap under the paper towel.

Drip small drops of food coloring onto the paper towel. Allow colors to drop next to each other so they bleed slightly together. Make sure there is enough area with food color to cover egg.

Wrap an egg in the paper towel and the plastic wrap. The longer you keep the egg in the brighter the egg will get.

Repeat until all your eggs are tie dyed. Every one will be different, but all of them will be pretty!


Naturally With Dyes From Your Kitchen
by Debra Lynn Dadd

The most beautiful dyes for Easter eggs come from foodstuff you probably already have in your kitchen.

I have been delighted with the results of the colors I have tried and my friends have been thrilled to receive them as springtime gifts. The colors are very unusual -- gentle, earthy, soft, and very vibrant, without being harsh like the artificial dyes -- and when I tell people the colors come from plant dyes, they always want to know the origin of each color.

To color these eggs, you boil the eggs with the dyestuff, rather than boiling the eggs separately and then dying them.

General directions:

Put raw, white-shelled, organically-raised eggs in a single layer in a pan. Cover with cold water. Add a little more than a teaspoon of white vinegar. Add the natural dyestuff for the color you want your eggs to be. (The more eggs you are dying at a time, the more dye you will need to use, and the more dye you use, the darker the color will be.)

Bring water to a boil, then reduce heat and simmer for 15 minutes.

Quickly check the eggs for color by removing them from the dye liquid with a slotted spoon.

If the color is as desired, pour off the hot dye liquid and rinse the eggs immediately in cold water to stop the eggs from cooking. Continue to change the water until it stays cool in the pot because the eggs are no longer releasing heat. Drain and allow eggs to cool in the refrigerator.

If you wish a deeper color, strain the hot dye liquid into a container, then rinse the eggs immediately in cold water to stop them from cooking. Continue to change the water until it stays cool in the pot because the eggs are no longer releasing heat. Drain the last of the cold water, then cover the eggs with the strained dye liquid. Add more water if necessary so that the eggs are completely covered. Put into the refrigerator immediately and keep eggs in the refrigerator until the desired shade is achieved. Overnight is good. Longer than about twelve hours some of the colors just get muddier instead of deeper, and the lighter shades are more vibrant.

Try these foods to dye your eggs:

Red - Pink -- lots of red onion skins, cranberry juice, or frozen raspberries.

Orange -- Yellow onion skins

Brown -- Red beet skins or grape juice (produces a beautiful sparkling tan), coffee.

Yellow -- Saffron, tumeric or cumin, orange or lemon peels, or celery seed.

Green -- spinach, or carrot tops and peels from Yellow Delicious apples for a yellow-green.

Blue -- Red cabbage leaves make the most incredible robin's-egg blue.

Deep Purple -- Red wine makes a beautiful burgundy color

Tips for successful results:
Use filtered or distilled water. Chlorine and other chemicals will work against the dye, making it less intense. Buy distilled water or use your own filtered water.

For deeper colors, use more dyestuff or let the eggs soak longer. For even coverage, cook eggs in a pot large enough to hold enough water and dyestuff to completely cover the eggs, even after some of the liquid has evaporated during the 15 minute of boiling.

Again, for even coverage, if you continue to soak the eggs in the refrigerator after cooking, make sure the eggs are completely covered with the dye liquid. Blot the eggs dry or allow them to air dry, as for some colors the dye will rub off while still wet. On the other hand, if you wish to make a white pattern on the egg, you can rub off some of the dye for some colors immediately after cooking.

Make sure eggs of different colors are completely dry before piling them up in a bowl together, as wet dye from one egg can transfer to another.

About the Author: Hailed as "The Queen of Green" by the New York Times, Debra Lynn Dadd has been a consumer advocate for products and lifestyle choices that are better for health and the environment since 1982. Visit her website at http://www.dld123.com for 100s of links to 1000s of nontoxic, natural and earthwise products, and to sign up for her free email newsletters.


Easter Egg Wreath

For thousands of years, the egg has been a symbol of new life — and spring — for people the world over. Craft the time-honored symbol into a wreath for your door, and you've got the perfect way to welcome spring into your home.
Materials
14 plastic pull-apart eggs
Puffy paint
Egg cartons
2 large heavy-duty paper plates
Scissors
Glue
Green craft foam
Twist ties
Instructions

First, decorate 14 plastic pull-apart eggs with puffy paint and let them dry. (Overturned egg cartons make great workstations and drying racks; just set each egg half over a carton cup bottom.)

Cut the rims from the paper plates and glue them together. Glue green craft foam leaves around the ring, leaving 1 1/2 inches between them.

To attach the eggs, tightly wrap twist ties (one for each egg) between the leaves around the paper plate ring, then simply close the egg halves together over the ties.

You can also decorate eggs by dying them the color you want and allowing them to dry. Then with craft glue, cover the egg in crystal beads (used in jewelry making). You will have a precious jeweled egg. Or perhaps you can decoupage some cute clippings from magazines, etc. The possibilities are endless. The point is to make them unique!

Ok, time to eat. Well tonight I think I will be making Chili Rellenos for the guys. You and I, however, will feast our eyes (and if you are ambitious, our palates) on this yummy dessert!


Brownie Caramel Cheesecake

Ingredients

1 (9 ounce) package brownie mix
1 egg
1 tablespoon cold water
1 (14 ounce) package individually wrapped caramels, unwrapped
1 (5 ounce) can evaporated milk
3 (8 ounce) packages cream cheese, softened
3/4 cup white sugar
1 teaspoon vanilla extract
3 eggs
1 cup chocolate fudge topping

Directions

Preheat oven to 350 degrees F (175 degrees C). Grease the bottom of a 9 inch springform pan.

In a small bowl, mix together brownie mix, 1 egg and water. Spread into the greased pan. Bake for 10-15 minutes.

Melt the caramels with the evaporated milk over low heat in a heavy saucepan. Stir often, and heat until mixture has a smooth consistency. Reserve 1/3 cup of this caramel mixture, and pour the remainder over the warm, baked brownie crust.

In a large bowl, beat the cream cheese, sugar and vanilla with an electric mixer until smooth. Add eggs one at a time, beating well after each addition. Pour cream cheese mixture over caramel mixture.

Bake cheesecake for 50 minutes. Chill in pan. When cake is thoroughly chilled, loosen by running a knife around the edge, and then remove the rim of the pan. Heat reserved caramel mixture, and spoon over cheesecake. Drizzle with the chocolate topping.

Ok peeps (oh those sound good right now LOL!) its time for me to get off of here and head down to the doctors so the vampires can attack me. Hopefully that won’t take too long, that way I can come back and catch a nap! Make sure you always tell the ones you care about how you feel so they always know! It will make them feel important and brighten their day! I will see you all tomorrow. Peace, Love, and LOTS of HUGS!